Add/Remove Custom IAM Policies to CAIP Default Roles
Introduction
Connected AI Platform already gives users the possibility to add custom policies to the following roles:
caip-developercd4mlglue-executionsagemaker-executiondata-visualization
This is done by adding policy files to the following folders in the products repository:
- caip-developer role:
<PRODUCT_NAME>/policies/caip/<NAMESPACE>/<POLICY_NAME>.json - cd4ml role:
<PRODUCT_NAME>/policies/cd4ml/<NAMESPACE>/<POLICY_NAME>.json - glue role:
<PRODUCT_NAME>/policies/glue/<NAMESPACE>/<POLICY_NAME>.json - sagemaker role:
<PRODUCT_NAME>/policies/sagemaker/<NAMESPACE>/<POLICY_NAME>.json - data-visualization role:
<PRODUCT_NAME>/policies/data-visualization/<NAMESPACE>/<POLICY_NAME>.json
Be aware that the name you give to your file will be part of the resulting policy name.
This action is only available via the PR-based self-service — it is not covered by a Service Request.
Example
To add a new policy to a role:
- Access the products repository.
- Locate your product.
- Navigate to the policies folder:
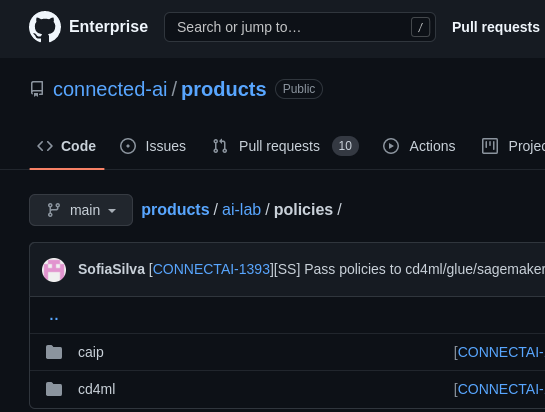
- Add the needed policy to the specific role and namespace.
Example: Adding a custom policy to caip-developer in the namespace ai-hworld to get secrets from Secrets Manager:
- Navigate to the
caipfolder:- Open your product folder.
- Open the
policiesfolder. - Open the
caipfolder. - Open the
ai-hworldfolder.
- Create a JSON file (the name of the file will be the name of the policy) with the following structure:
{
  "Version": "2012-10-17",
  "Statement": [
      {
          "Effect": "Allow",
          "Action": [
              "<action_type>"
          ],
          "Resource": ["<resources>"]
      }
  ]
}
{
  "Version": "2012-10-17",
  "Statement": [
      {
          "Effect": "Allow",
          "Action": [
              "secretsmanager:GetSecretValue"
          ],
          "Resource": [
              "arn:aws:secretsmanager:eu-central-1:123456789347:secret:namesecrer2",
              "arn:aws:secretsmanager:eu-central-1:123456789347:secret:namesecrer3",
              "arn:aws:secretsmanager:eu-central-1:123456789347:secret:namesecrer1",
              "arn:aws:secretsmanager:us-east-1:987654321123:secret:namesecrer5",
              "arn:aws:secretsmanager:us-east-1:987654321123:secret:namesecrer6",
              "arn:aws:secretsmanager:us-east-1:987654321123:secret:namesecrer1"
          ]
      }
  ]
}
Limitations
The policy above will be applied to all accounts and contains resources from different accounts. So this adds permission to a role to get secrets from different accounts.
Example with Variables
When adding the same policy to a non-prod and prod account but needing to restrict access (e.g. a resource for the non-prod account doesn't exist on the prod account), variables can be used instead of hard-coding the account ID, environment, region, or partition.
This is possible because the pipeline replaces the variables with the correct values at rollout time.
Available variables:
${aws_partition}${aws_account_id}${aws_env}${region}
{
    "Version": "2012-10-17",
    "Statement": [
        {
            "Action": ["sts:AssumeRole"],
            "Effect": "Allow",
            "Resource": [
                "arn:${aws_partition}:iam::${aws_account_id}:role/Test-Role-${aws_env}-${aws_account_id}"
            ],
            "Sid": "TestPolicy"
        }
    ]
}
Limitations
Unfortunately, this is only possible if the resources you are adding exist in all accounts, regions, and environments.
- If adding the same policy to non-prod and prod accounts to assume a role that exists in both accounts, regions, and environments, this method can be used.
- This method won't work when the role doesn't exist in one of the accounts.