PR-based Self-Service
As the Connected AI Platform Team, our goal is to provide a scalable, transparent, and efficient way to process use case–specific platform requests.
To enable greater autonomy and faster turnaround times, we offer structured self-service mechanisms. Depending on the type of request and current capability coverage, changes can either be executed directly through our dedicated workflows (see Service Requests) or, where required, via a Pull Request to our Infrastructure-as-Code repository.
For Managed Kubeflow, please use our Service Requests whenever possible. See Requests & Self-Service for guidance on which one to choose.
All actions that can be triggered via a Service Request must be executed via the Service Request process. The PR-based self-service described on this page should only be used for actions that are currently not available through the Self-Service Portal or Service Request workflow.
This page walks through a concrete, CAIP-specific example of the fork-and-pull-request workflow. For the general contribution model used across connected-ai repositories, see Contributing via Pull Requests.
Guides
The following pages walk through concrete examples of changes you can make via Pull Request:
- Add/Remove Custom IAM Policies
- Add/Remove Repository in CI-Trust
- Enable MLflow Experiments & Model Registry
- Enable EMR-on-EKS
- Enable Grafana
- Integrate with CDH PII API
- Integrate Vehicle Shadow
- Enable Vector Database
- Enable KServe
0. General Flow
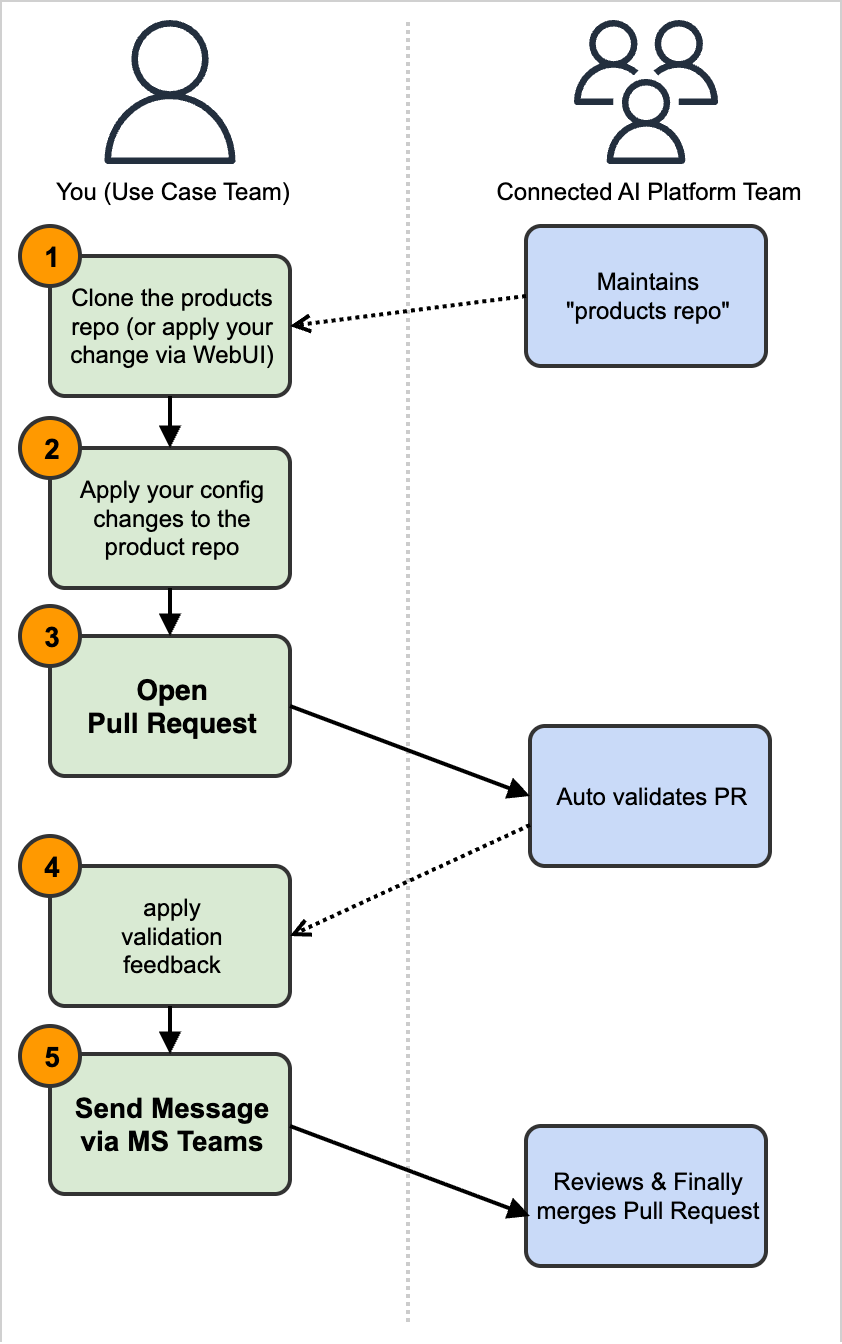
The following diagram describes the general flow of opening a pull request to our products repository.
1. Clone the products repo with your main config file — the product.yaml file
Our products repository contains the high-level configuration of all clusters we operate. We have a directory for each product team, which then again contains a product.yaml file.
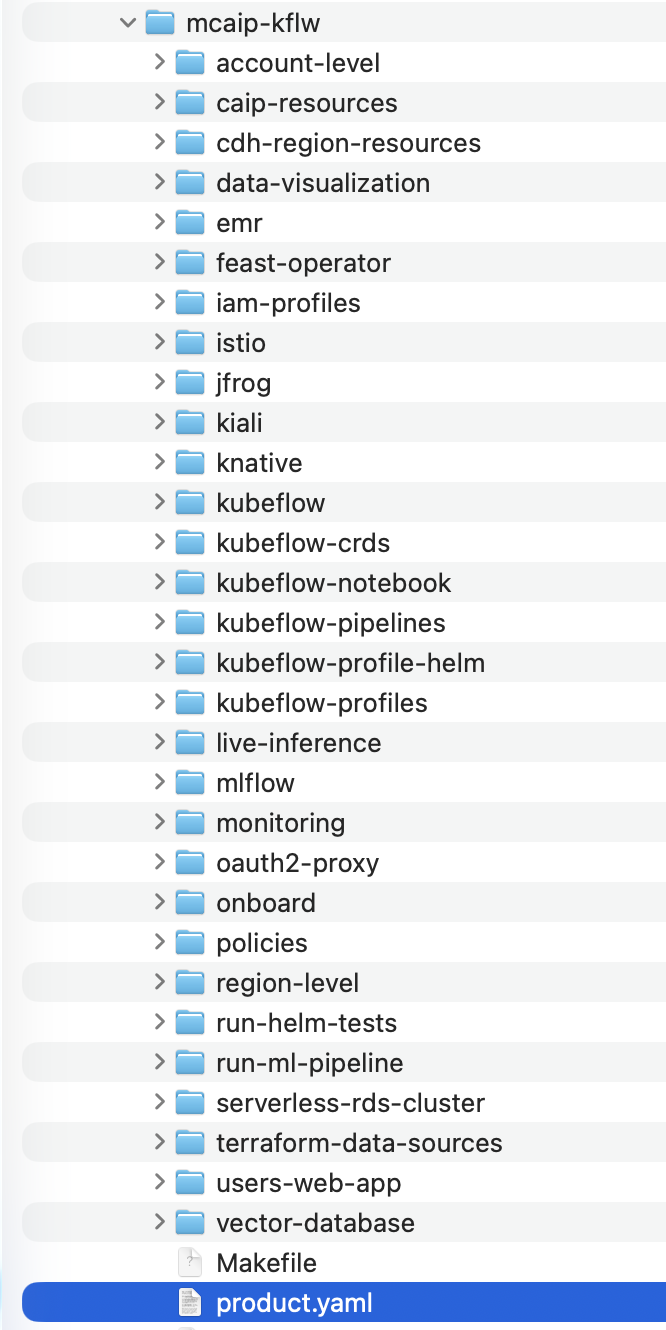
This product.yaml file serves as the central place for configuring your instance of the Connected AI Platform, see example here.
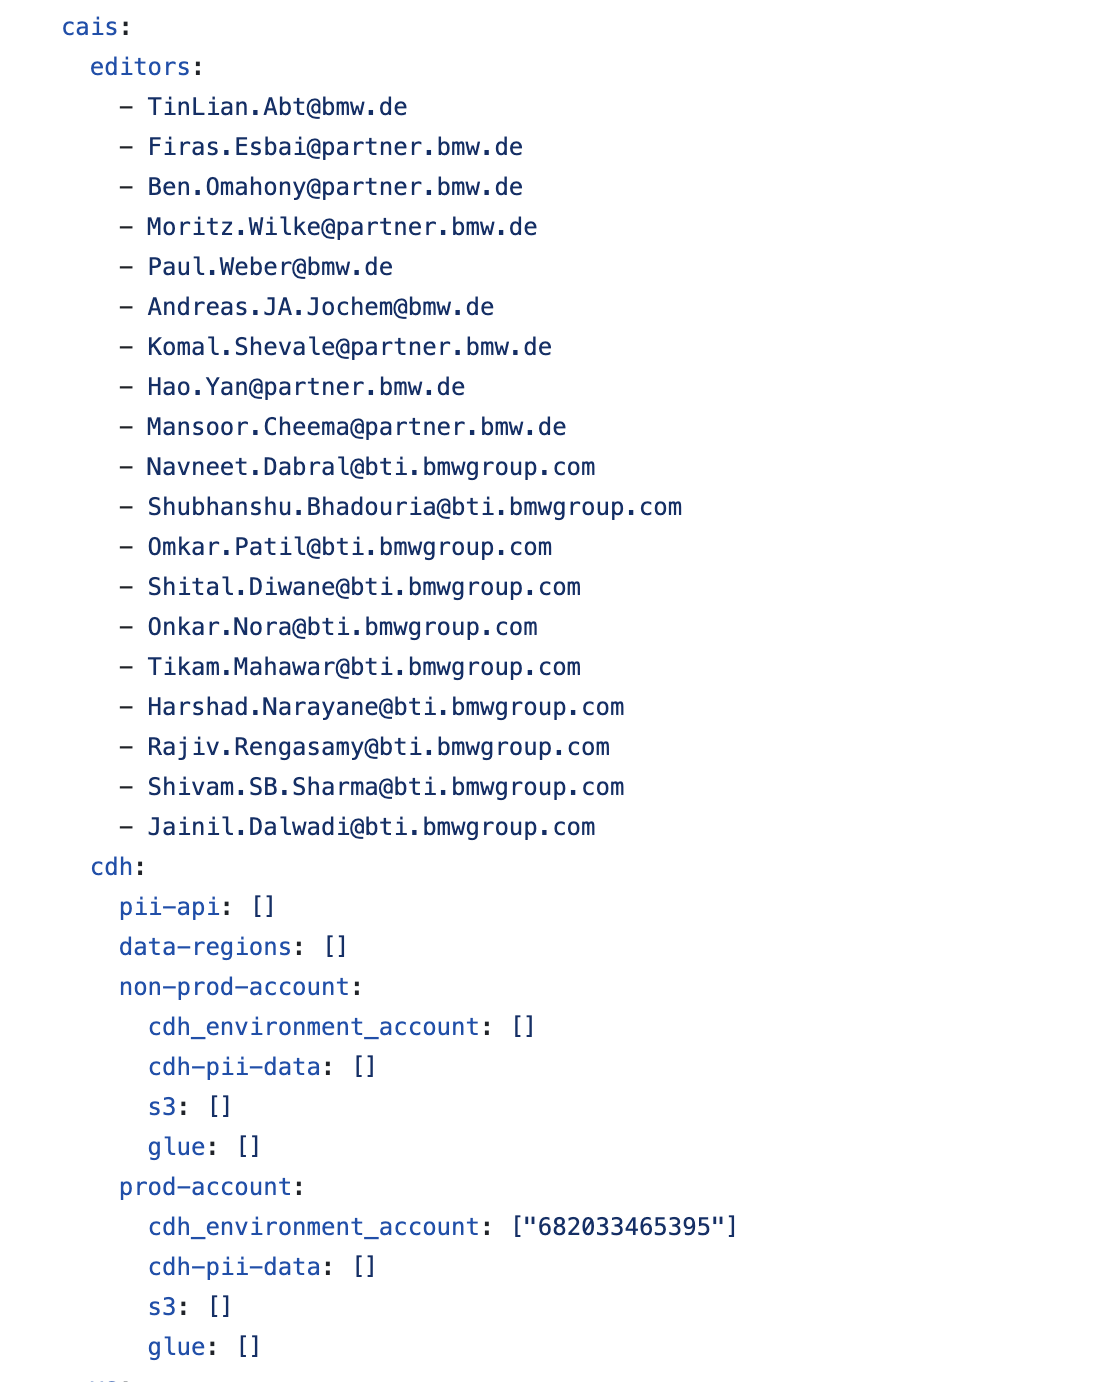
2. Apply your config changes
Adjust the configuration depending on your request. See the guides above for the change you want to make.
3. Push your branch to a Fork, create a Pull Request and wait for successful validation
Once you're done with your changes, commit them and push the changes to a fork of the remote products repository.
As you are not a member of the Connected AI Team, you won't be able to directly push to the products repo. Instead you have to create a fork.
a) Contribute via GitHub UI
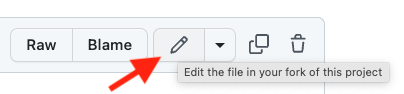
Creating a fork requires some manual steps, so for simpler changes we recommend doing it directly via the GitHub UI. Just follow the instructions on screen and GitHub will directly create the PR for you.
- Click on the edit button of the file you want to modify:
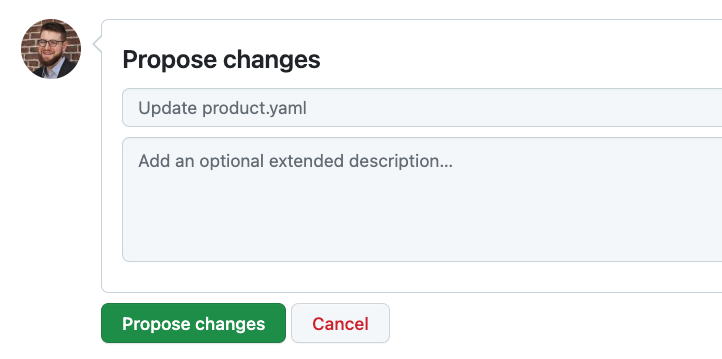
- After you have applied your changes, fill out the commit message and click on Propose changes:
b) Contribute from a locally checked out repo
If you prefer cloning the repo to your local machine, be sure to push to a fork, because your permissions won't allow pushing directly to the repo.
We recommend using GitHub's CLI to create a PR with the command gh pr create. This will ensure that the fork exists and will otherwise automatically create it for you.
Finally, open a Pull Request from your fork (see this guide on how to open a new Pull Request).
4. Ensure no validation failures
Wait for the check to be executed successfully:
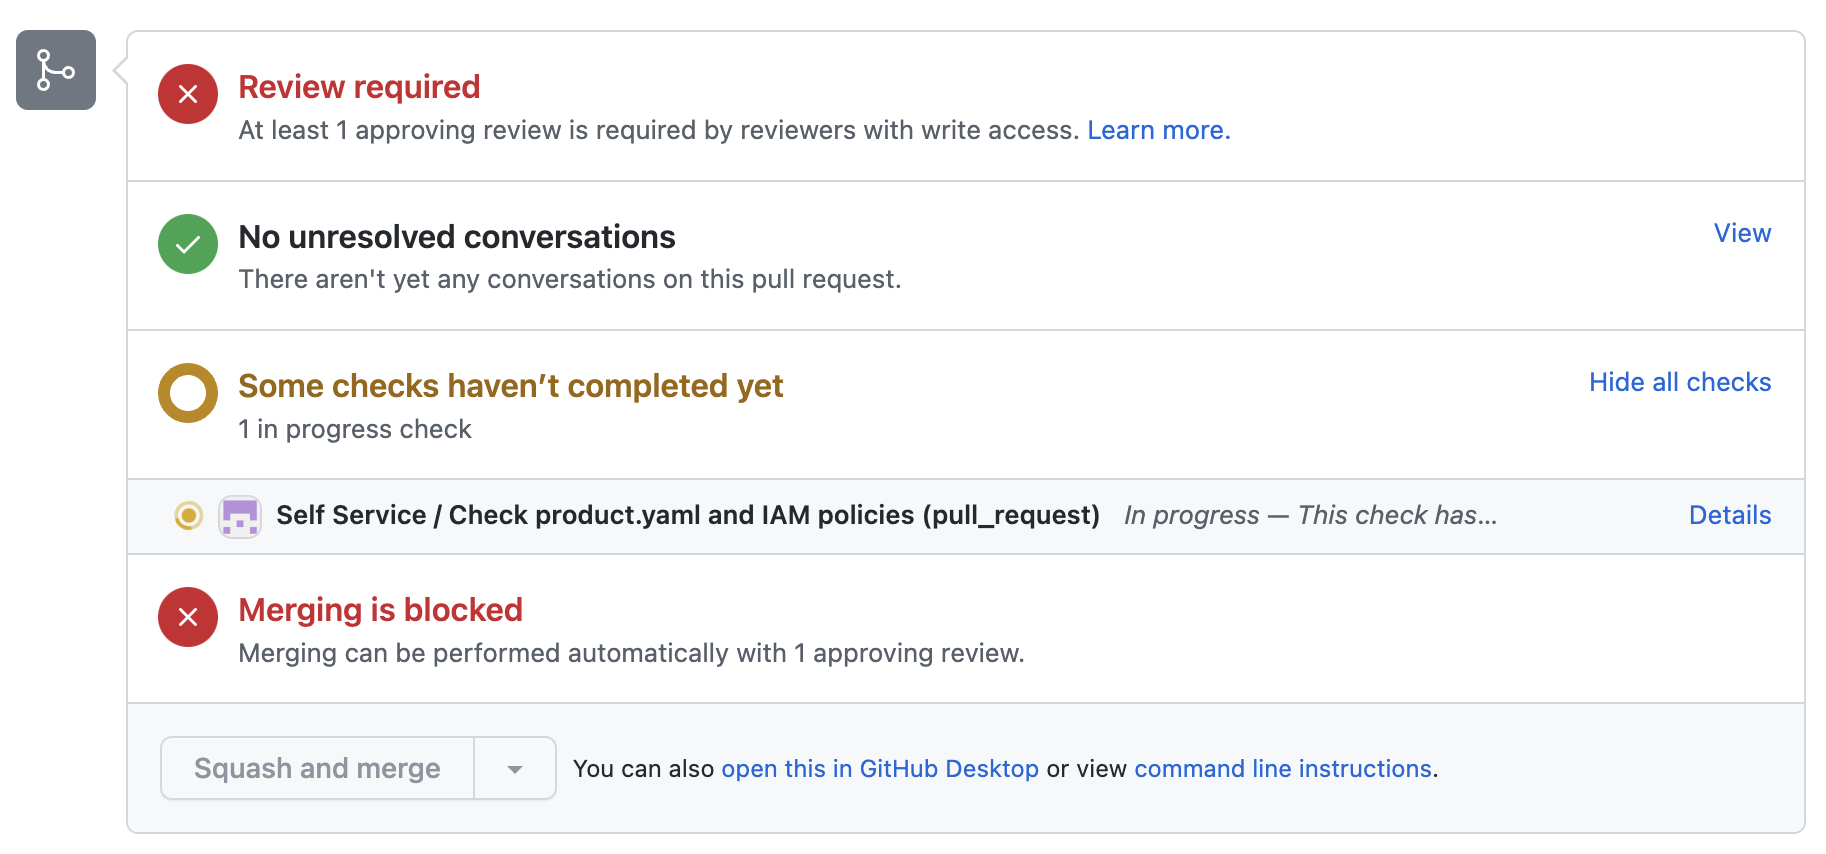
If the check is not successful, please consult the GitHub Action logs for details, fix the errors and push the changes to your branch.
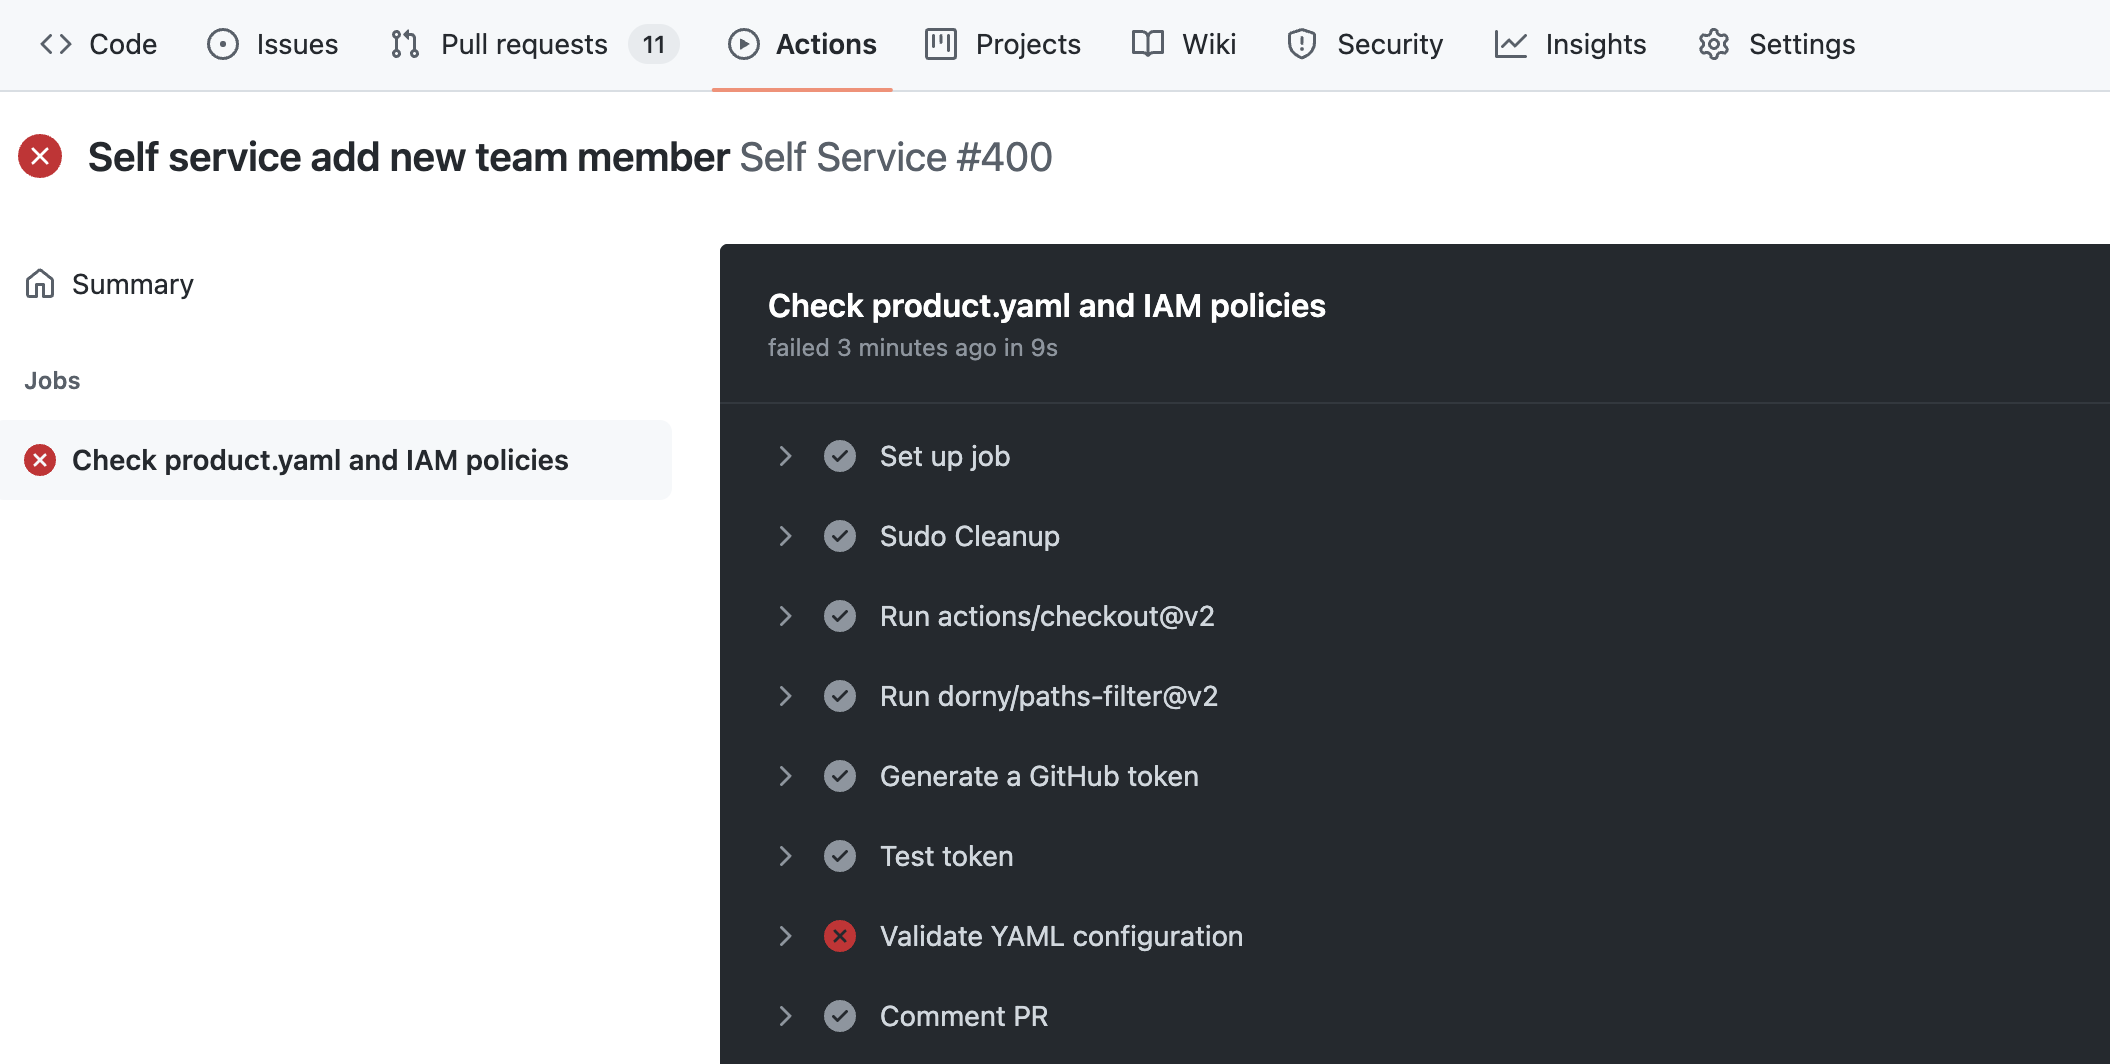
Generally, we apply the following validation rules:
1. Validate YAML schema
We have defined a common schema for the product.yaml files, see here. This schema defines the allowed structure and data types in the product.yaml file. During the CI workflow, changes to product.yaml are checked against the schema.
2. Linting and fixing product.yaml files
We use two Python-based packages, yamllint and yamlfixer, to lint the product.yaml file and automatically push fixes to the upstream branch. The linting rules are defined here.
3. Validate ARNs for CDH and S3 connections
We use a custom library written in Go (see here) that detects faulty AWS ARNs. The library detects wrong/non-existing AWS regions, wrong account IDs, wrong resource types, or ill-formatted AWS ARNs in general.
4. Validate IAM policies
We use AWS Access Analyzer to validate identity-based custom IAM policies.
5. Get help
Once your PR passes validation, post a message in the Connected AI Platform | PullRequest based Self Service Microsoft Teams channel so the platform team can review and merge it.