VSCode Server on Kubeflow Notebooks
Erstellt von Jonas Schroeder (DE-732) am 17 Jan 2025 • Lesedauer: 6 Minute(n)
Contents
- Background
- Getting started
- Important Information
- Updating Existing Kubeflow VS Code Server instance
- Running Jupyter Notebooks from VS Code Server instance
Background
The Connected AI Platform provides a customised code-server image that can be used to develop and run your code straight from Kubeflow Notebooks. The benefits of using this image are:
- It contains best practices and common workflows needed for teams to jump start their onboarding process and start developing their projects.
- The image comes with preconfigured Bash setup and preinstalled Python packages, so the team does not need to configure the basic requirements on their own.
- It can be used without needing to install anything on a local machine, but still being able pull the source code from GitHub, develop the code, and deploy pipelines.
- The image has VS Code Python extension and teams can use to run Jupyter Notebooks.
Getting started
To create your VS Code Server instance on Kubeflow:
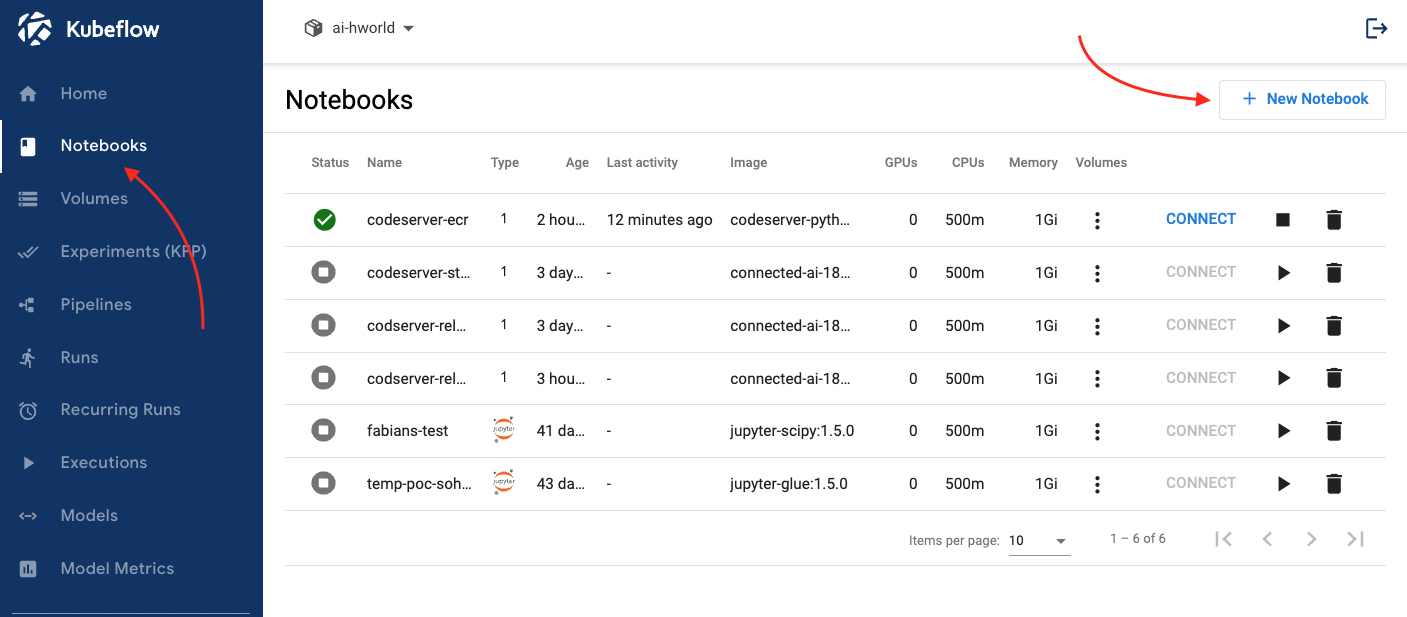
Navigate to the Kubeflow UI → Click on "Notebooks" → click on "New Notebook":
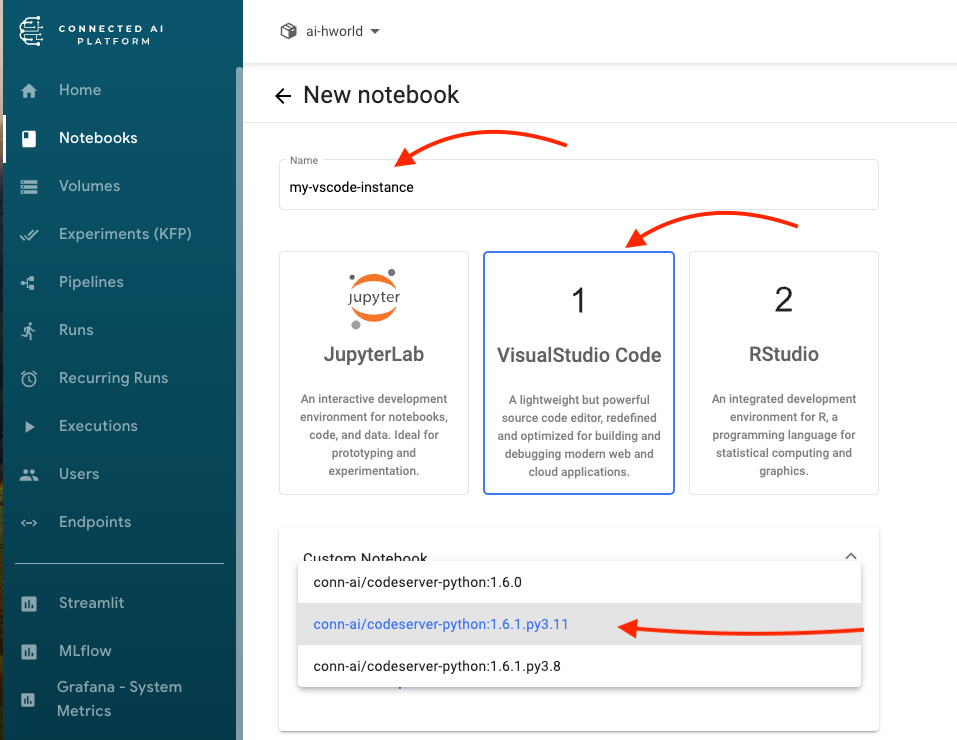
Set a name for your new instance → from the "Docker Image" section make sure to select "1" → choose the "latest available image" from the dropdown → and finally click on "LAUNCH":
If you are a team getting onboarded newly, you probably want to select the python 3.11 image which you can find in the dropdown ending with py3.11
It will take a couple of minutes to run your new instance and list it under the Notebooks page. From there click "CONNECT"
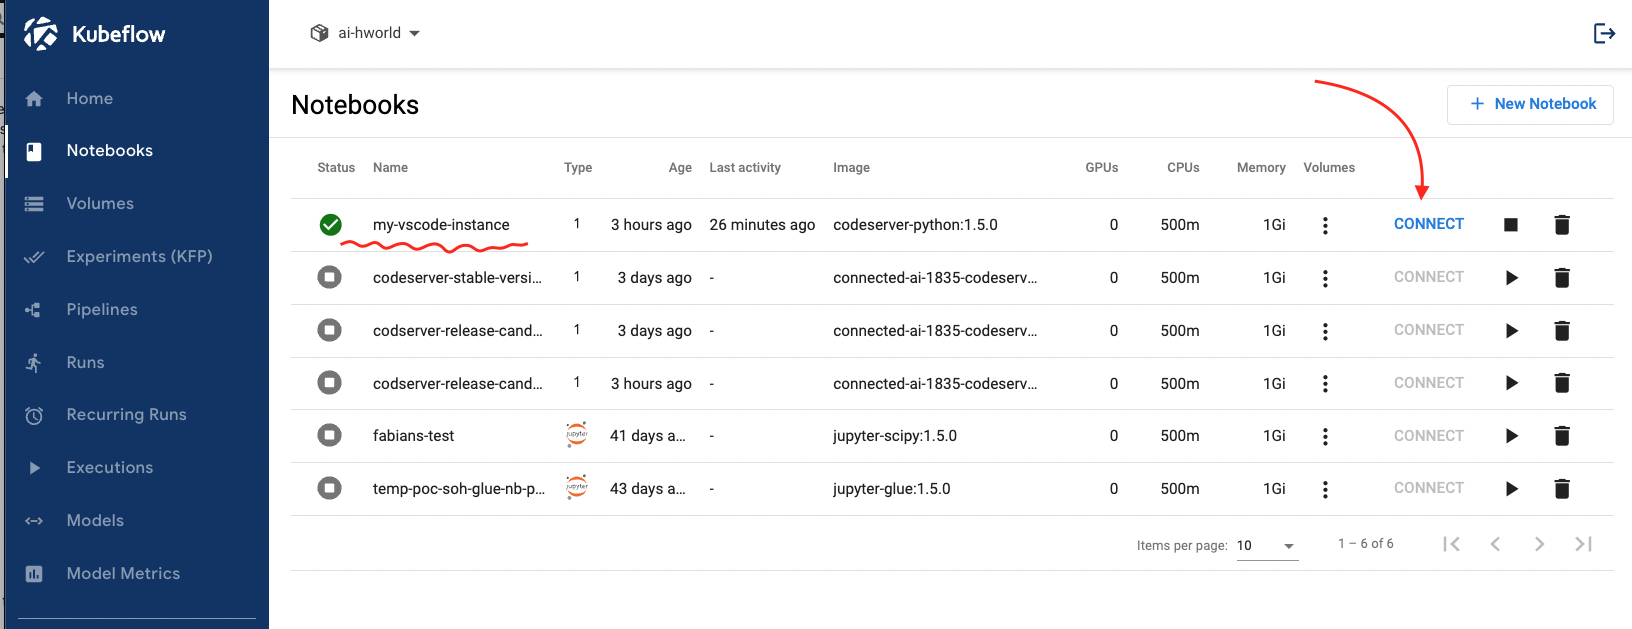
Now you are ready to use the VS Code image on Kubeflow:note
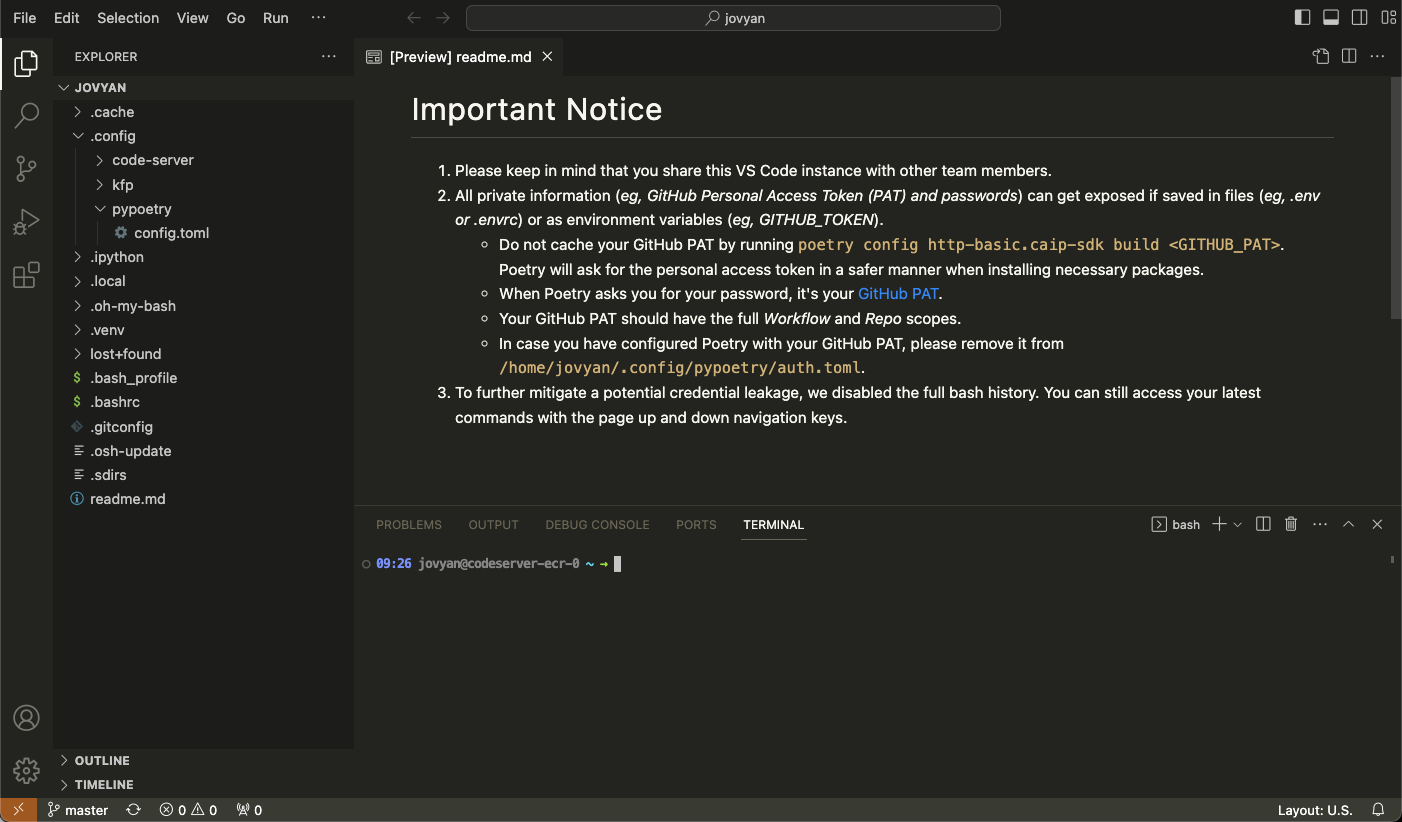
Important Information
Please keep in mind that you share this VS Code instance with other team members.
All private information (eg, GitHub Personal Access Token (PAT) and passwords) can get exposed if saved in files (eg, .env or .envrc) or as environment variables (eg, GITHUB_TOKEN):
- Do not cache your GitHub PAT by running
poetry config http-basic.caip-sdk build <GITHUB_PAT>. Poetry will ask for the personal access token in a safer manner when installing necessary packages. - When Poetry asks you for your password, it's your GitHub PAT.
- Your GitHub PAT should have the full Workflow and Repo scopes.
- In case you have configured Poetry with your GitHub PAT, please remove it from
/home/jovyan/.config/pypoetry/auth.toml.
To further mitigate a potential credential leakage, we disabled the full bash history. You can still access your latest commands with the page up and down navigation keys.
Updating Existing Kubeflow VS Code Server instance
If you already have a running VS Code Server instance and want to update it with a newer version of the VS Code Server image, then you can follow these steps to update it:
Let's assume you have an old image and when you run it you have some existing code in there. Something like this:
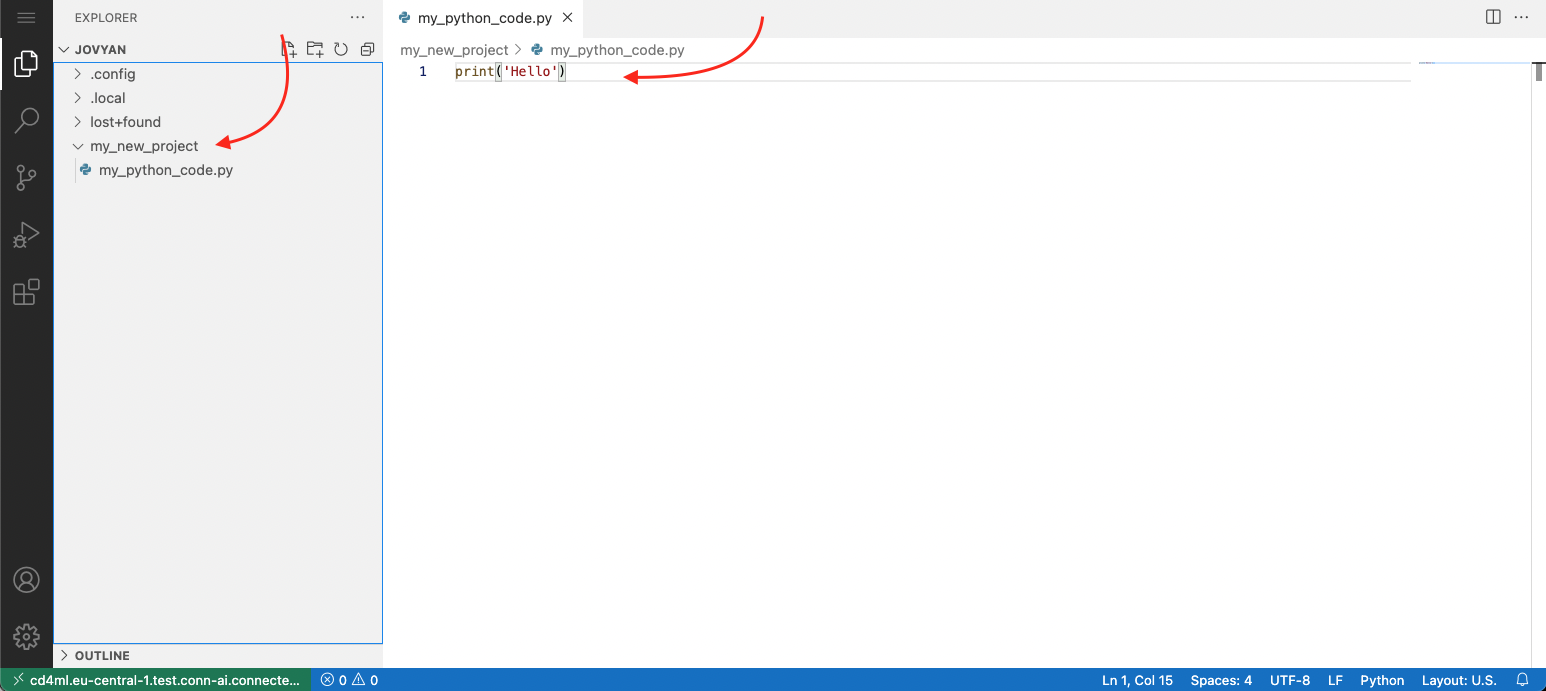
To update that image, navigate to the Kubeflow UI → and delete the running instance. Note that this will remove the instance, but you still have access to the volume and everything inside it:
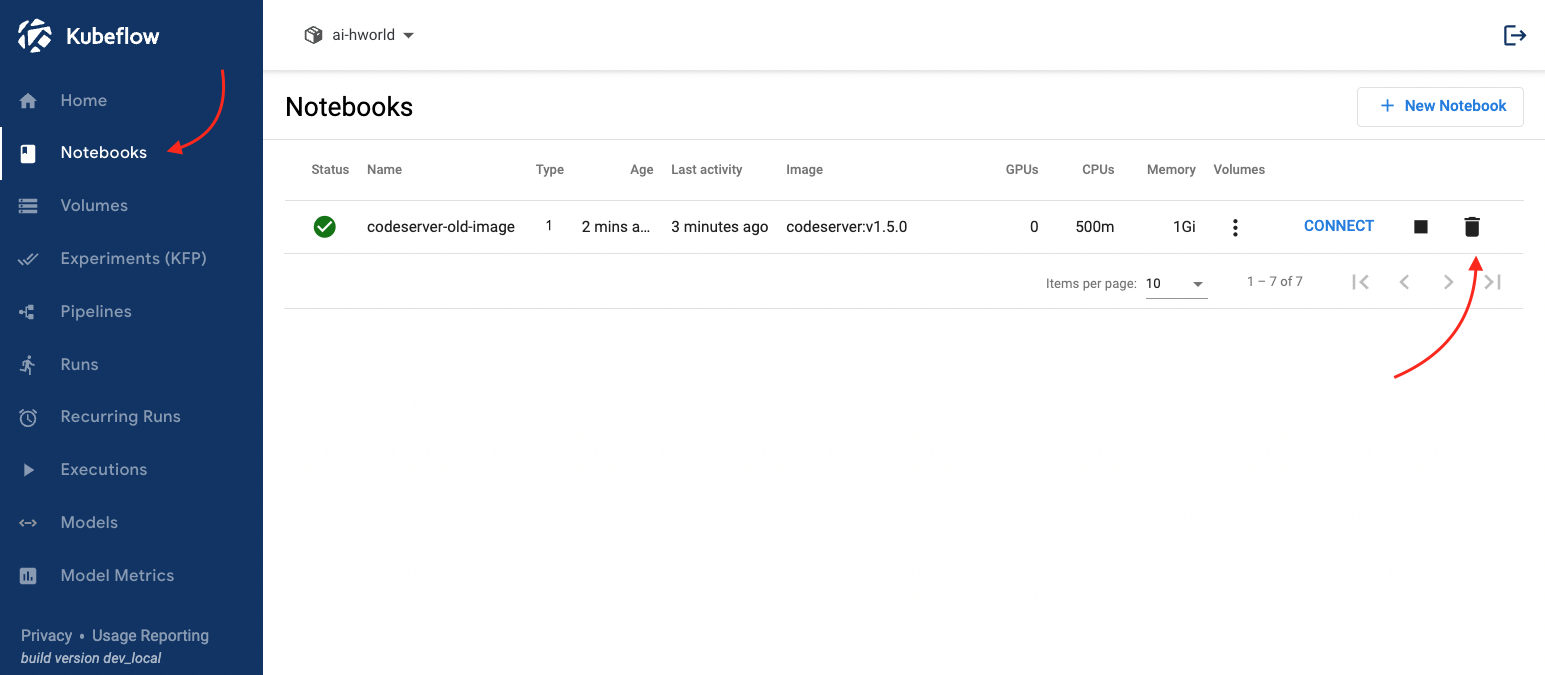
If you navigate to the "Volume" page you still have your volume there, even though the instance is now removed:
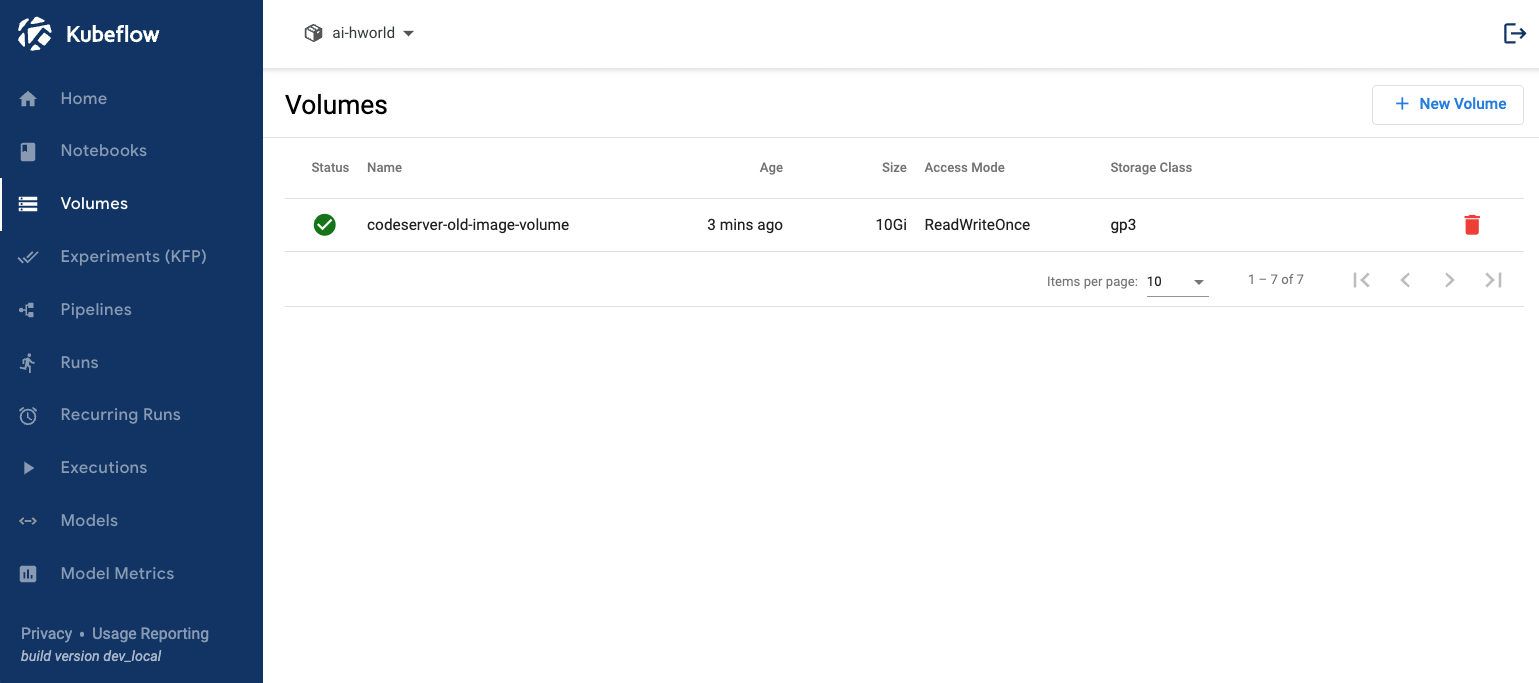
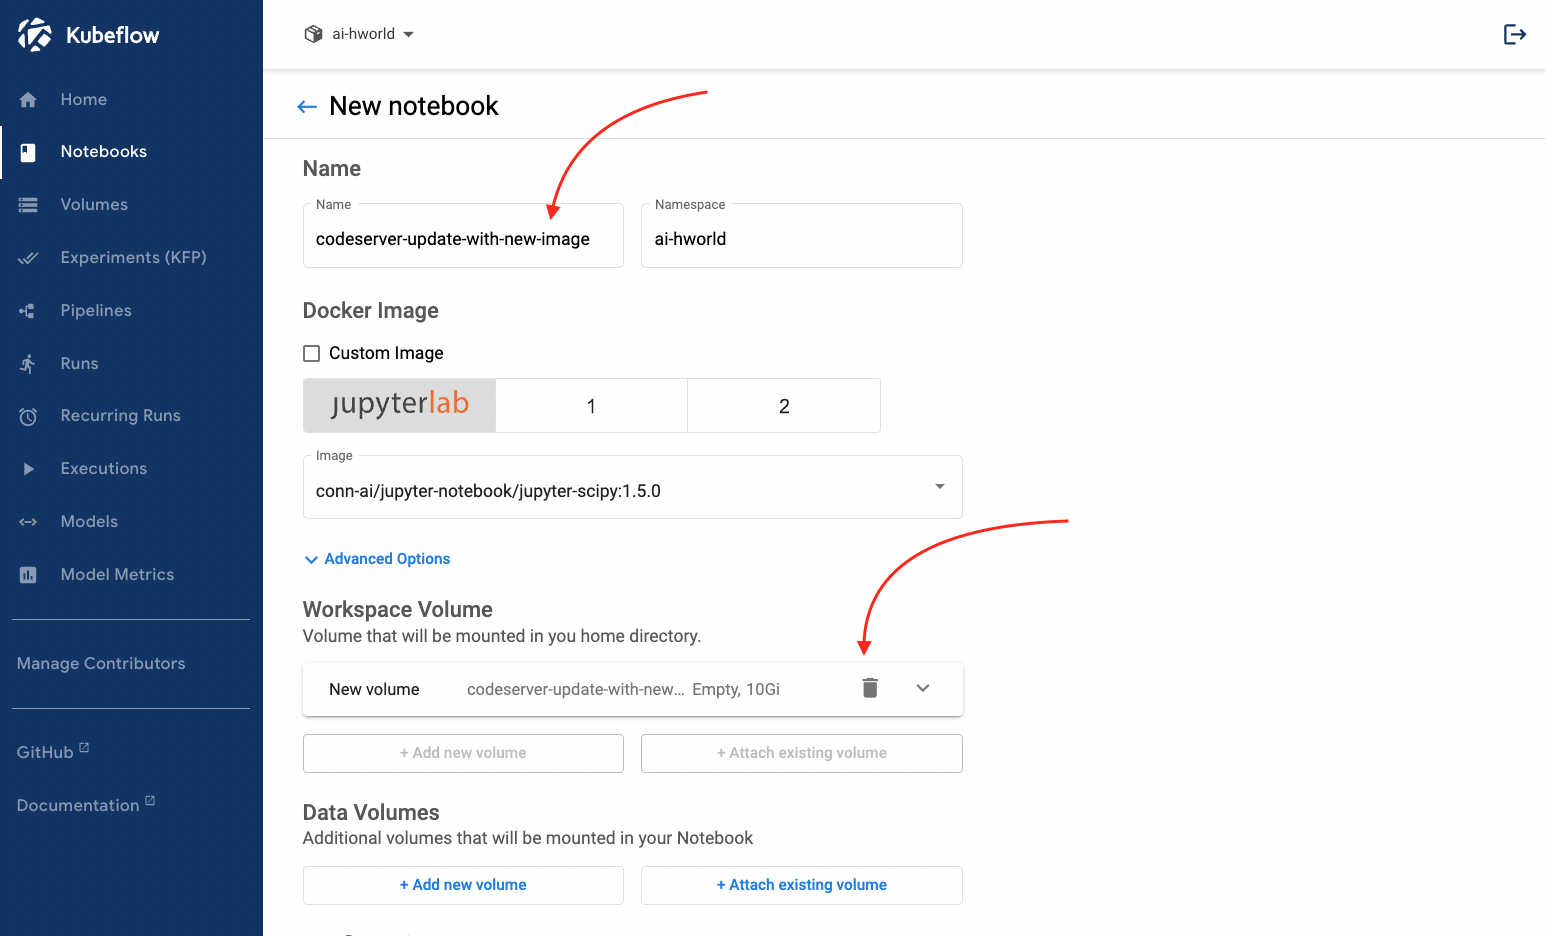
Now you can create a new image with the old volume. From the "Notebooks" page click on the "New Notebook" → give your new instance a name → and remove the volume that was added by default:
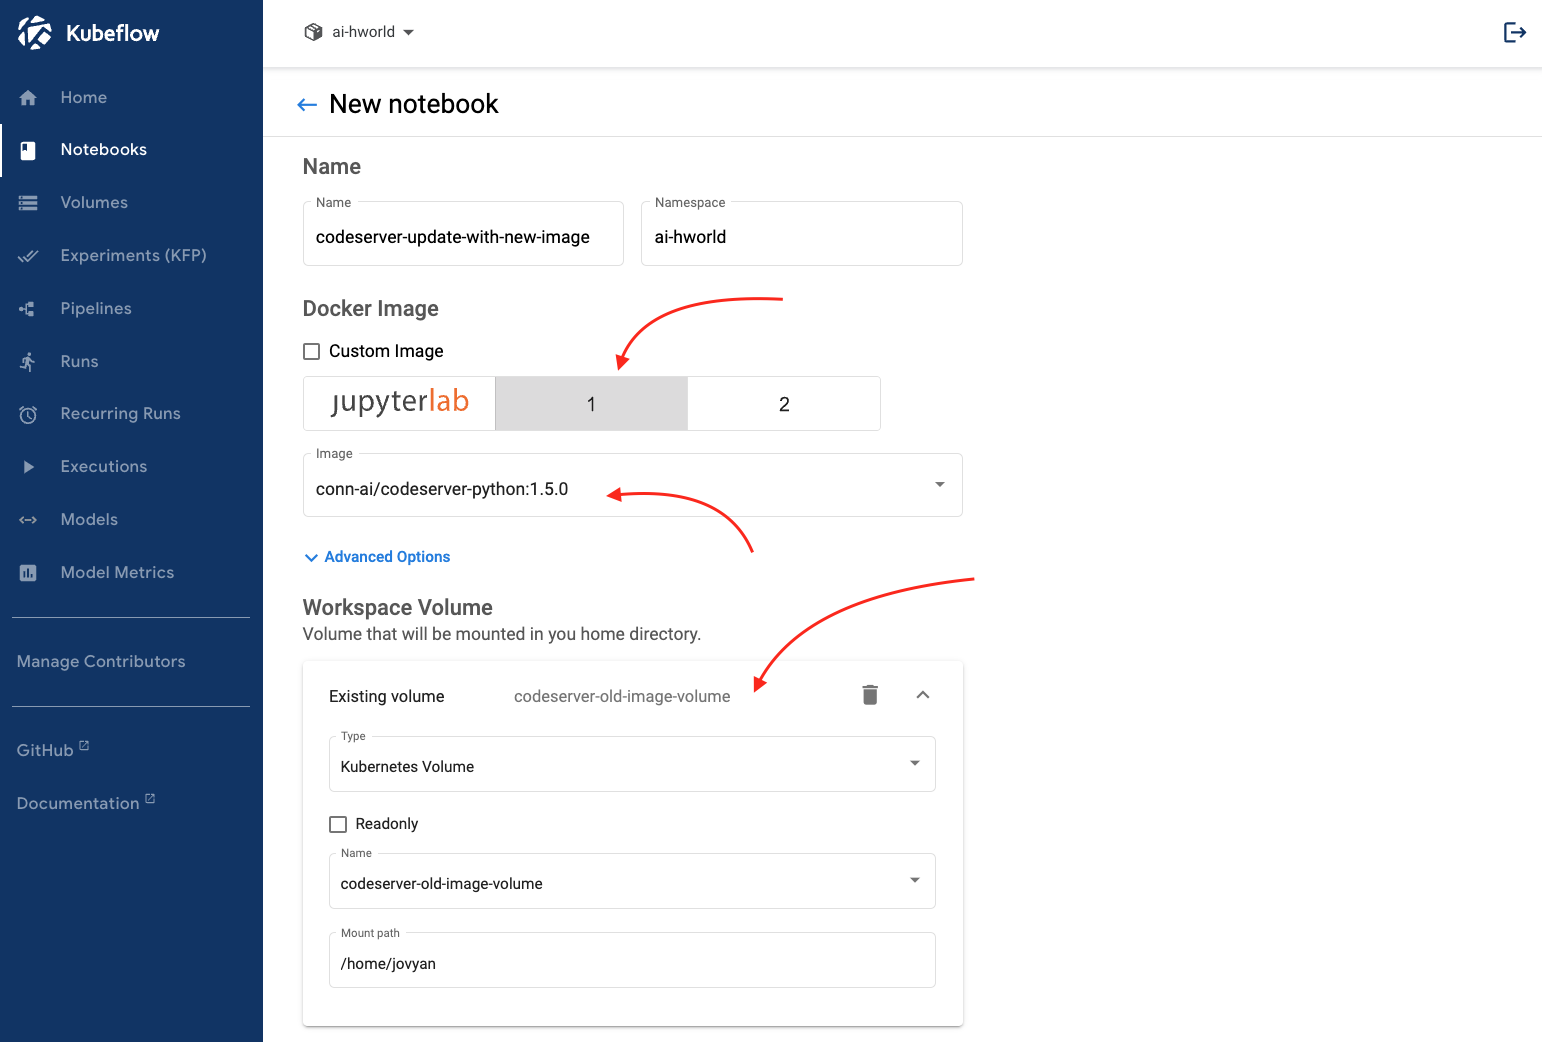
Once the default volume is removed you can attach the existing volume, and make sure to select "1" under "Docker image" and choose the latest image. Finally, click on "Launch":
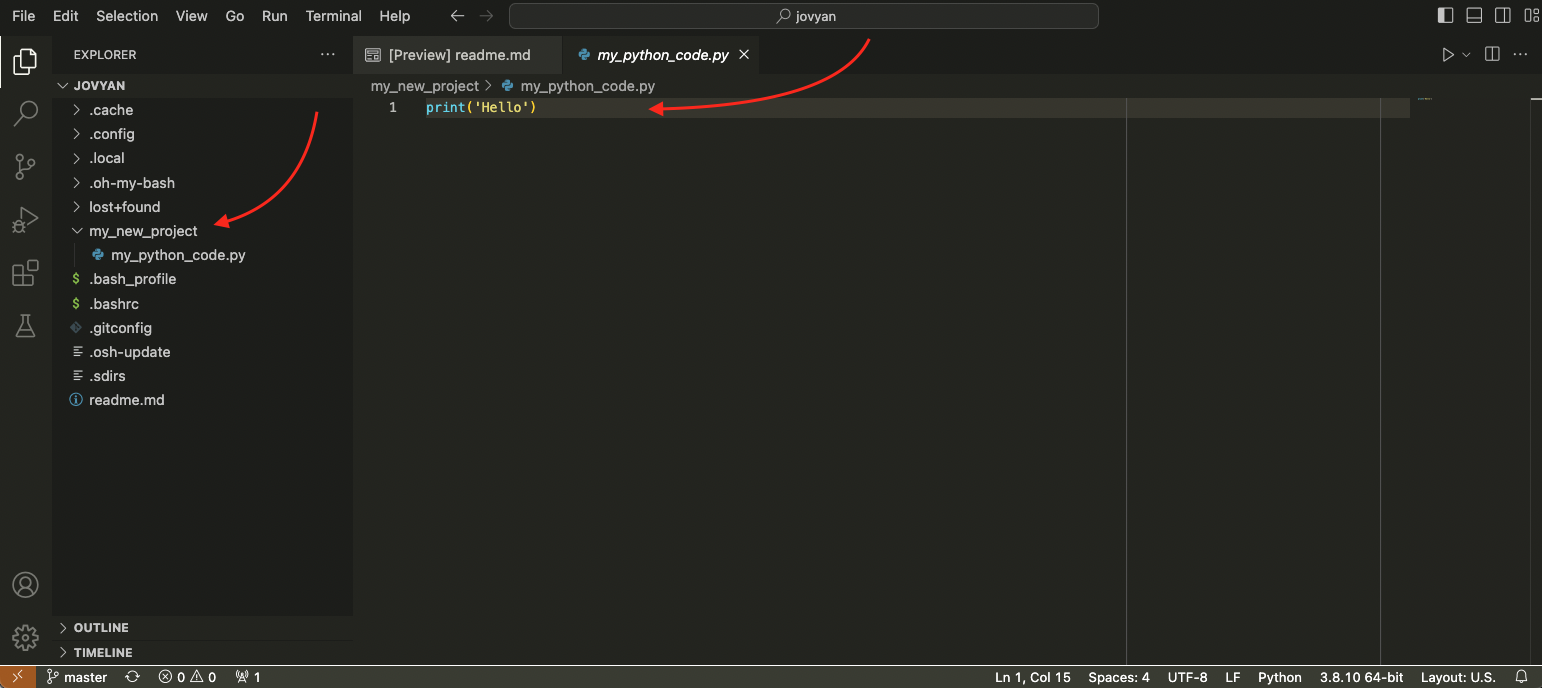
The new VS Code Server image will be used with instance, but it will keep your old files intact:
Running Jupyter Notebooks from VS Code Server instance
One of the best feature of the VS Code Server image is that it allows installing different VS Code extensions and the image that Connected AI Platform provides comes VS Code Python extension which allows running Jupyter Notebooks straight from VS Code.
Creating and running a Jupyter Notebook
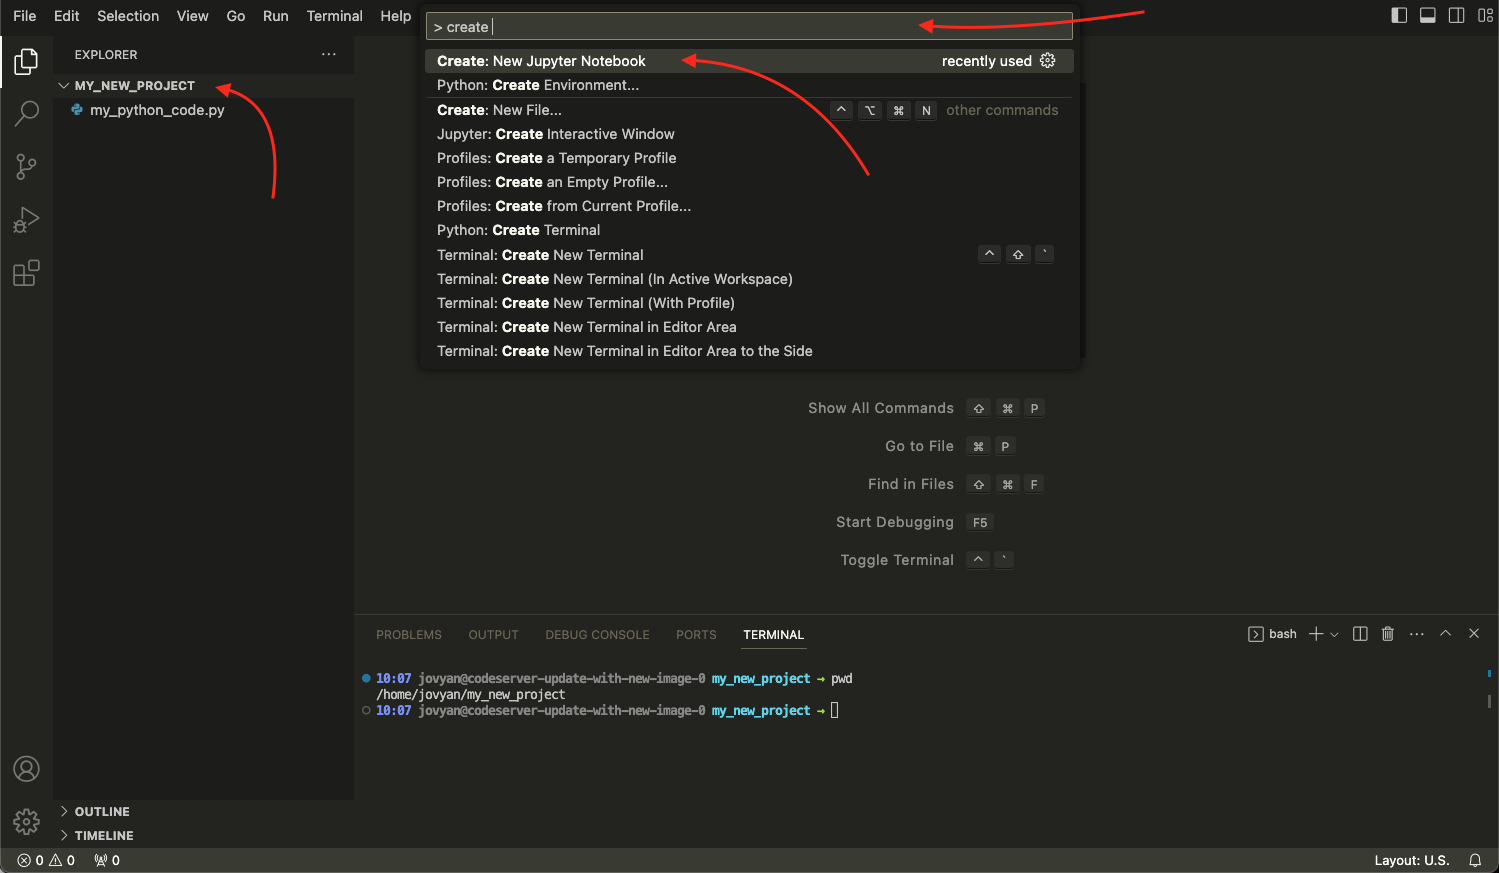
You can create a new Jupyter notebook by navigating to your project directory → click on the "Search bar" → and start typing "> create " → VS code will suggest you different commands and you have to choose "Create: New Jupyter Notebook":
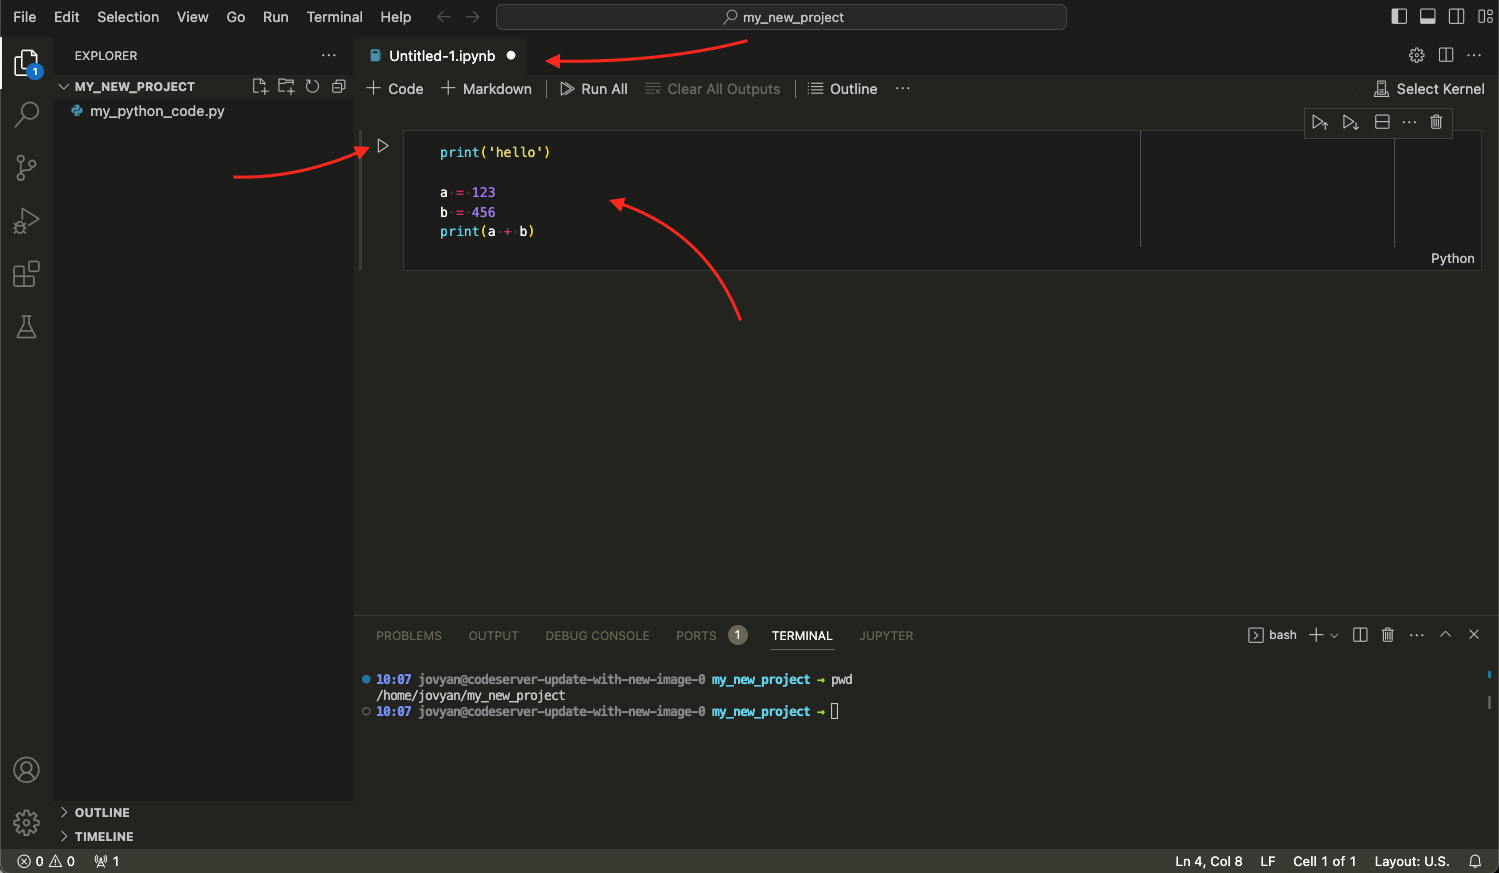
Type your Python code inside the Jupyter notebook's cell → to execute the cell, click the small button near the cell:
This will prompt you to choose a Python kernel (a kernel is an instance of Python virtual environment or a system level Python):
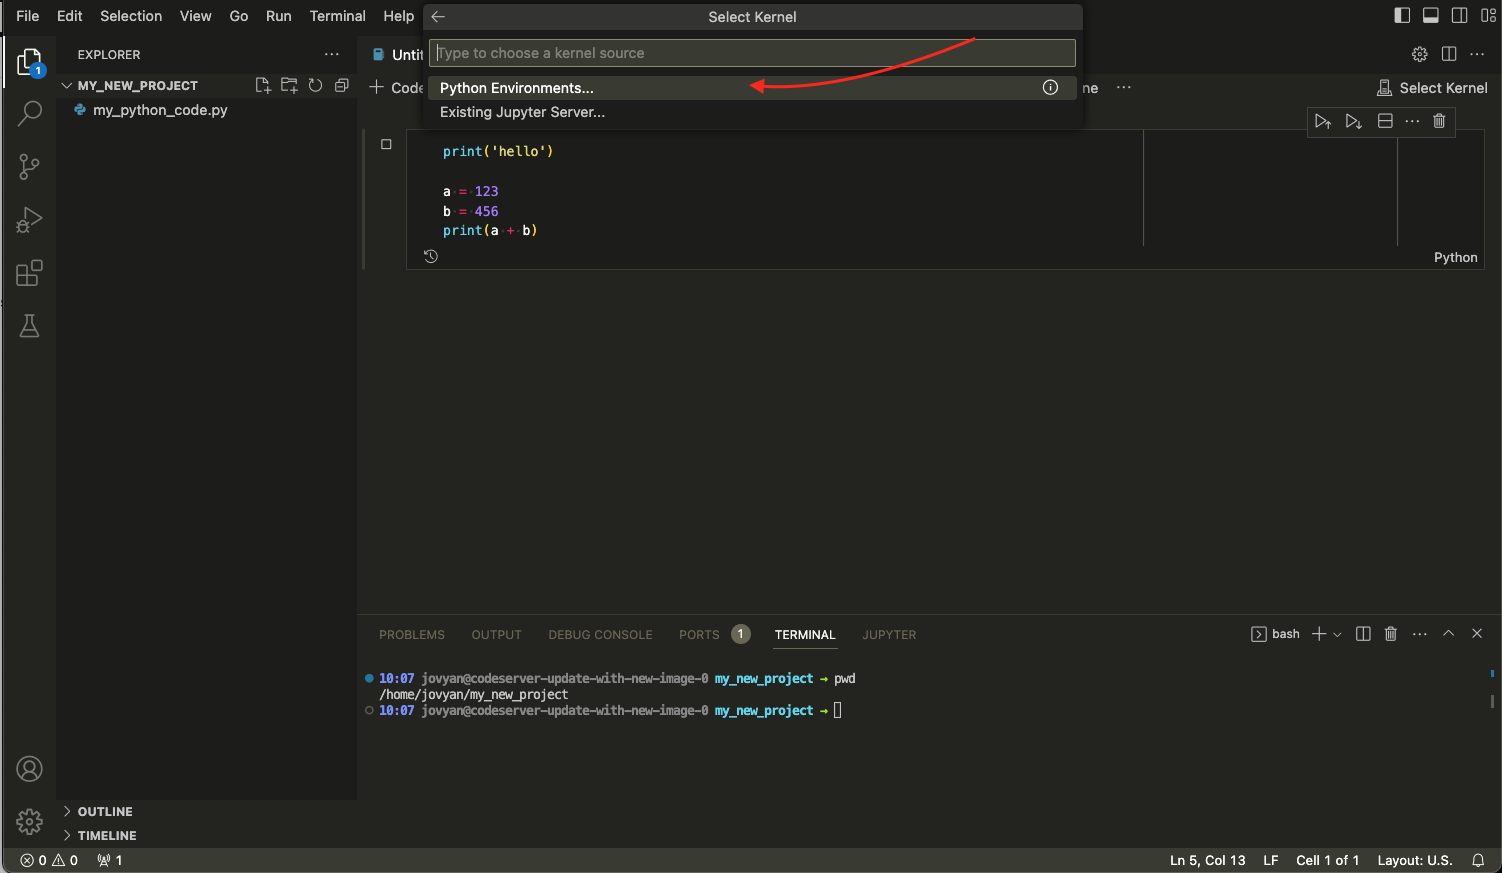
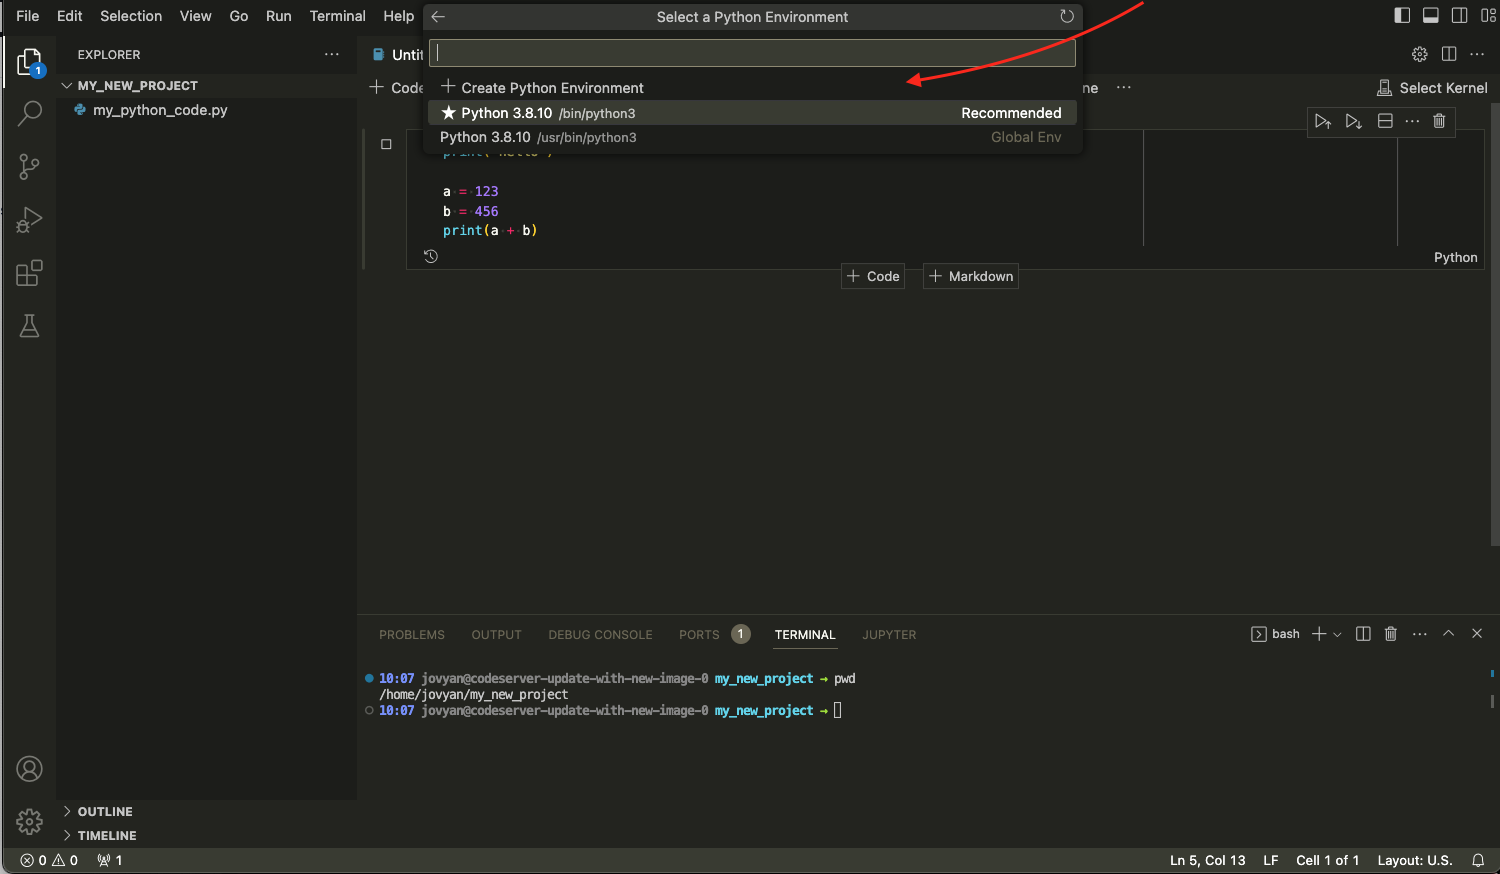
Click on "Python Environments..." → and select either the recommended Python or create a new Python virtual environment. Note that you will have to do it only once and VS Code will remember the kernel next time you want to run your notebook:
Once the environment is selected VS Code will execute your notebook cell and you should be able to see the output:
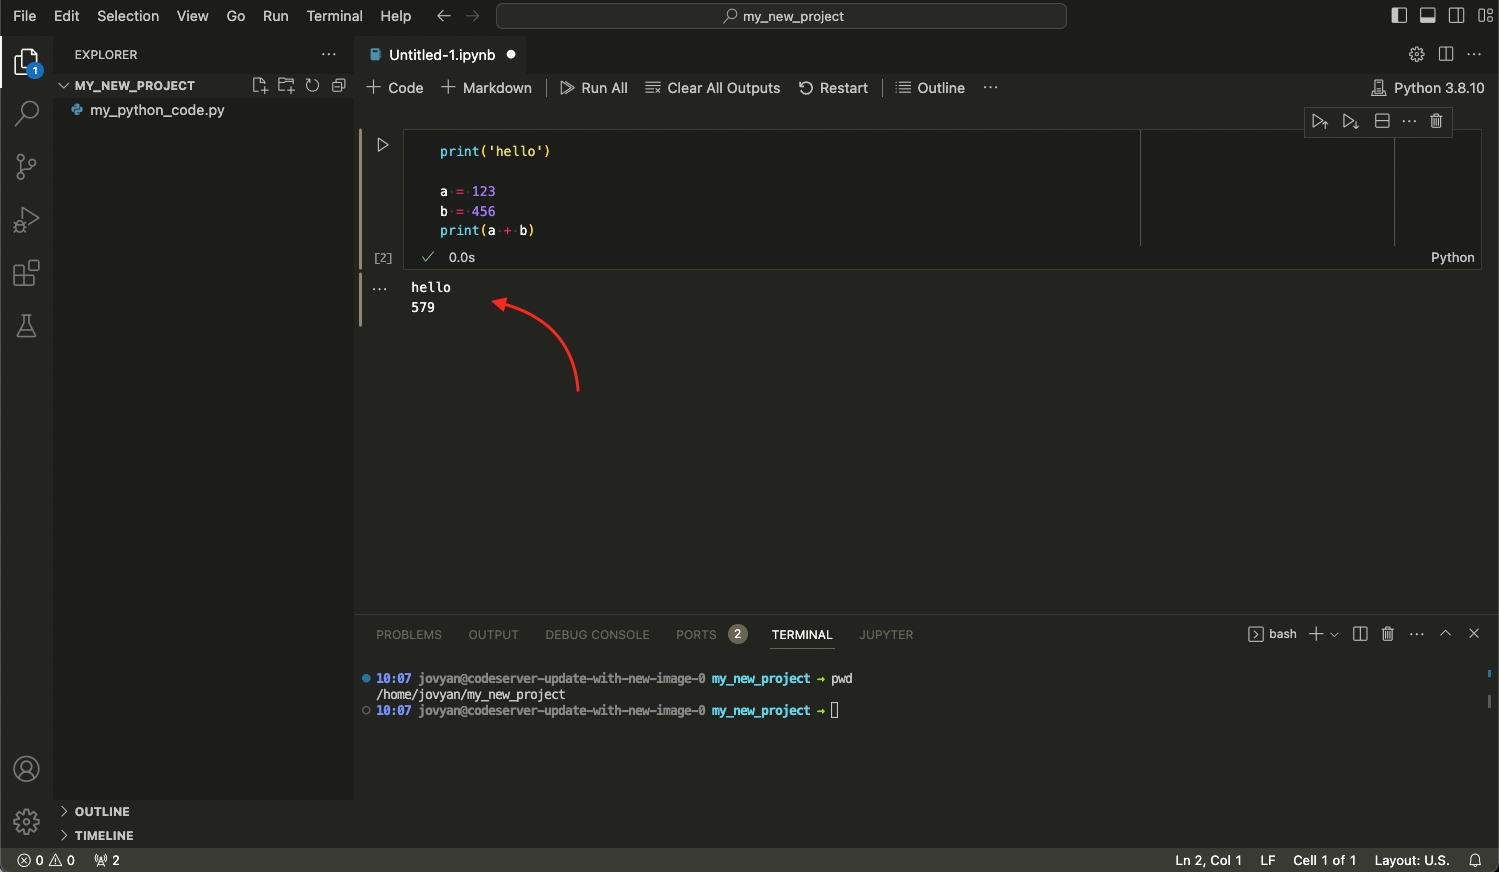
Running an interactive Jupyter Notebook session
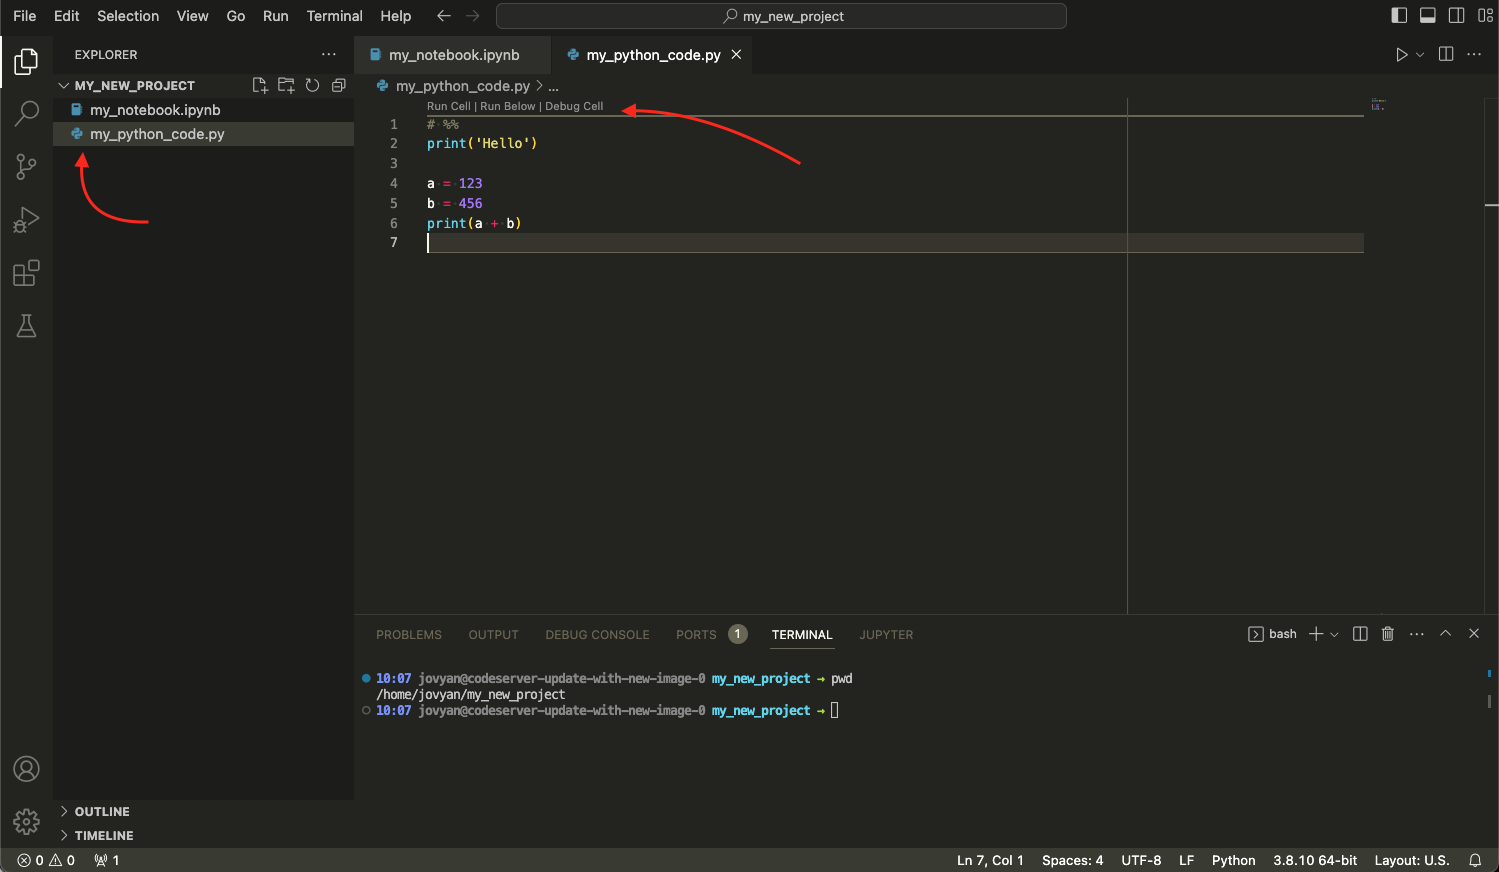
In VS Code, you are not limited to running Jupyter Notebooks by creating notebooks and executing cell, but you can run any Python code in the "interactive mode" by leveraging Jupyter Notebook's session.
Open a Python file and add "# %%" at the very top of your file. This will tell VS code to treat everything that comes after the "# %%" as a single cell and show a button "Run Cell" at the top of the line:
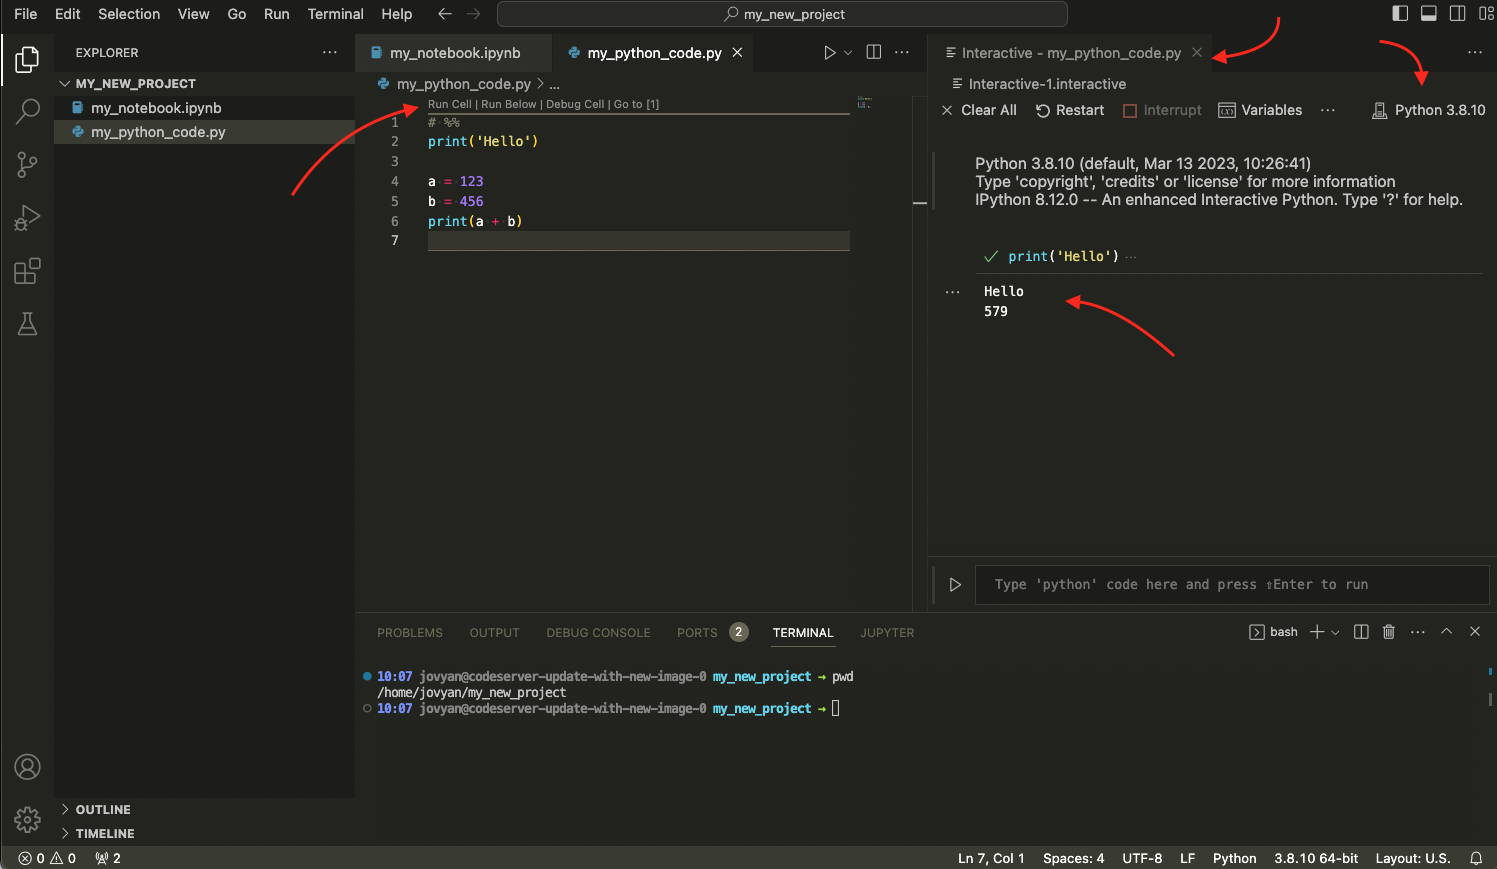
When clicking on the "Run Cell" button it will automatically create a new Jupyter session, choose the Python kernel instance, display an interactive view on the right side, and execute your code as if it was run from a Jupyter Notebook:
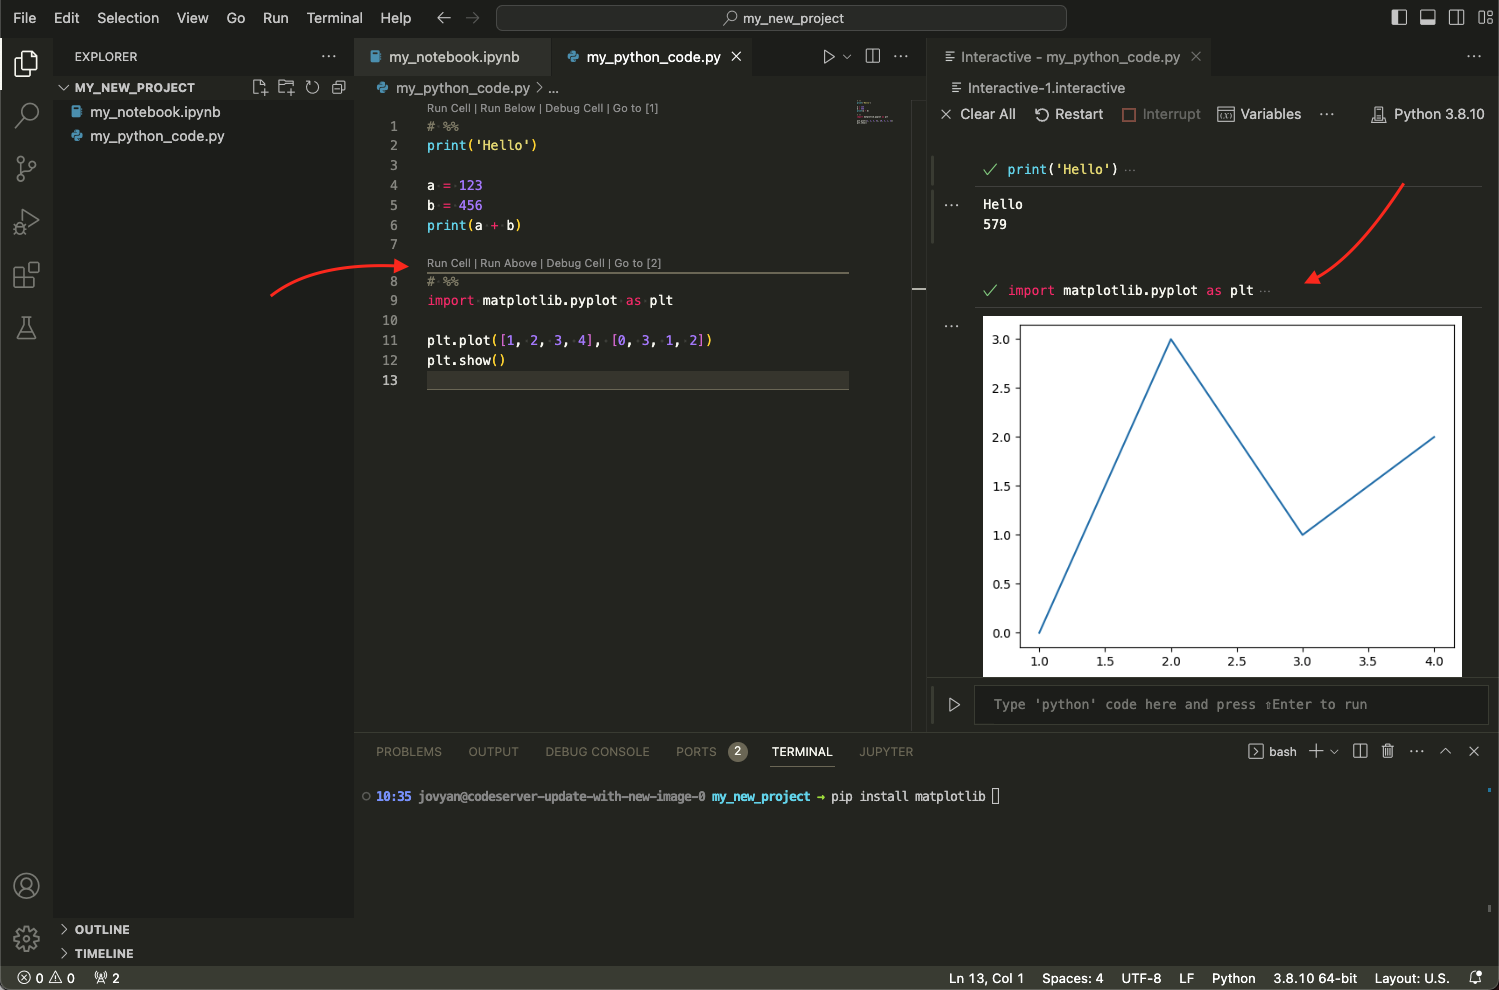
You can add another block of Python code starting with "# %%" and VS Code will treat it as new cell, execute it, and append the output to the same interactive session:
How to Use GitHub Copilot in VS Code Server
Log In to GitHub Enterprise
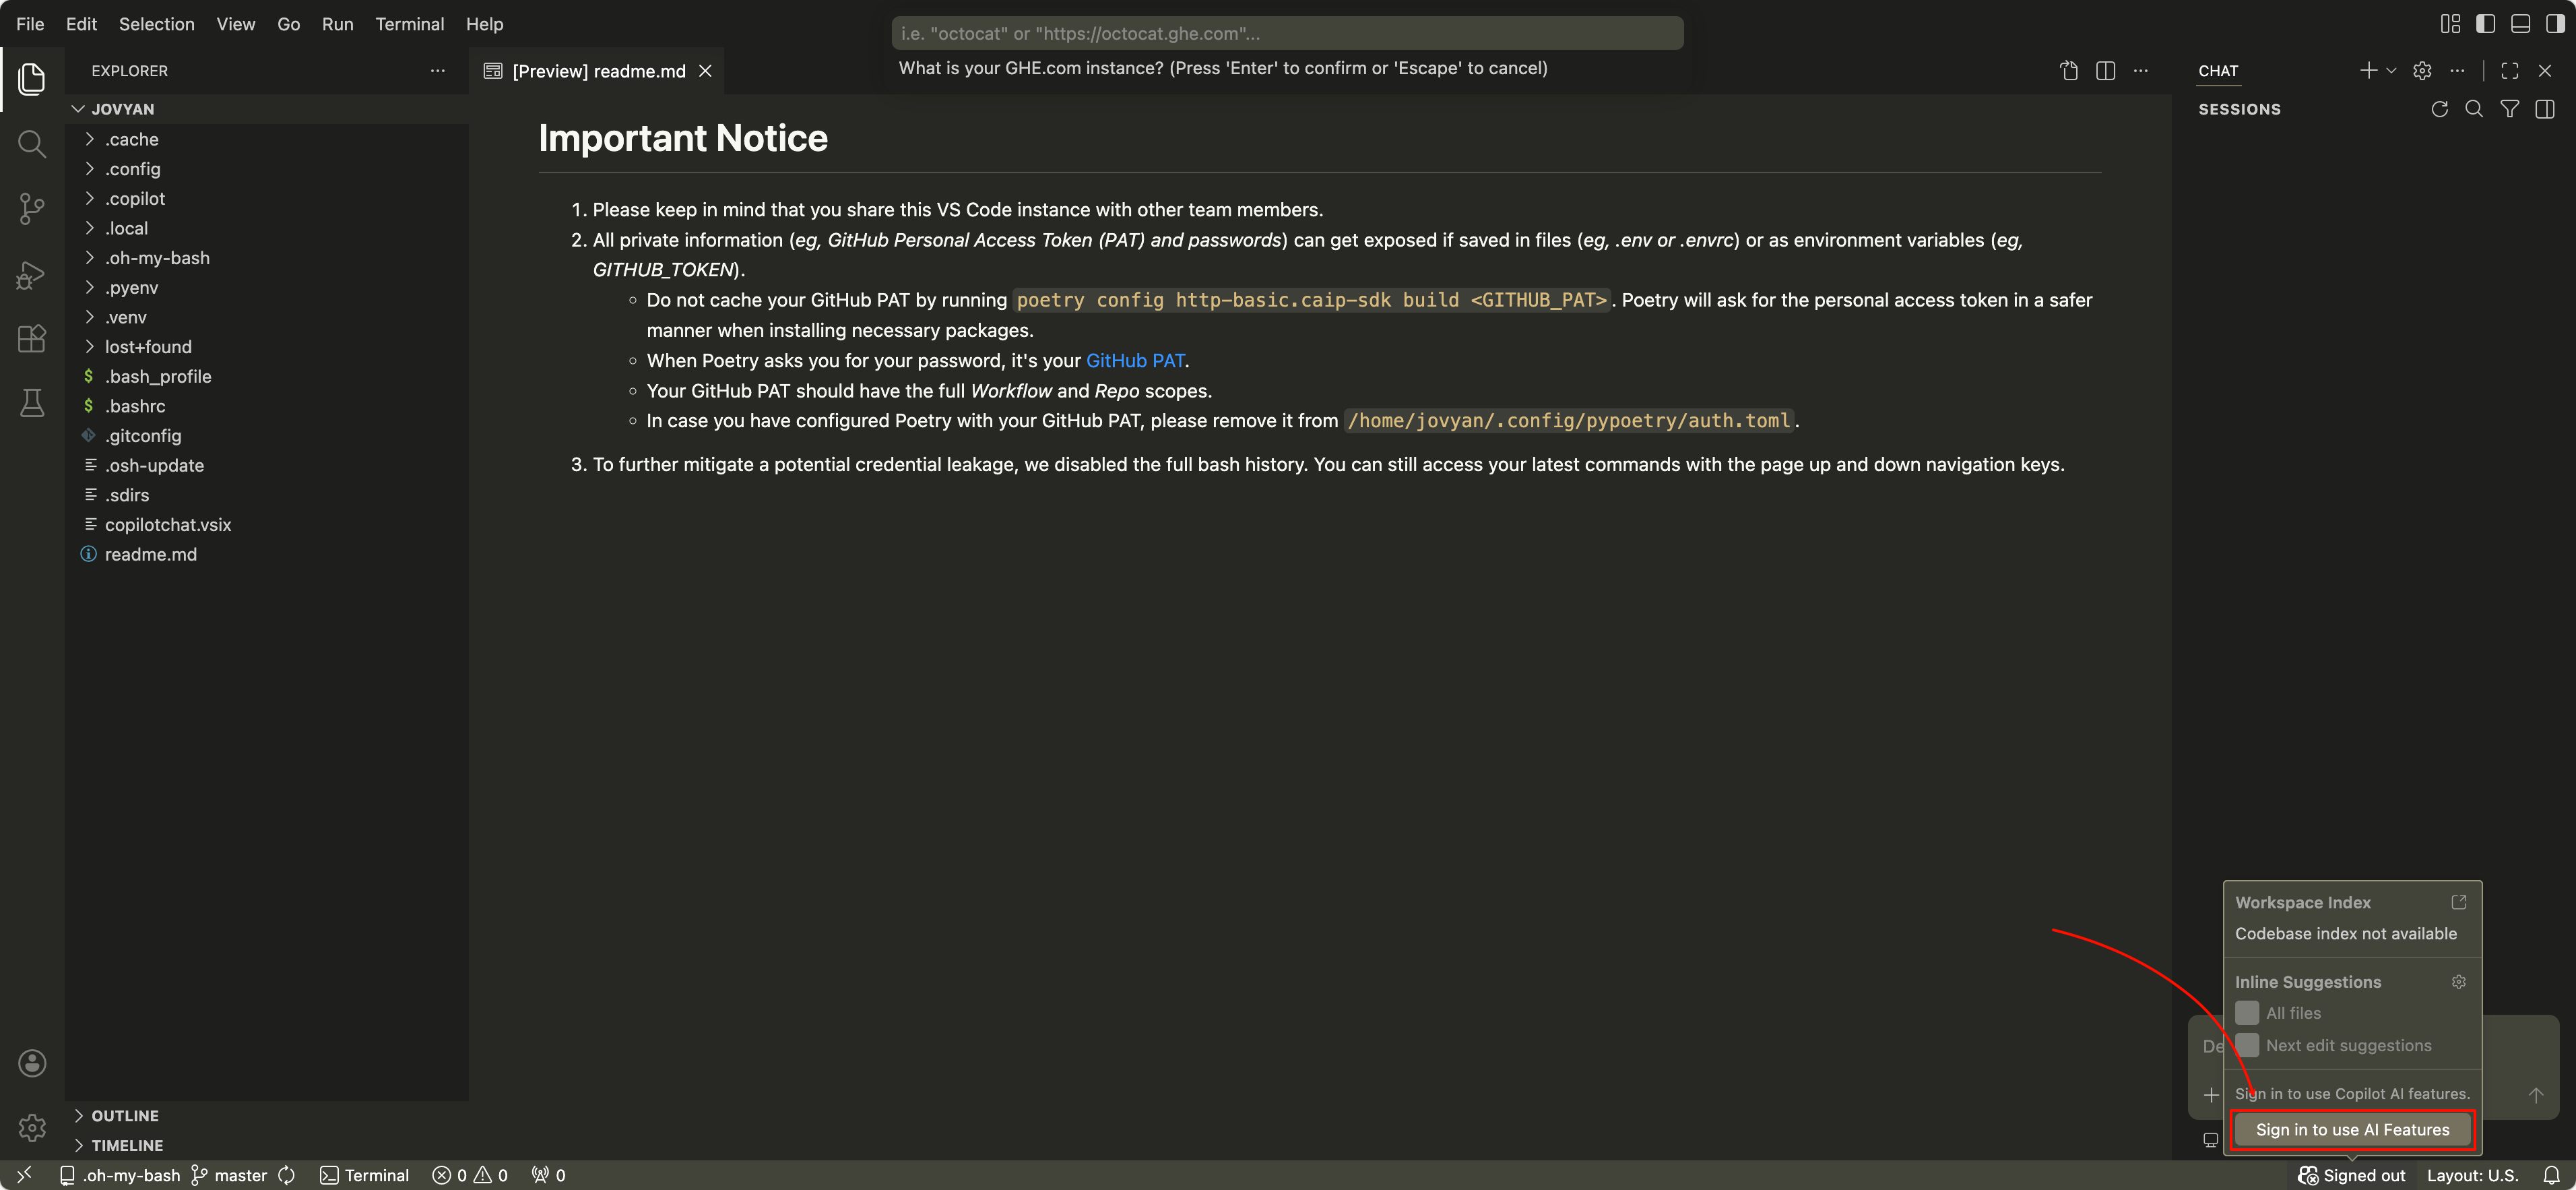
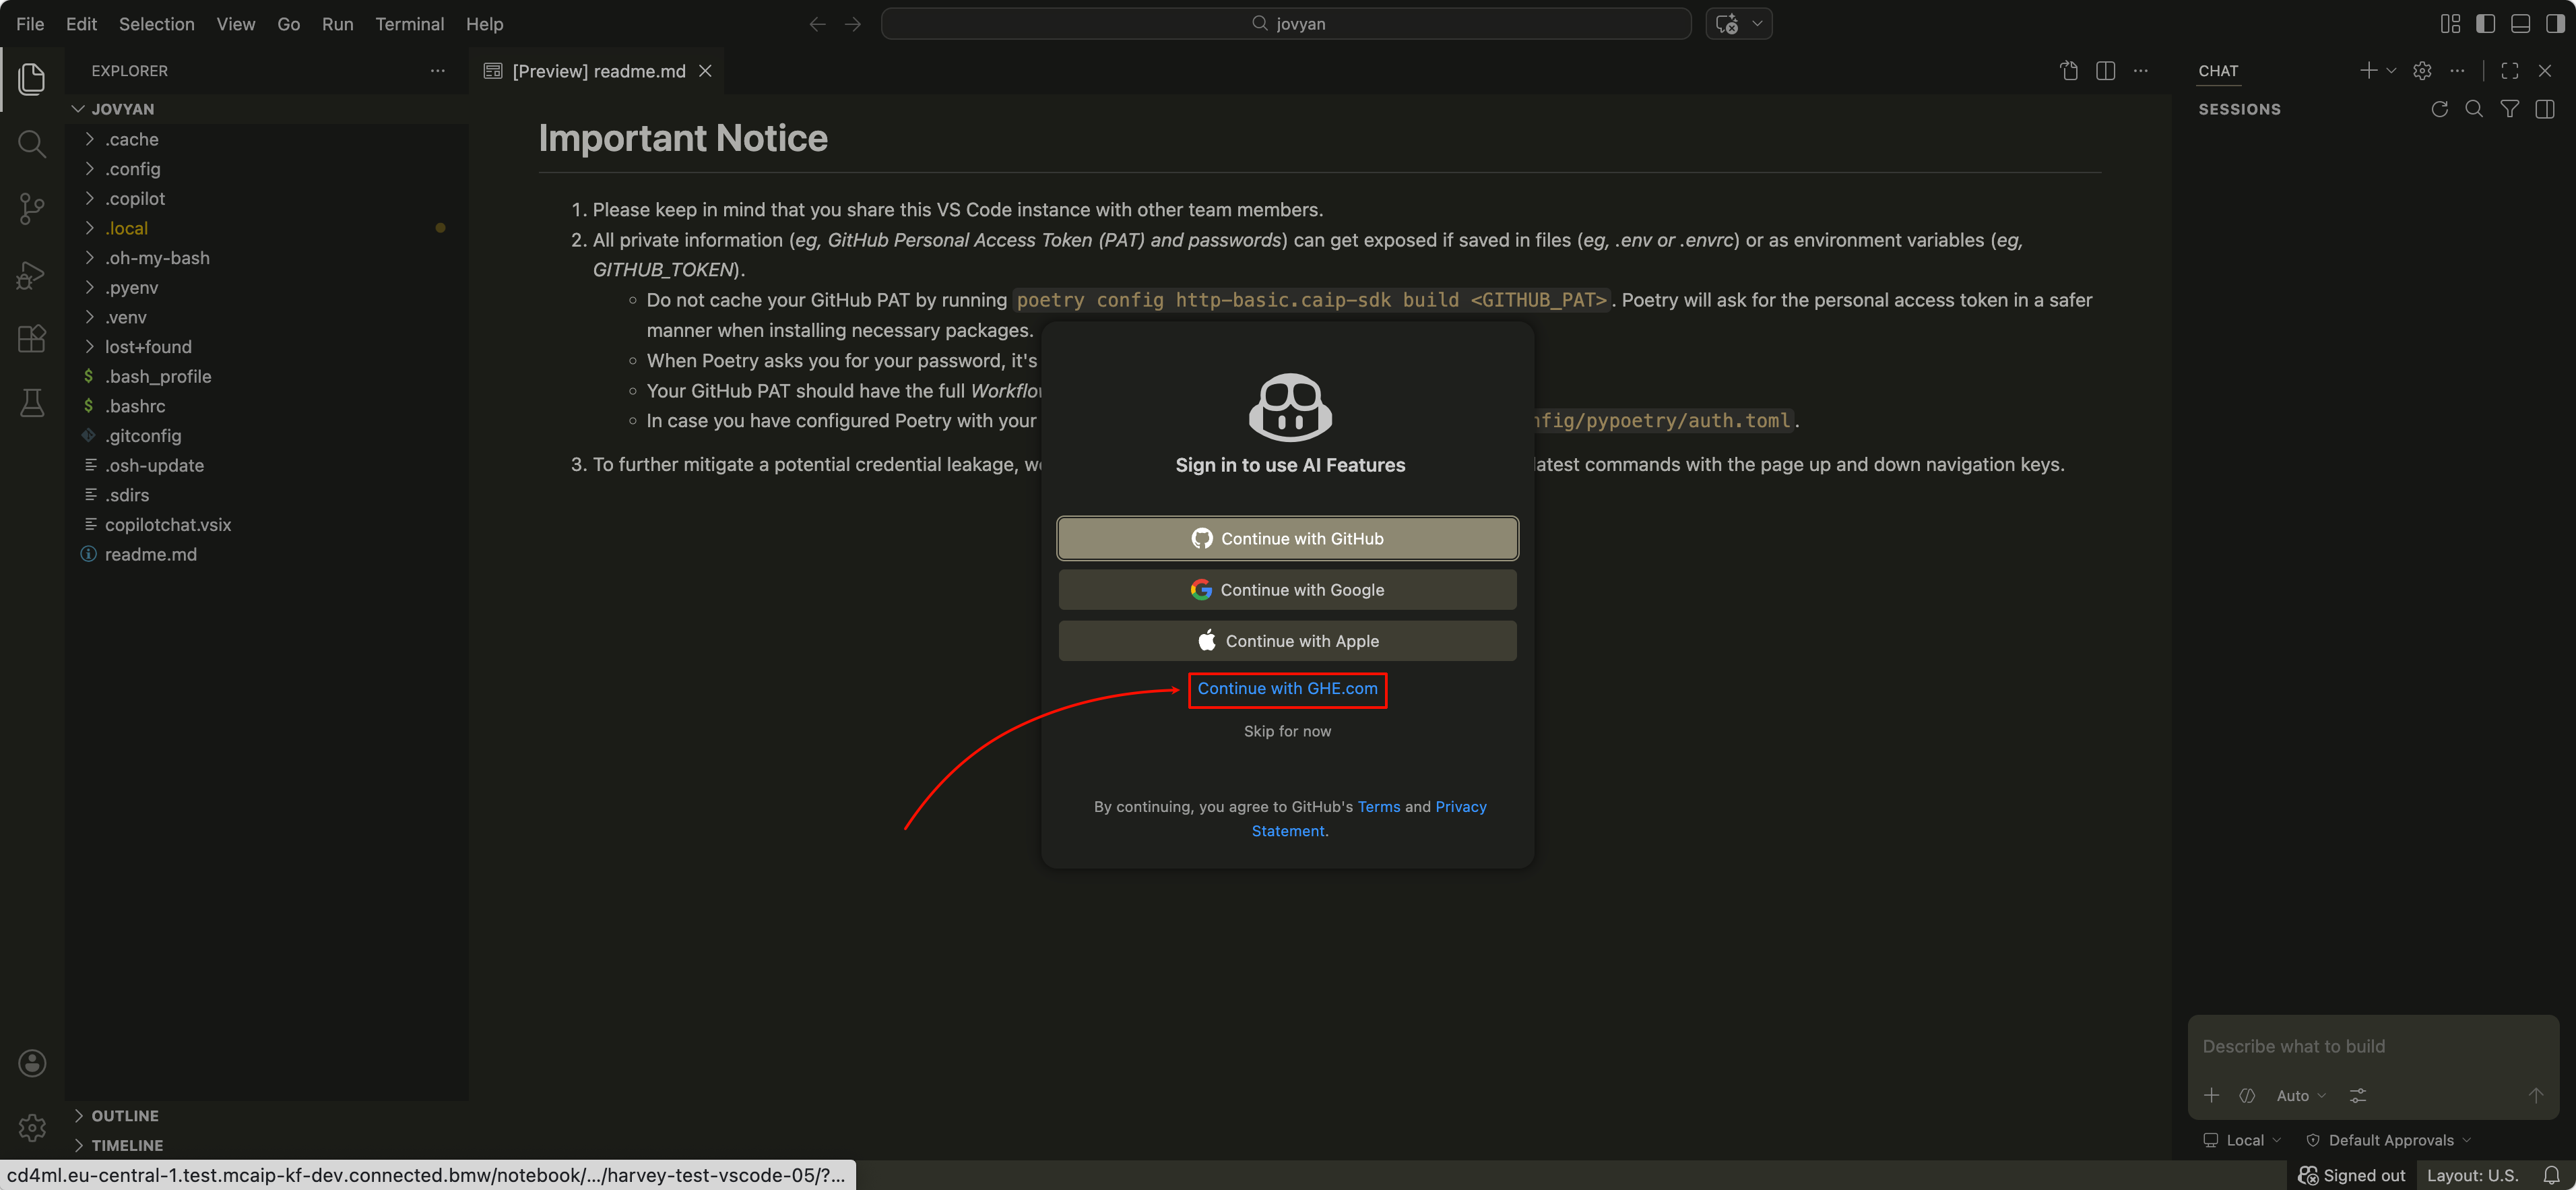
Click the Sign In button in the Copilot panel and choose Continue with GHE.com.
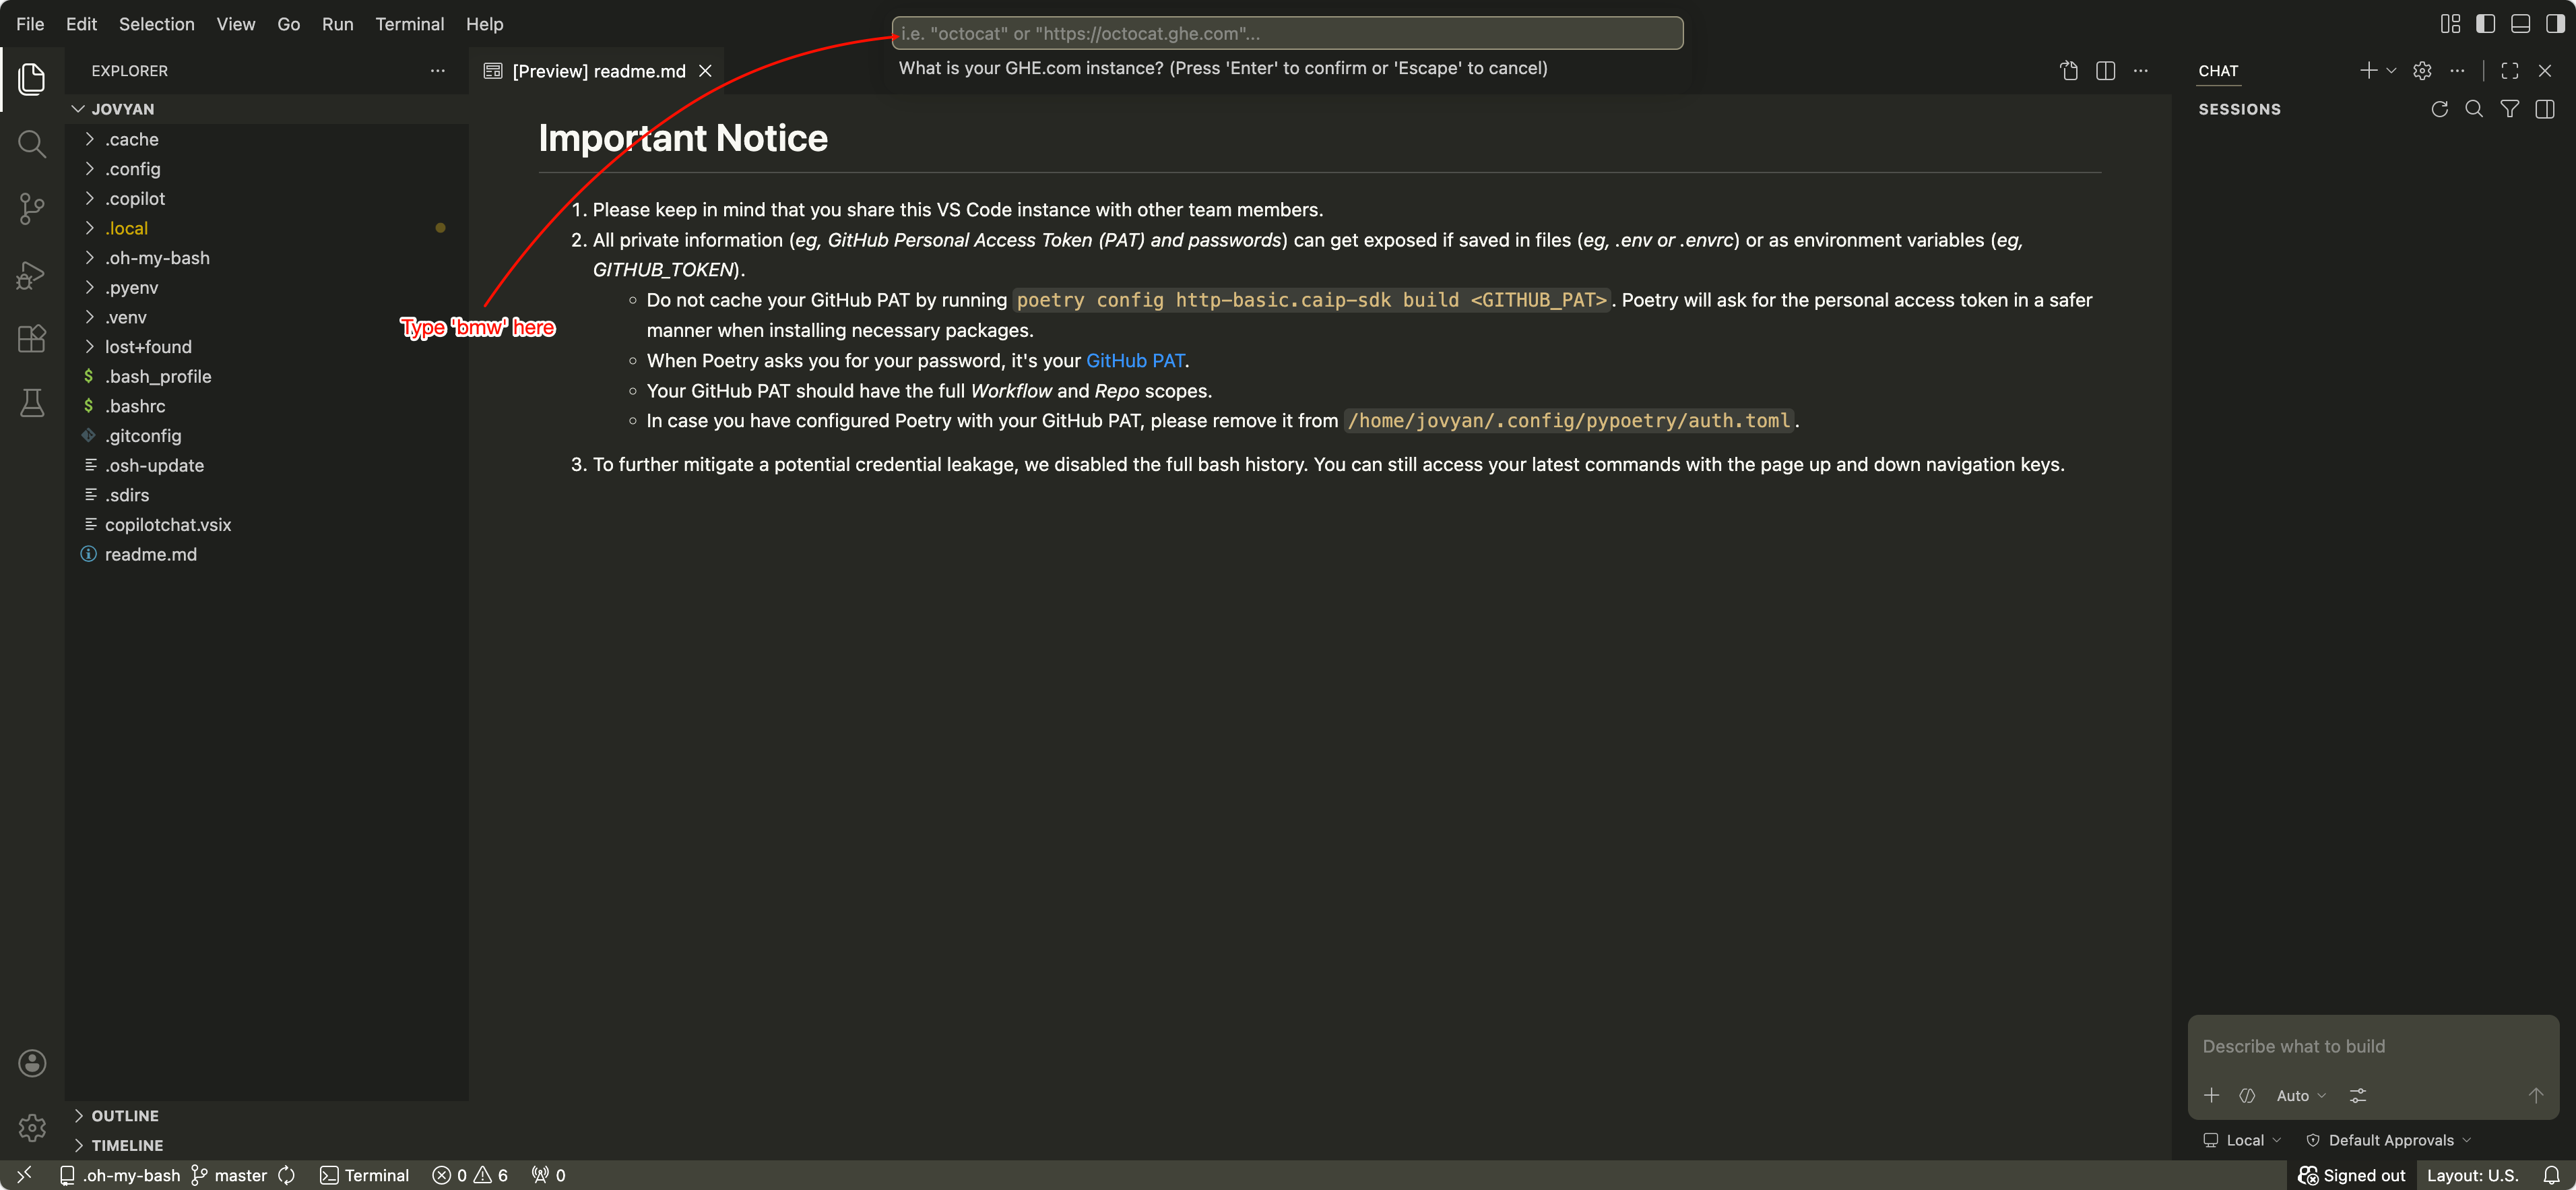
Then enter bmw in the top input box.
Click the Copy & Continue to GitHub button.
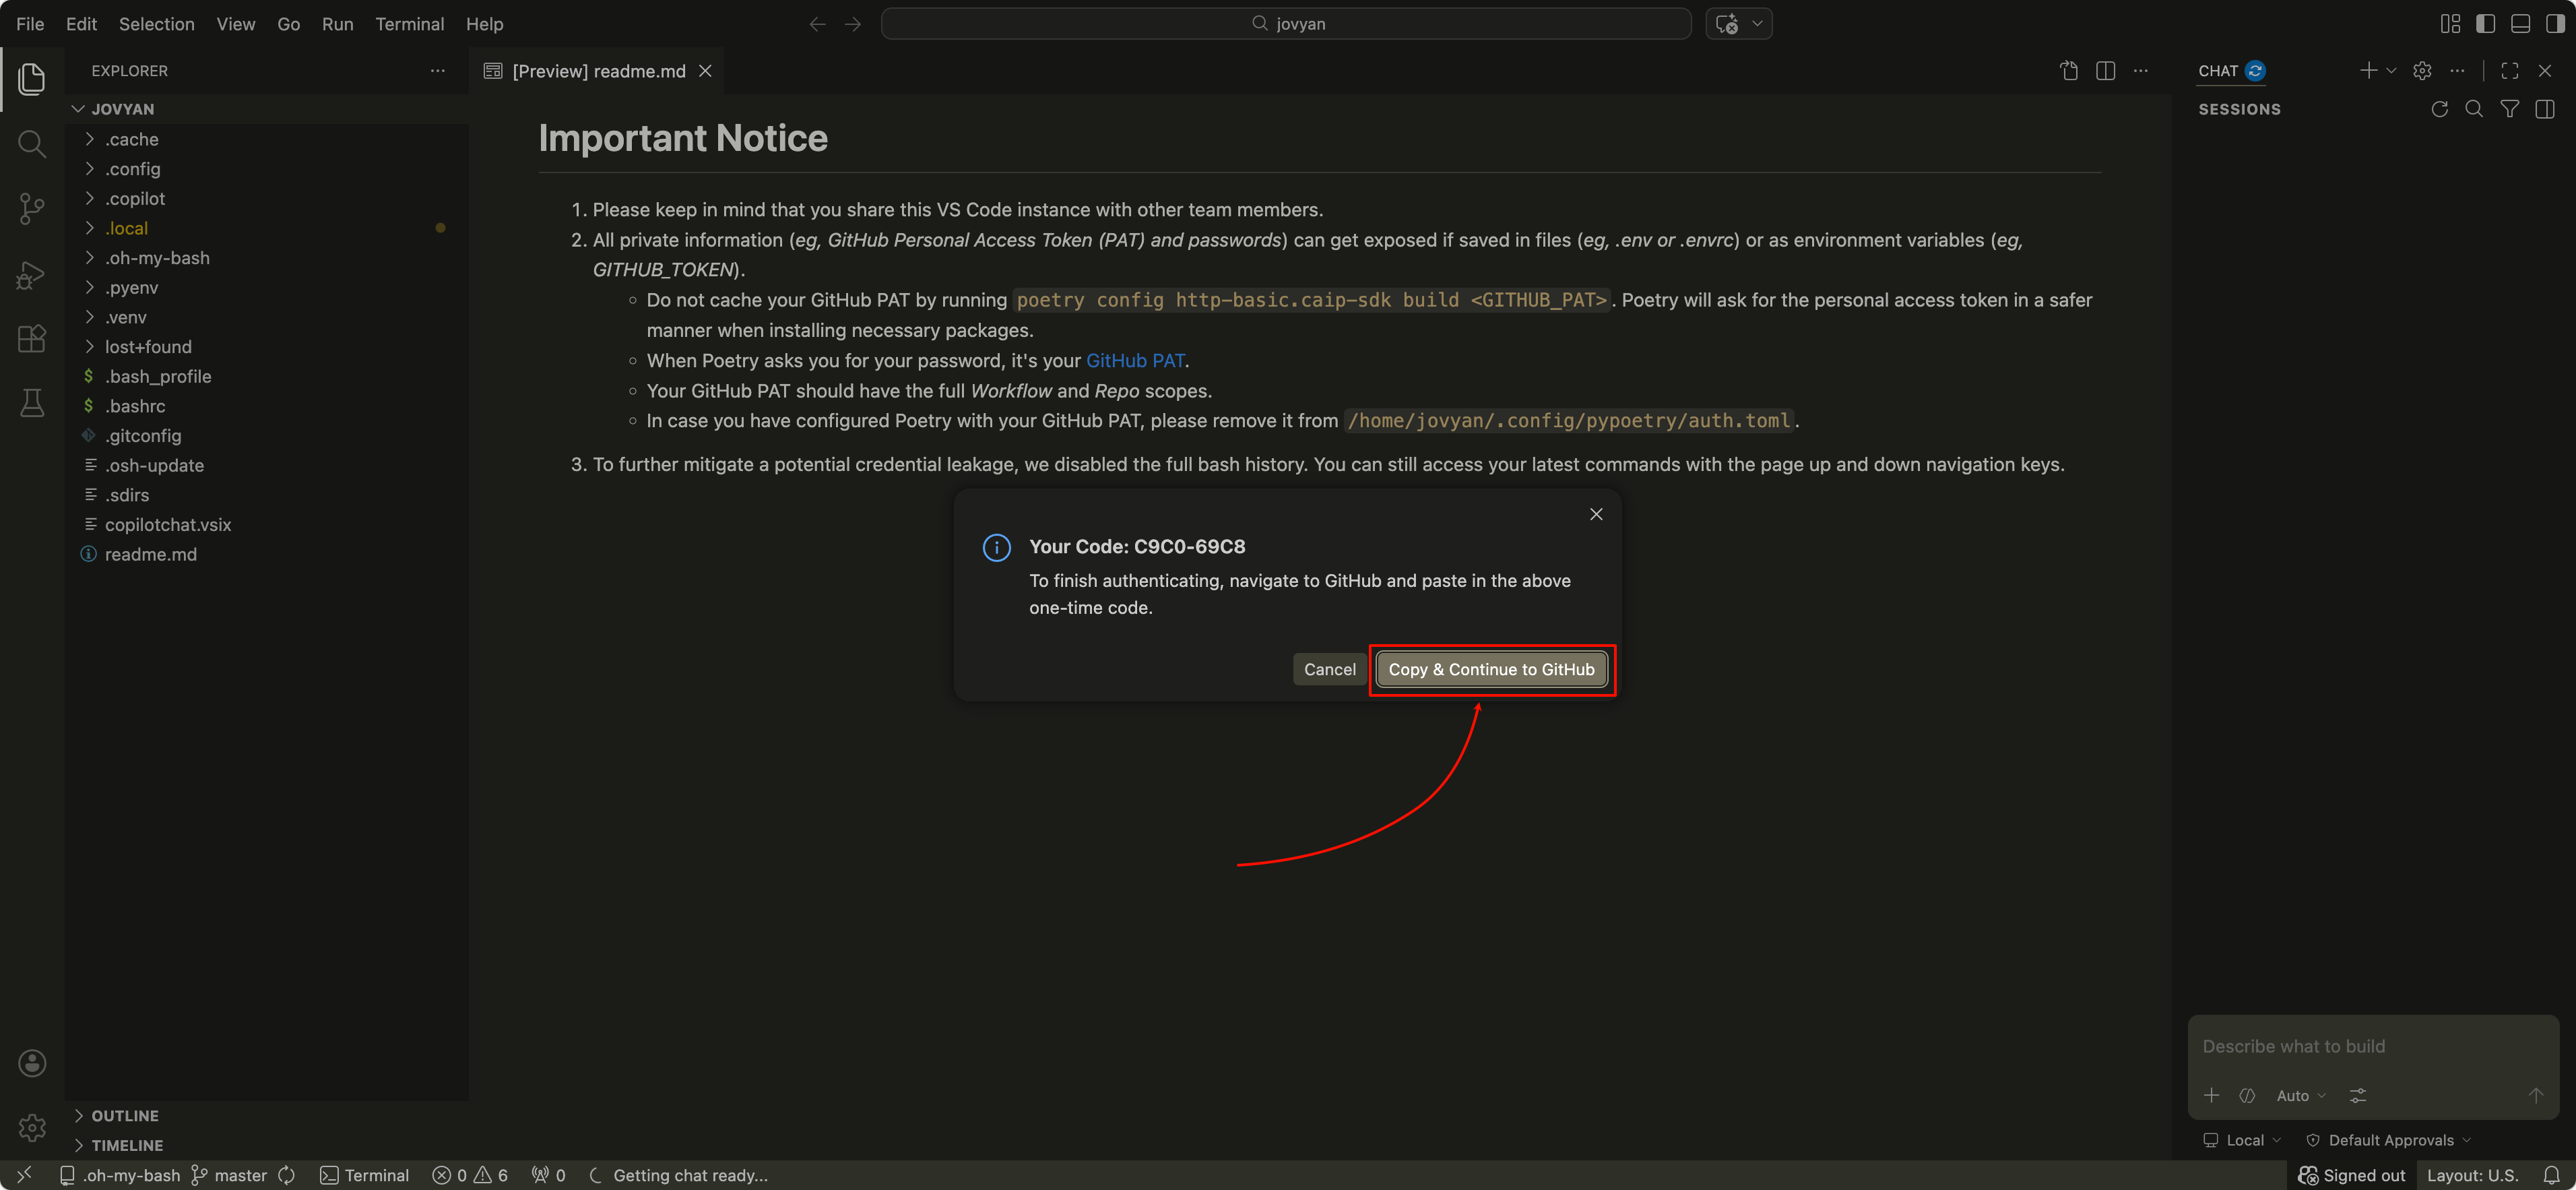
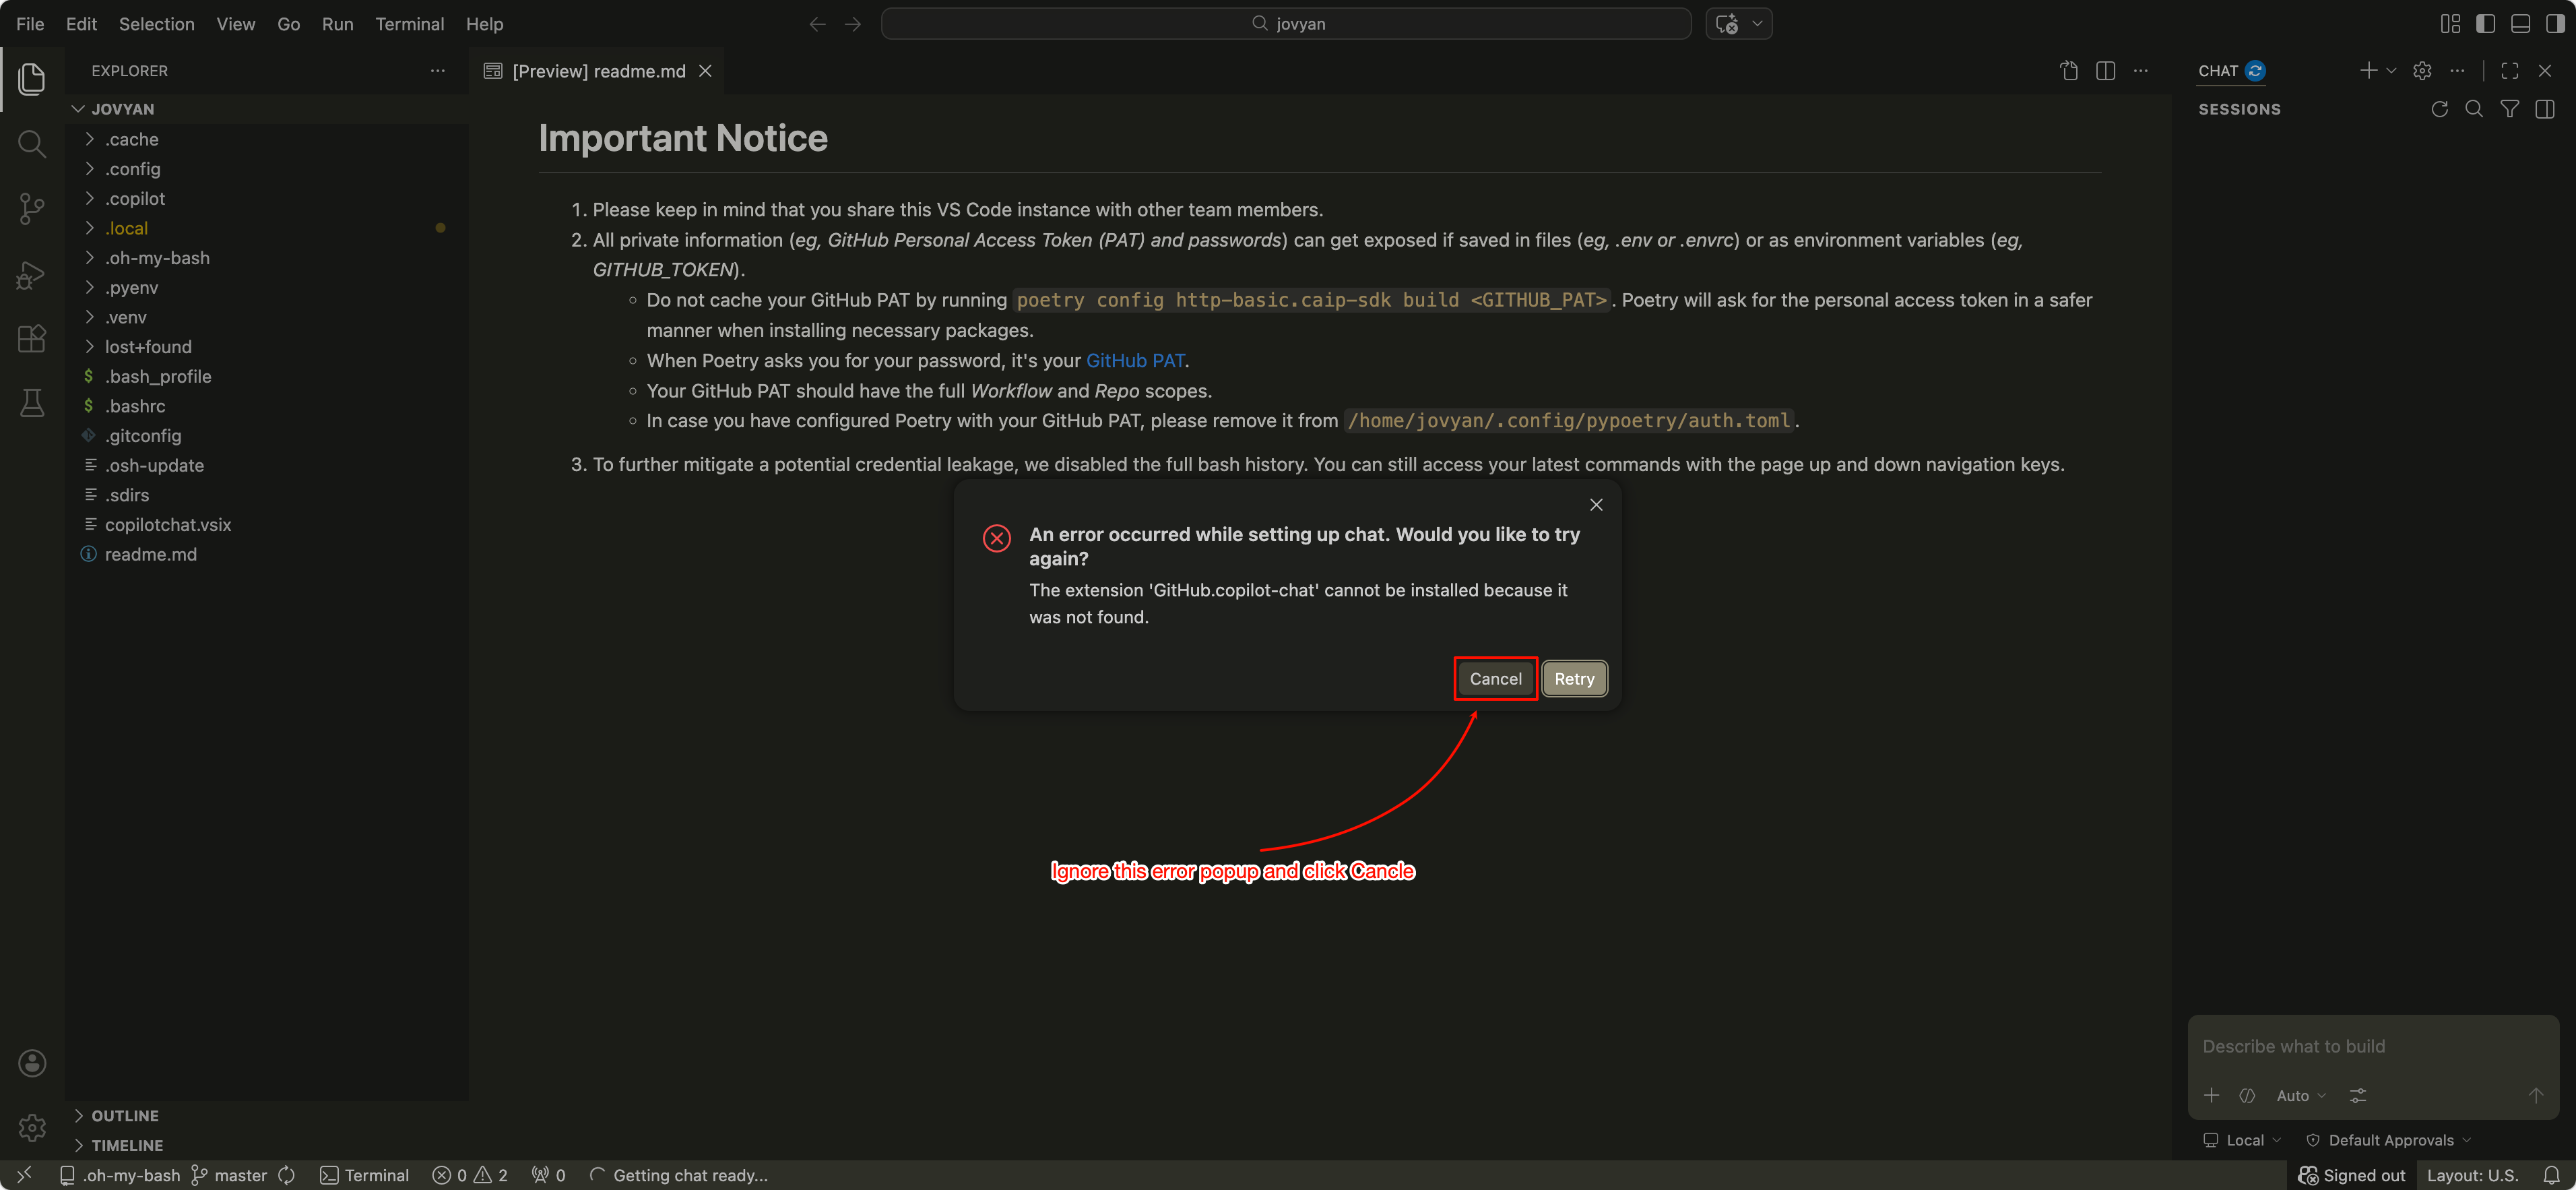
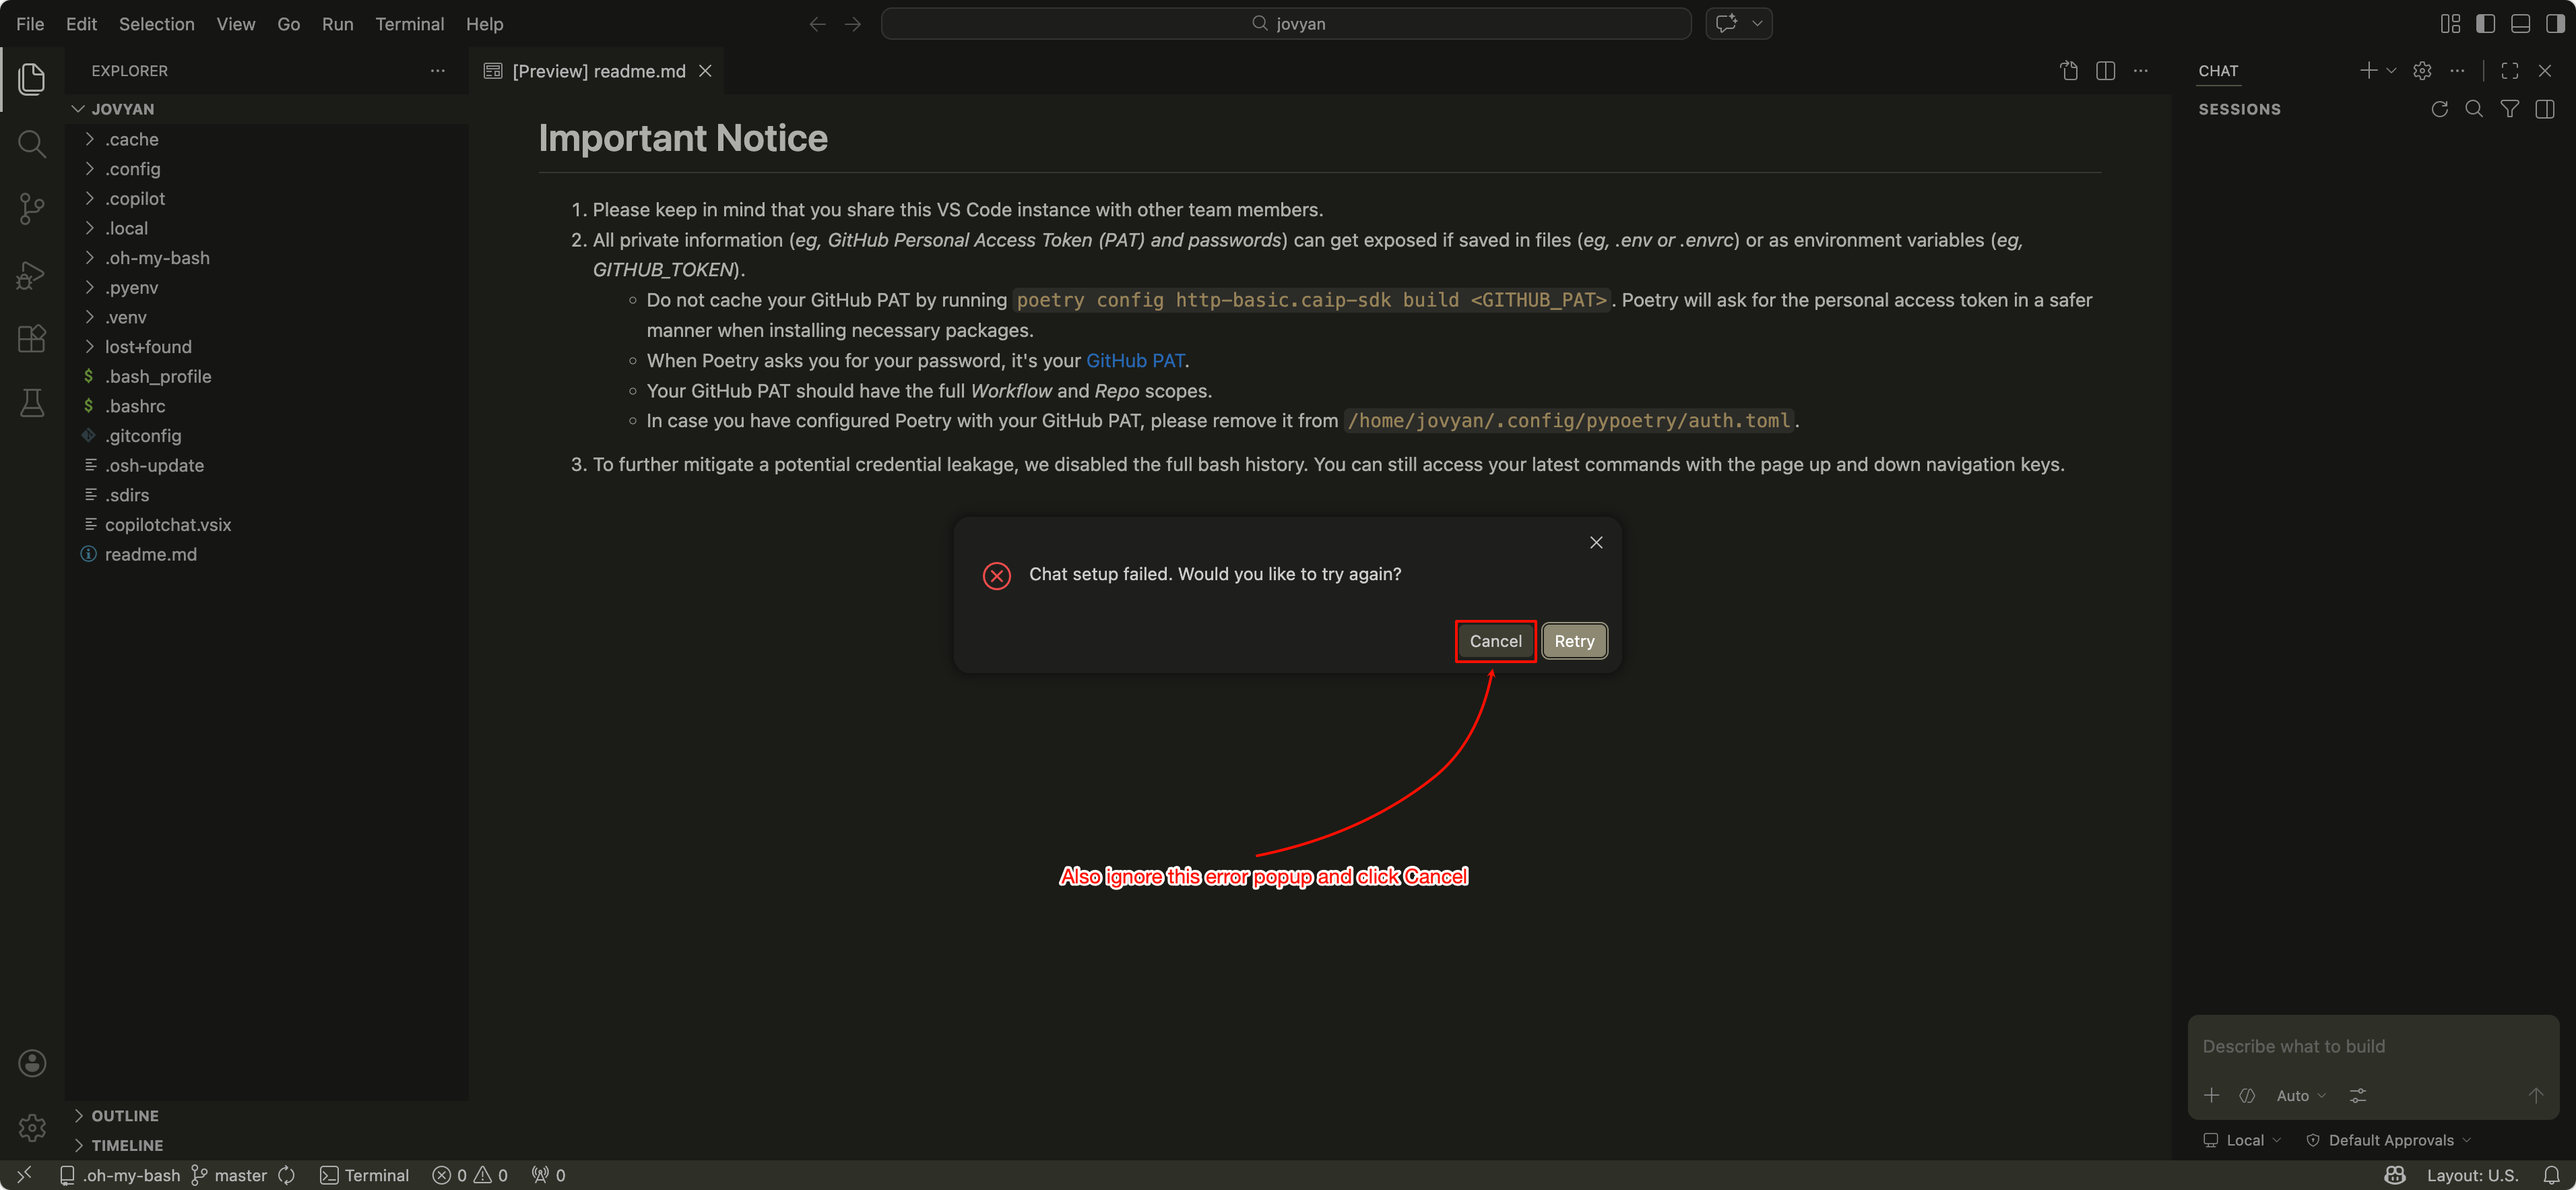
After you successfully log in on the GitHub page, go back to the VS Code Server page. You may then see two error popups. These popups do not affect the login flow. They do not mean that the Copilot login failed, and they do not mean that the extension is actually missing. You can just ignore them and continue to use Copilot.