Working with Kubeflow Notebooks
Introduction
Kubeflow Notebooks provide an interactive development environment for building, testing, and iterating on your machine learning pipelines. Whether you prefer JupyterLab's notebook interface or VS Code's full-featured IDE, Kubeflow offers both options accessible directly through your web browser. This guide walks you through accessing your cluster, creating a notebook, configuring resources, and setting up your development environment to start working with Kubeflow pipelines.
Reference Implementation
For a complete working example, refer to the reference repository:
https://bmw.ghe.com/AI-Lab/DemoOnboarding-AILab
Accessing Your Kubeflow Cluster
Understanding the Cluster URL
To begin working with Kubeflow notebooks, navigate to your cluster using the following URL structure:
https://cd4ml.<region>.<environment>.<your_cluster>.connected.bmw/?ns=<your_namespace>
This URL will open the CAIP Kubeflow UI dashboard for your specified cluster and namespace.
Example
Here's a concrete example accessing the AI Lab cluster:
https://cd4ml.eu-central-1.test.ai-lab.connected.bmw/?ns=astroboy
Breaking this down:
- Cluster:
cd4ml.eu-central-1- The AI Lab cluster in the eu-central-1 region - Environment:
test- The test environment (note: may be unstable, primarily for testing) - Namespace:
astroboy- Your specific workspace namespace
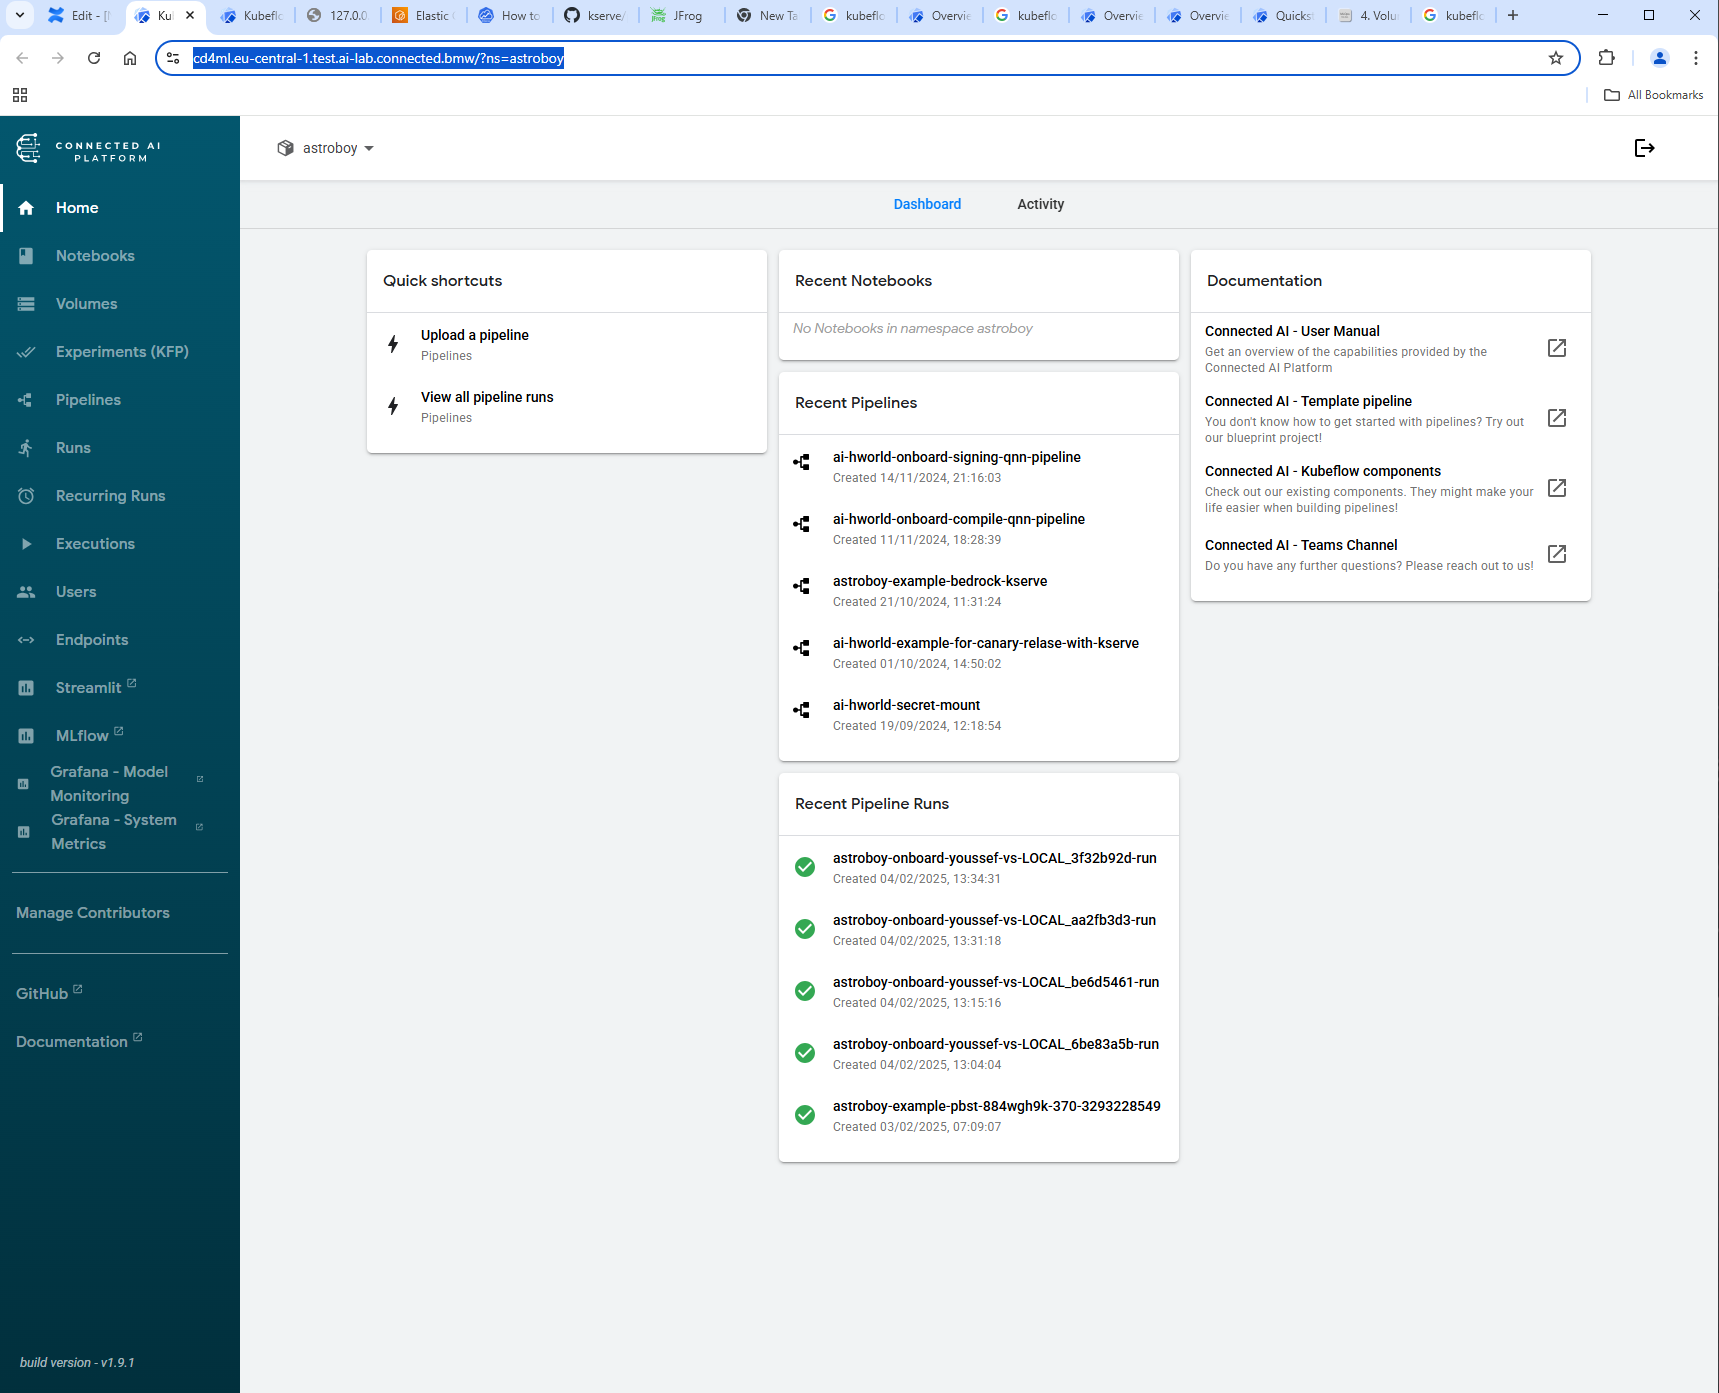
Once loaded, you'll see the Kubeflow dashboard with access to all available resources in your namespace.
Creating Your First Notebook
Step 1: Navigate to Notebooks
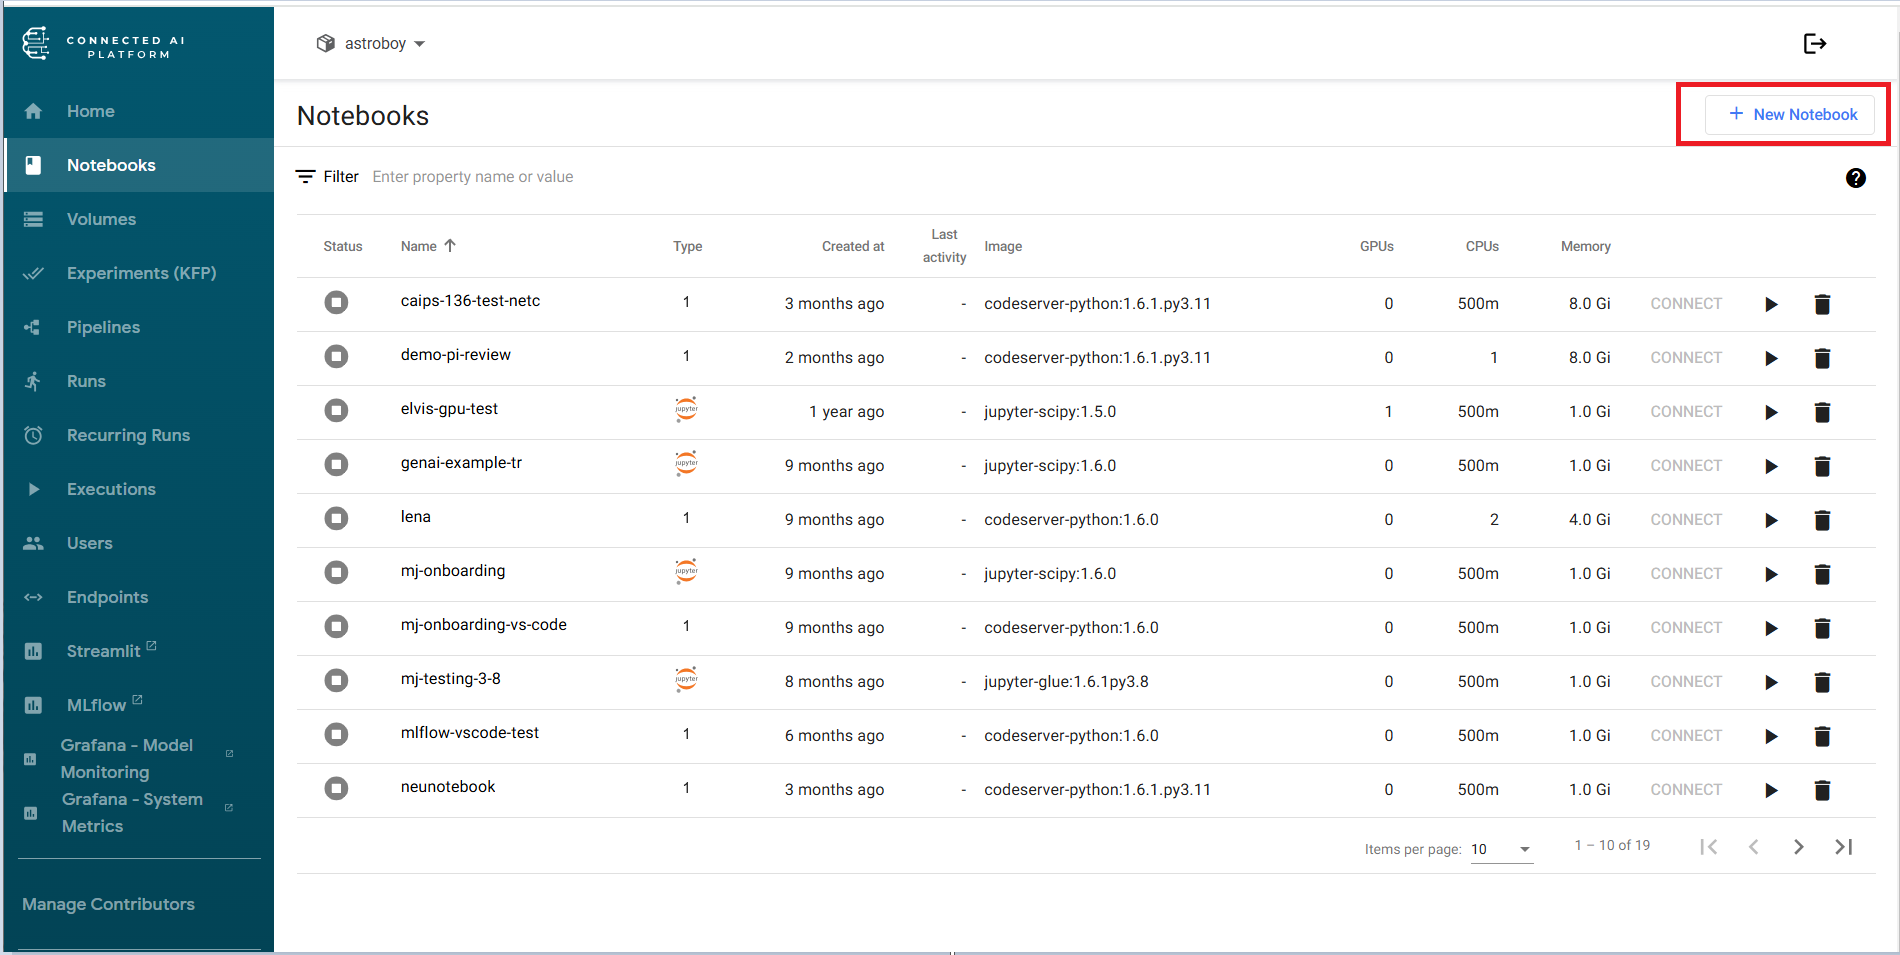
From the Kubeflow dashboard:
- Click on the Notebooks tab in the left side menu
- Click the New Notebook button
Step 2: Choose Your Environment
Kubeflow offers two development environments:
- JupyterLab: A classic Jupyter notebook interface ideal for data exploration and experimentation
- Visual Studio Code: A full-featured IDE with extensions, better for complex development tasks
Select the environment that best suits your workflow.
Step 3: Configure Resource Allocation
Before creating your notebook, you need to allocate computational resources. The recommended configuration is:
- CPUs: Minimum 2
- RAM: Minimum 2GB
- Volume Size: 20GB
These resources should be sufficient for most development and testing tasks.
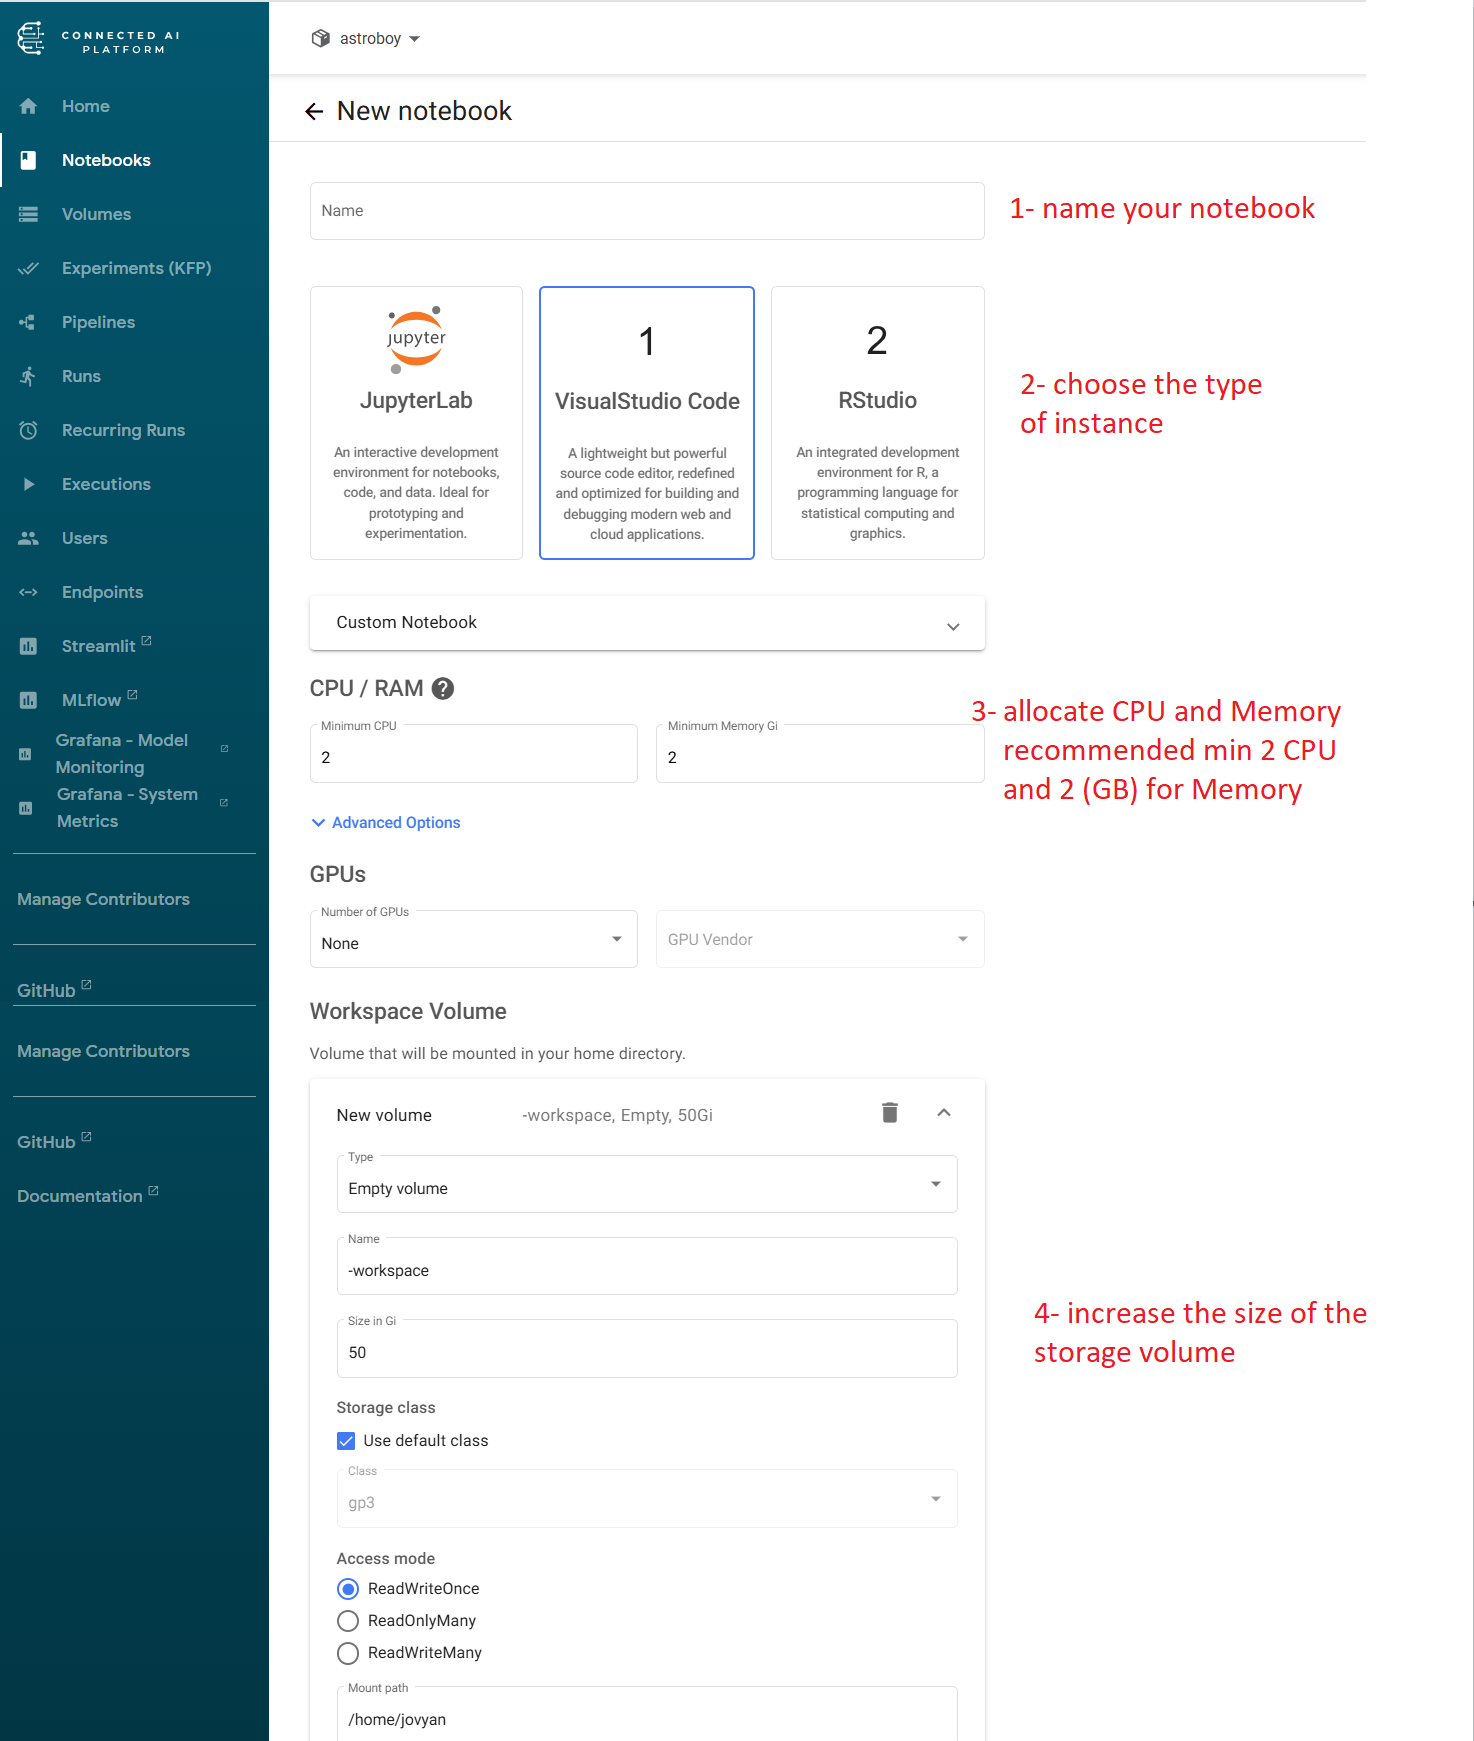
Step 4: name your image.
Before you are ready to create it, name your image then Click Create to provision your notebook with these resources.
Connecting to Your Notebook
Initial Connection
Once you've submitted the creation request, navigate to your newly created notebook:
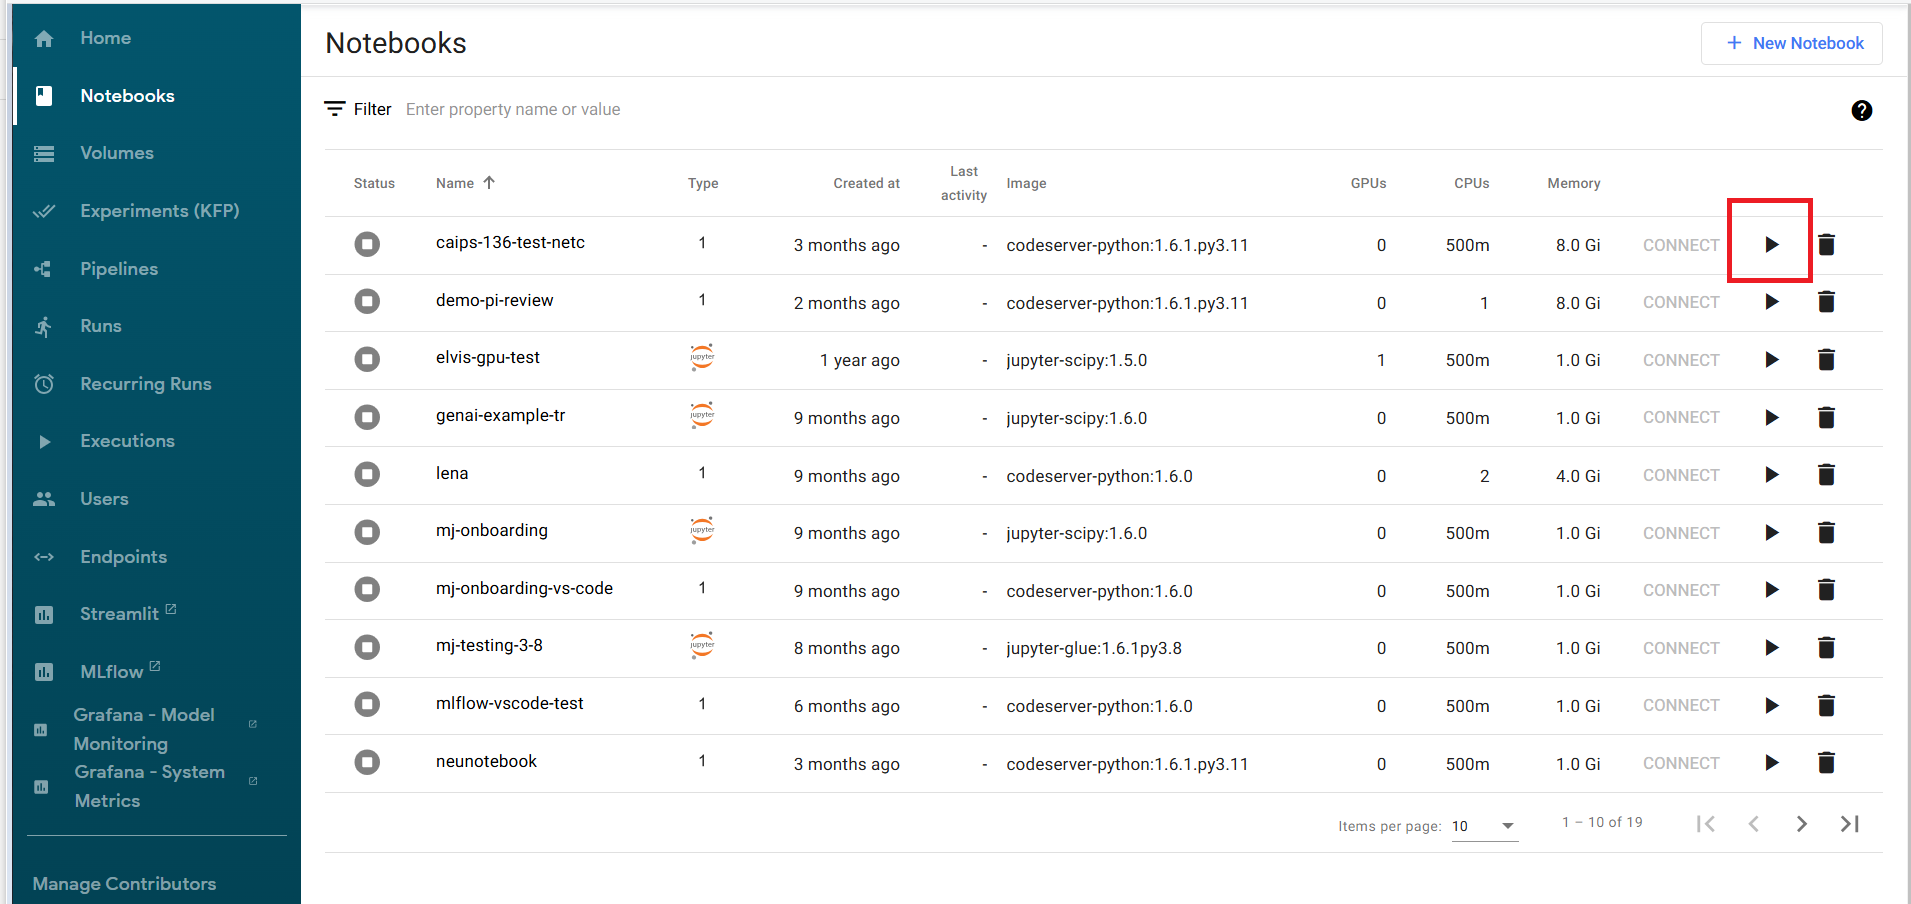
Click the Connect button to access your notebook environment.
Expected Scheduling Message
When first connecting, you may see a warning indicating that Kubeflow is unable to immediately schedule or provision resources for your notebook:
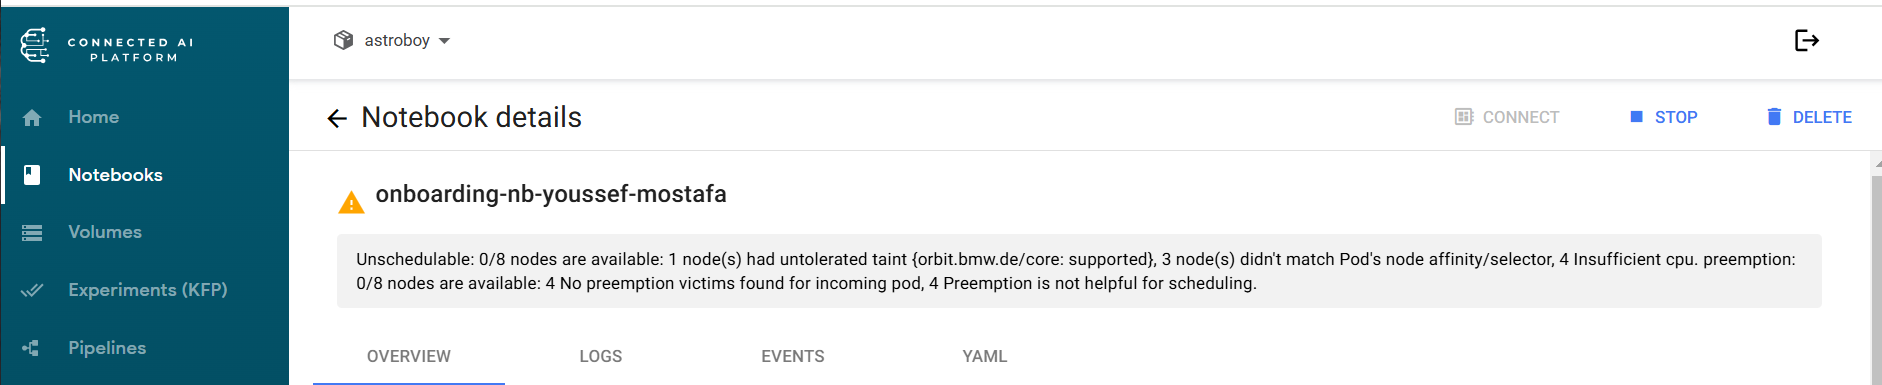
This is a normal temporary state. Kubeflow typically provisions the resources within about 2 minutes. If the issue persists beyond this time, contact your cluster administrator.
Setting Up Your Development Environment
Once your notebook successfully starts, you'll need to set up a Python environment for development.
Accessing the Terminal
Both JupyterLab and VS Code provide terminal access for running commands.
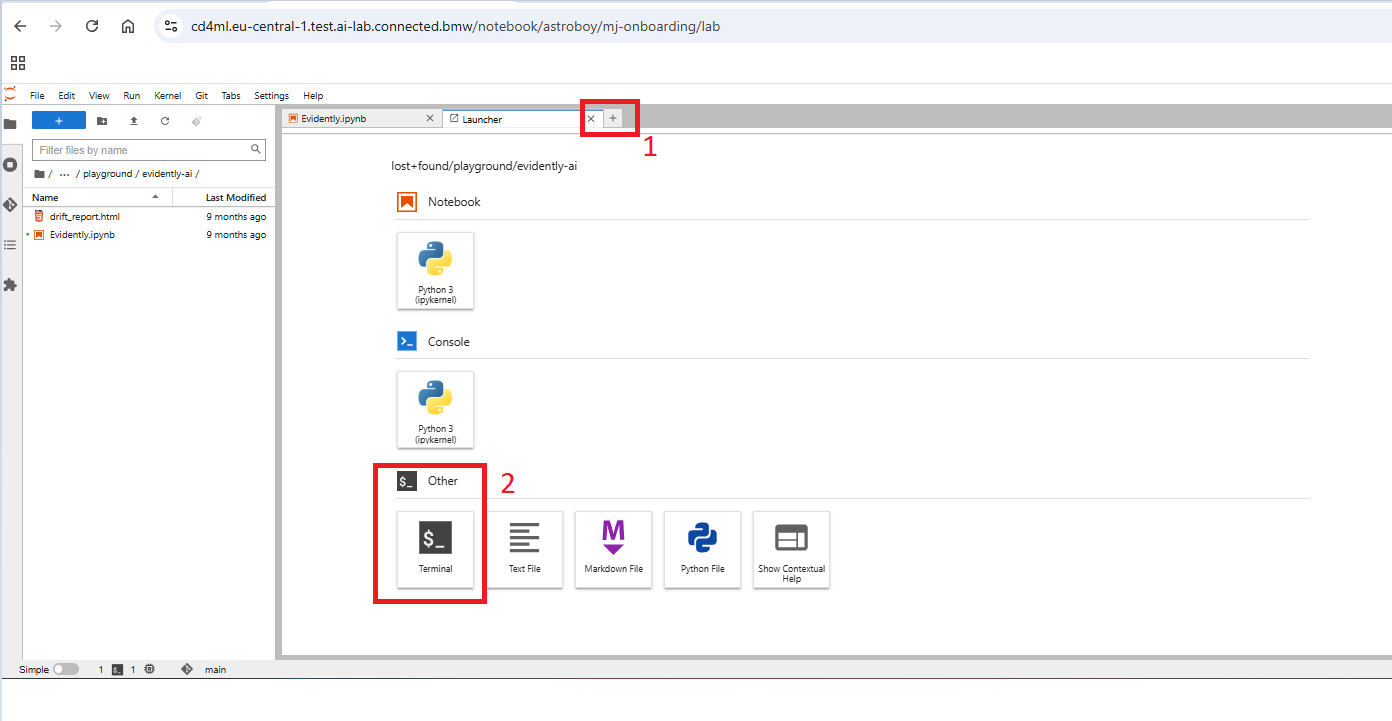
In JupyterLab
Click the terminal icon or use the menu to open a new terminal:
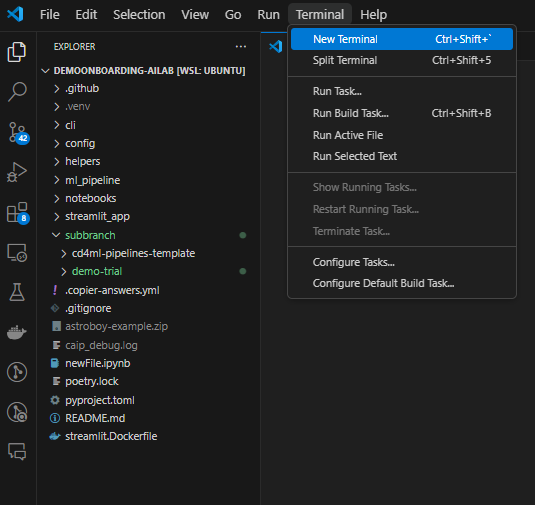
In VS Code Server
Click on the integrated terminal or open it via the menu:
Creating a Python Virtual Environment
A Python virtual environment isolates your project dependencies from system packages. Create one using:
python -m venv .venv
This creates a new virtual environment in a directory called .venv.
Activating Your Virtual Environment
Activate the virtual environment to begin using it:
source .venv/bin/activate
After activation, your terminal prompt will show (.venv) at the beginning, indicating the virtual environment is active.
Installing and Testing Packages
With your virtual environment activated, you can now install packages and run Python code. Try this quick test:
pip install numpy
python -c "import numpy; print(numpy.array([1, 2, 3]))"
This installs NumPy and verifies the installation by running a simple test.
Experimenting with Both Environments
Trying JupyterLab and VS Code
To gain familiarity with both development environments, follow these steps for both:
- Create a separate notebook instance with JupyterLab
- Create another notebook instance with VS Code
- Set up virtual environments in both
- Install test packages and run simple Python scripts in each
- Compare which interface you prefer for your workflow
Each environment has strengths:
- JupyterLab excels at exploratory data analysis and interactive development
- VS Code provides better code organization, debugging, and extension support for larger projects
Next Steps
Now that you have a working notebook environment, you're ready to:
- Clone the reference repository
- Develop your pipeline components
- Test your code interactively
- Debug issues using the notebook's execution cells or VS Code's debugger
Proceed to the next section of the guide to start building your Kubeflow pipeline.