Train and Test
The Connected AI Platform provides flexible options for training and testing machine learning models, supporting both rapid prototyping and production-ready workflows.
Overview
You can train and test your models on the Connected AI Platform using two primary approaches:
Training and Testing Options
Jupyter Notebooks
Jupyter Notebooks are ideal for rapid prototyping, experimentation, and iterative model development. They provide an interactive environment where you can quickly test ideas, visualize data, and iterate on your models.
Key Benefits:
- Interactive development environment
- Real-time code execution and visualization
- Perfect for data exploration and experimentation
- Quick iteration and testing cycles
- Immediate feedback and debugging
Best for:
- Initial data exploration
- Rapid prototyping
- Model experimentation
- Educational purposes
- Proof of concept development
📋 Learn More: See the Jupyter Notebooks documentation for detailed setup and usage instructions.
Kubeflow Pipelines
Kubeflow Pipelines provide a robust, scalable solution for production-like training workflows. They enable you to create reproducible, automated machine learning workflows that can be scheduled and monitored.
Key Benefits:
- Reproducible and version-controlled workflows
- Scalable distributed training
- Automated pipeline execution
- Resource optimization and scheduling
- Production-ready infrastructure
Best for:
- Production training workflows
- Automated retraining pipelines
- Large-scale distributed training
- Scheduled training jobs
- MLOps and continuous integration
📋 Learn More: See the Kubeflow Pipelines documentation for comprehensive pipeline development guides.
Choosing the Right Approach
| Factor | Jupyter Notebooks | Kubeflow Pipelines |
|---|---|---|
| Development Stage | Prototyping & Exploration | Production & Automation |
| Workflow Type | Interactive & Manual | Automated & Scheduled |
| Scalability | Single instance | Distributed & Scalable |
| Reproducibility | Manual versioning | Built-in versioning |
| Resource Management | Manual allocation | Optimized allocation |
| Collaboration | Individual focused | Team workflows |
Getting Started
Prerequisites
Before you begin training and testing models, ensure you have:
- Access to the Connected AI Platform
- Appropriate permissions for your workspace
- Understanding of your data requirements
- Clear objectives for your machine learning project
Development Workflow
- Start with Notebooks: Begin your project with Jupyter Notebooks for initial exploration and prototyping
- Develop and Experiment: Use the interactive environment to test different approaches and algorithms
- Transition to Pipelines: Once your approach is validated, migrate to Kubeflow Pipelines for production workflows
- Monitor and Iterate: Use the platform's monitoring capabilities to track performance and iterate
Reproducible Dataset Preparation
When you prepare training data in notebooks, AI Dataschema can help you keep dataset access reproducible and explicit. In particular, it supports:
- loading versioned datasets and streams
- reading data either fully or in batches
- filtering data with
filter_expr - defining train and test splits with YAML configuration
- creating SQL-like data views for training workflows
This is especially useful during prototyping, where you want to iterate quickly while still keeping track of the exact data definition used for a training run. For a hands-on walkthrough, see AI Dataschema - Basic Usage.
Next Steps
- For Interactive Development: Follow the Jupyter Notebooks guide to set up your development environment
- For Production Workflows: Explore the Kubeflow Pipelines guide to build automated training workflows
- For GPU Computing: Learn about GPU compute resources for accelerated training
Integration with Platform Features
Data Engineering
Combine your training workflows with the platform's data engineering capabilities:
- Use Data Engineering tools for data preprocessing and feature engineering
- Leverage distributed computing for large-scale data preparation
Model Serving
Seamlessly deploy your trained models:
- Deploy models for inference using Model Serving capabilities
- Set up automated deployment pipelines from training to serving
Observability
Monitor your training processes:
- Use Observability tools to track training metrics
- Set up alerts and monitoring for long-running training jobs
Best Practices
For Jupyter Notebooks
- Save your work frequently and use version control
- Document your experiments and findings
- Use consistent naming conventions for notebooks
- Clean up resources after experimentation
For Kubeflow Pipelines
- Design modular and reusable pipeline components
- Implement proper error handling and logging
- Use appropriate resource allocation for each step
- Version your pipelines and maintain documentation
General Guidelines
- Start small and scale gradually
- Validate your data quality before training
- Use appropriate evaluation metrics
- Implement proper model validation techniques
- Maintain reproducible environments
Experiment Tracking and Model Registry
The Connected AI Platform provides integrated experiment tracking and model registry capabilities through MLflow, enabling you to track experiments, manage model versions, and maintain a complete audit trail of your machine learning workflows.
MLflow Overview
MLflow provides comprehensive capabilities for:
- Experiment Tracking: Log parameters, metrics, and artifacts from your training runs
- Model Registry: Centrally manage model versions and lifecycle stages
- Model Deployment: Seamlessly transition models from development to production
- Reproducibility: Ensure experiments can be reproduced with tracked parameters and environments
Enable MLflow
Using Pull Request Self-Service
Users can enable MLflow for their use cases using Pull-Request based Self-service for all non-prod and prod environments. The specific configuration can be found in the Enable MLflow Experiments & Model Registry documentation. For background on how the fork-and-pull-request workflow works, see Contributing via Pull Requests.
Access MLflow from Kubeflow UI
After your self-service pull request is approved and rolled out, you will find a jump-off link (MLflow) on the bottom left of your Kubeflow UI. By selecting different namespaces, it will direct you to the corresponding MLflow UI.
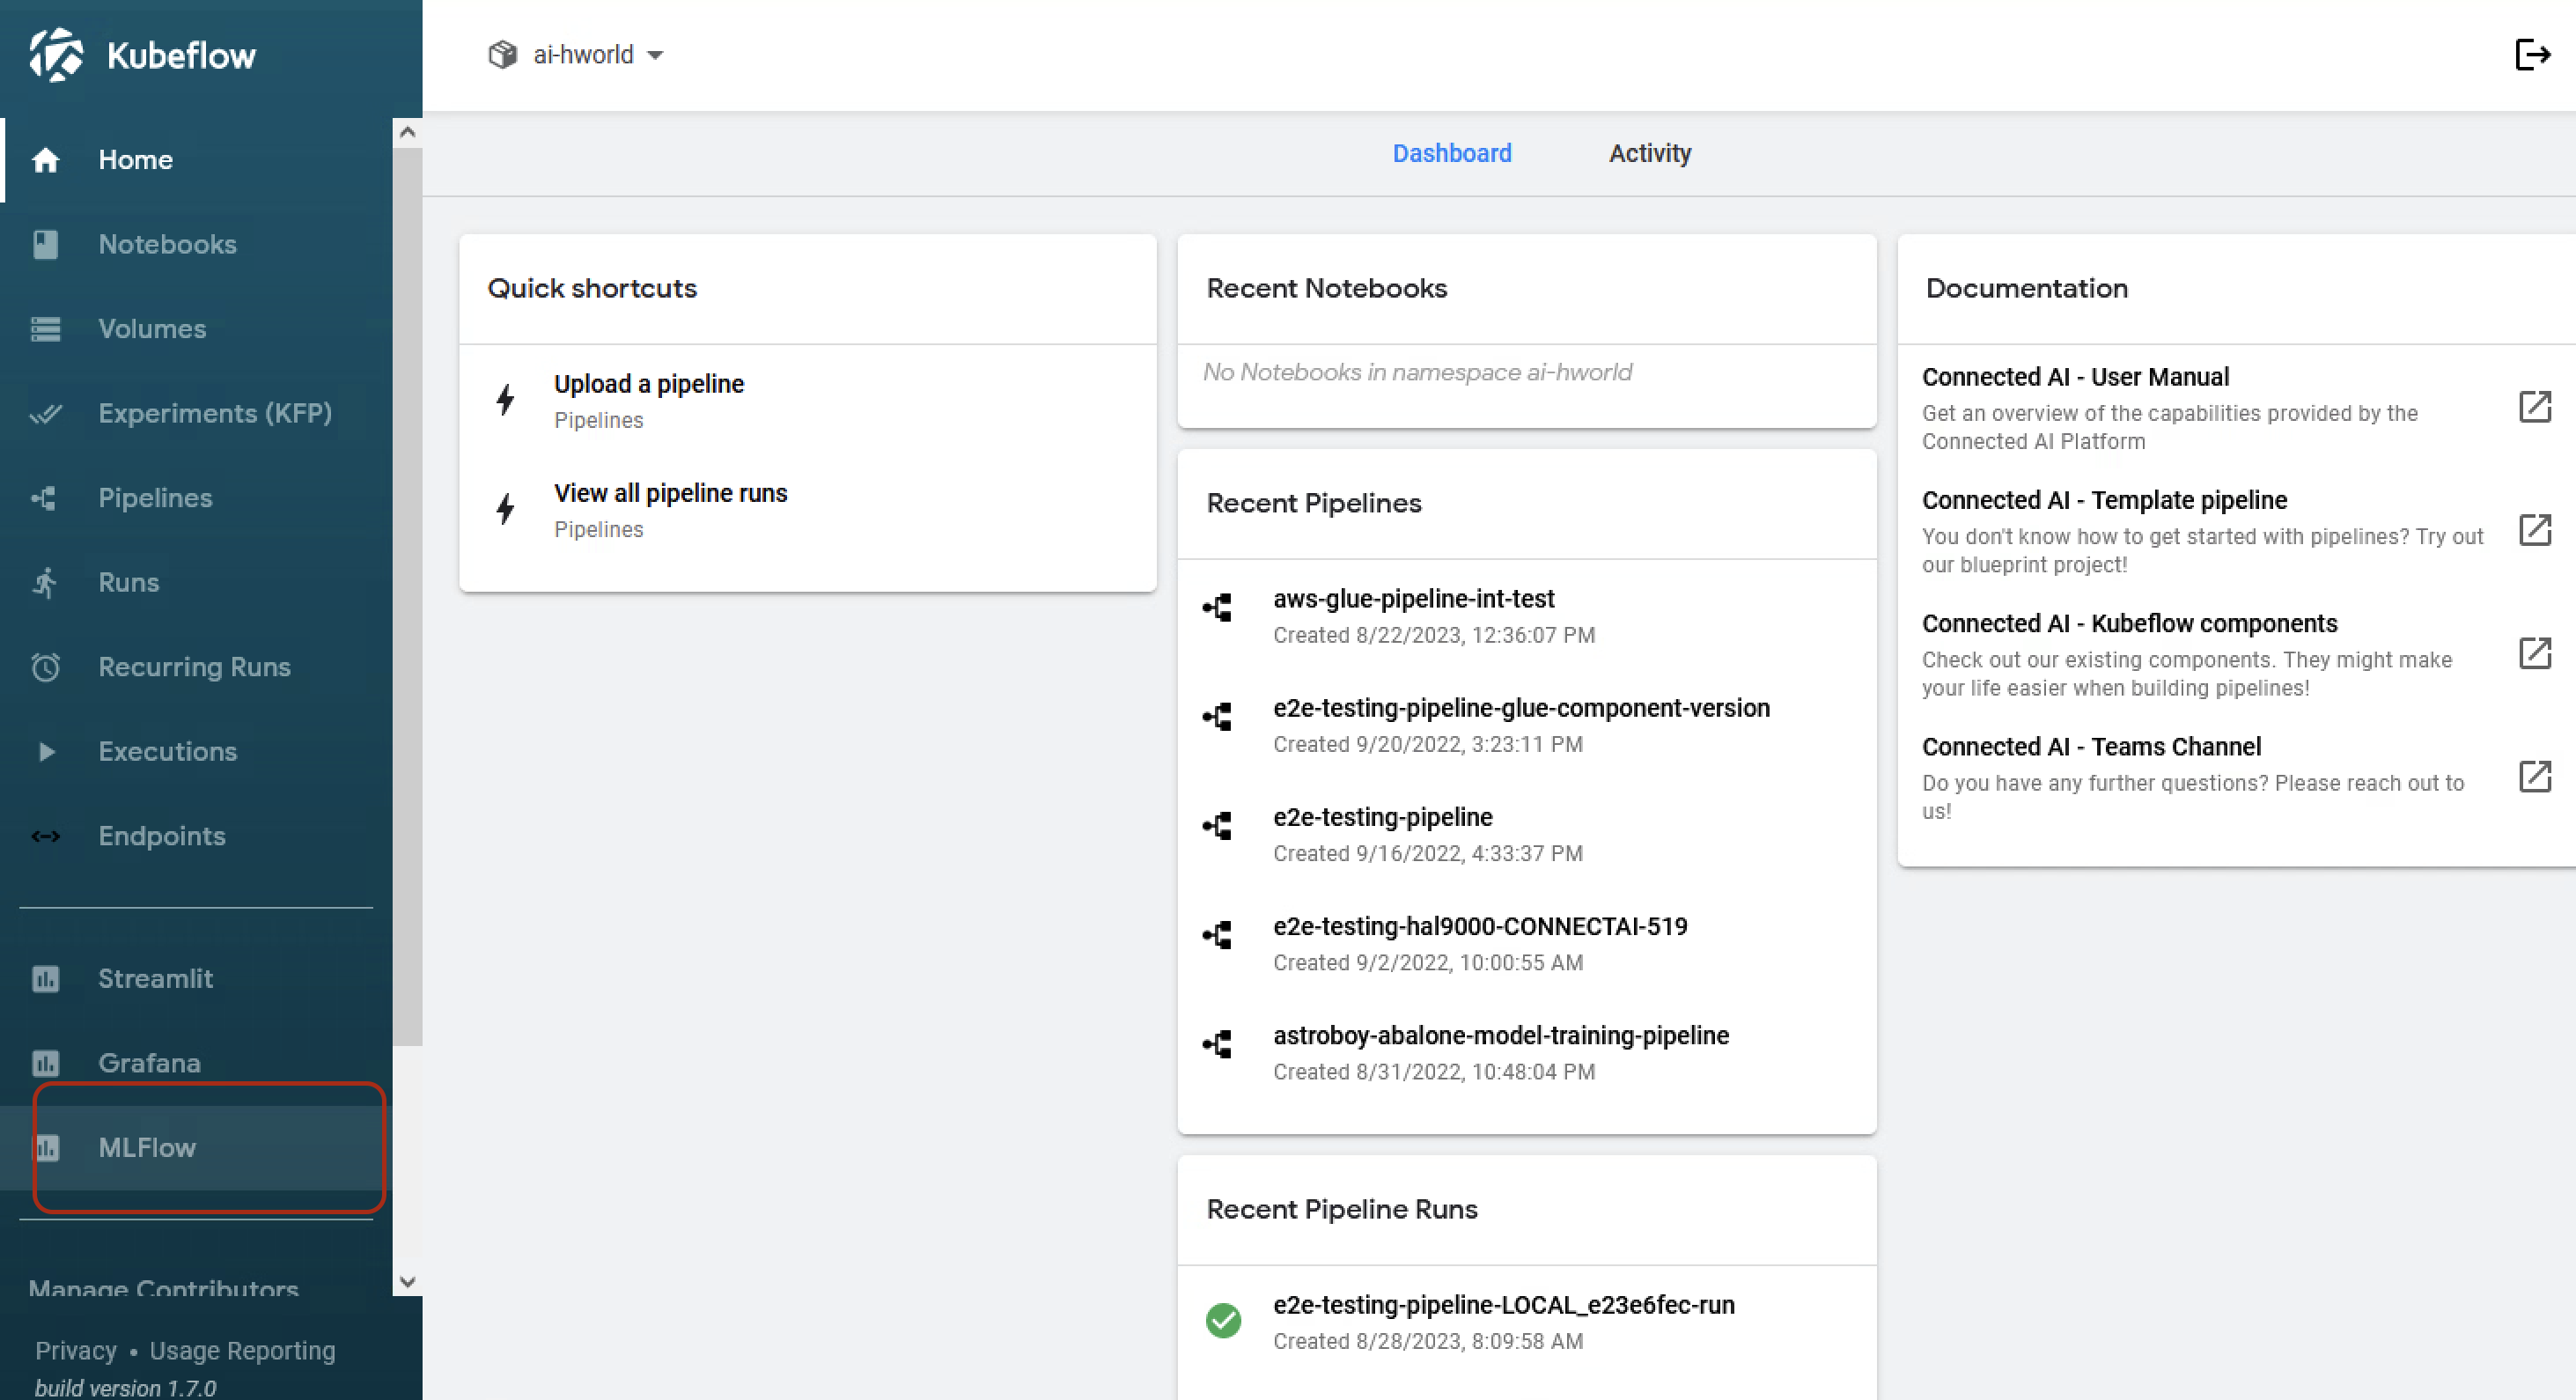
The MLflow URL follows the pattern:
RoW:
https://mlflow.<aws-region>.<environment>.<product-name>.connected.bmw/<namespace>/#/
China:
https://mlflow.<aws-region>.<environment>.<product-name>.cv.bmw.com.cn/<namespace>/#/
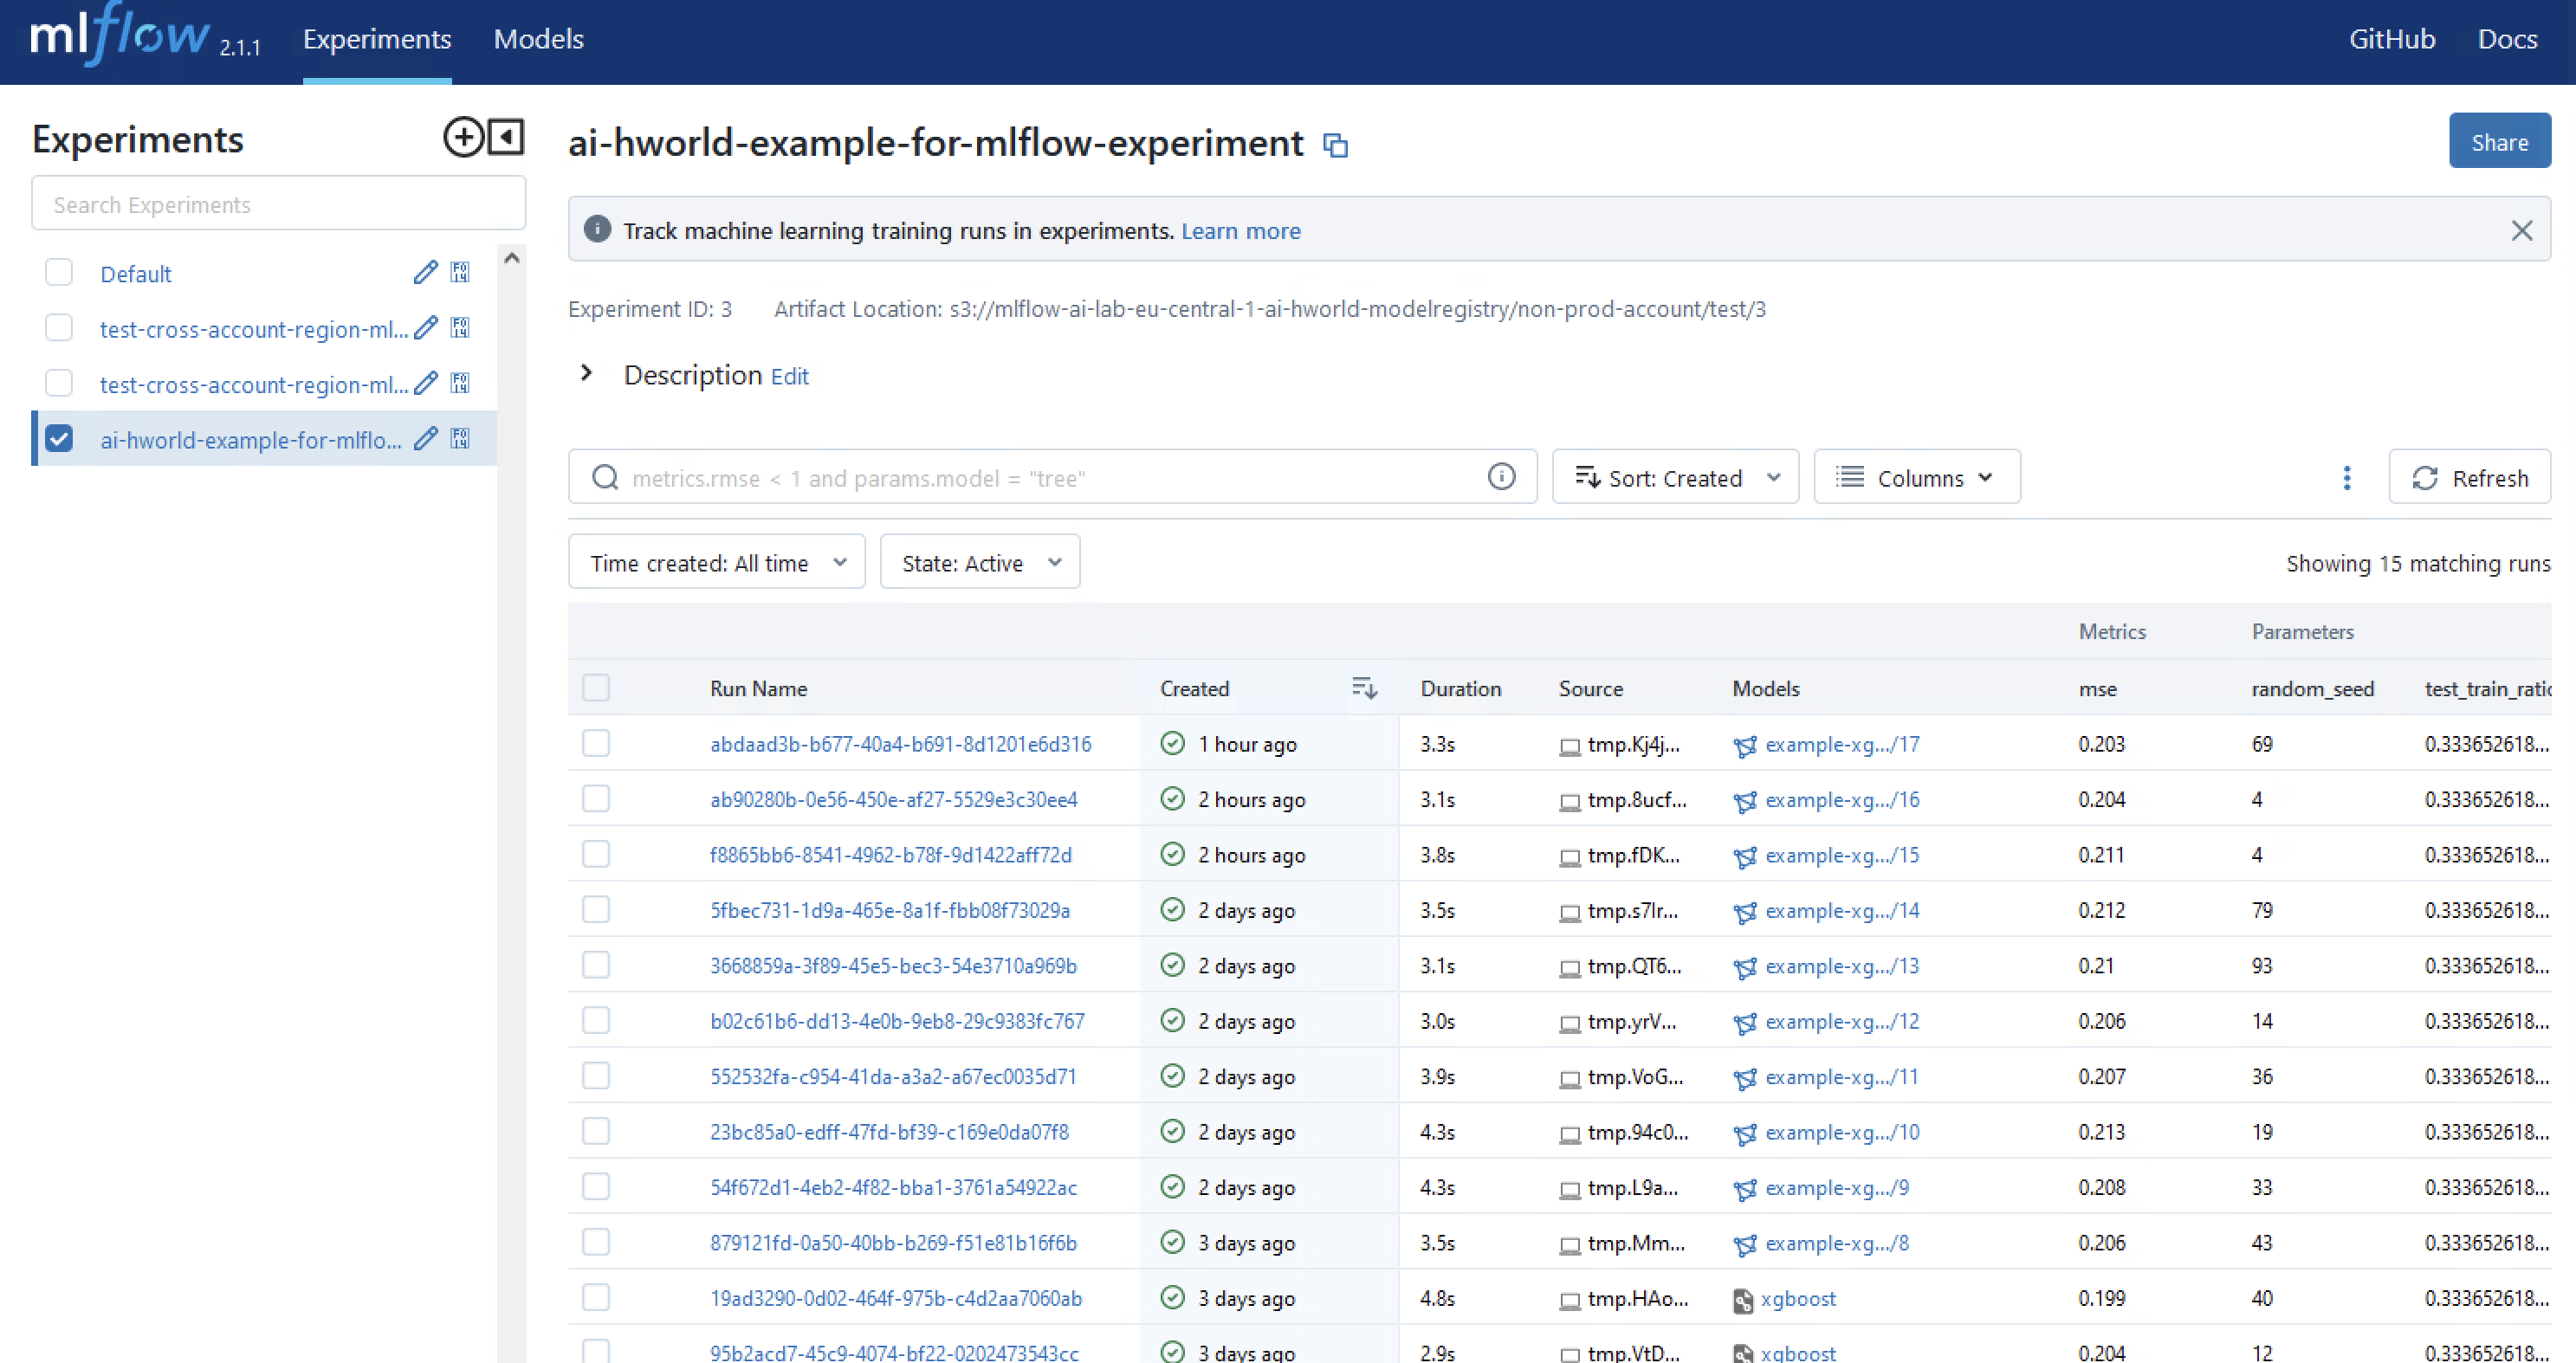
Track Parameters, Metrics and Models
After users train machine learning models, they can use the MLflow Python API in Kubeflow pipeline steps to:
- Register models and save model versions
- Log corresponding parameters and metrics
- Change the stage of models (None → Staging → Production)
- Track model artifacts and metadata
Kubeflow Pipeline Example
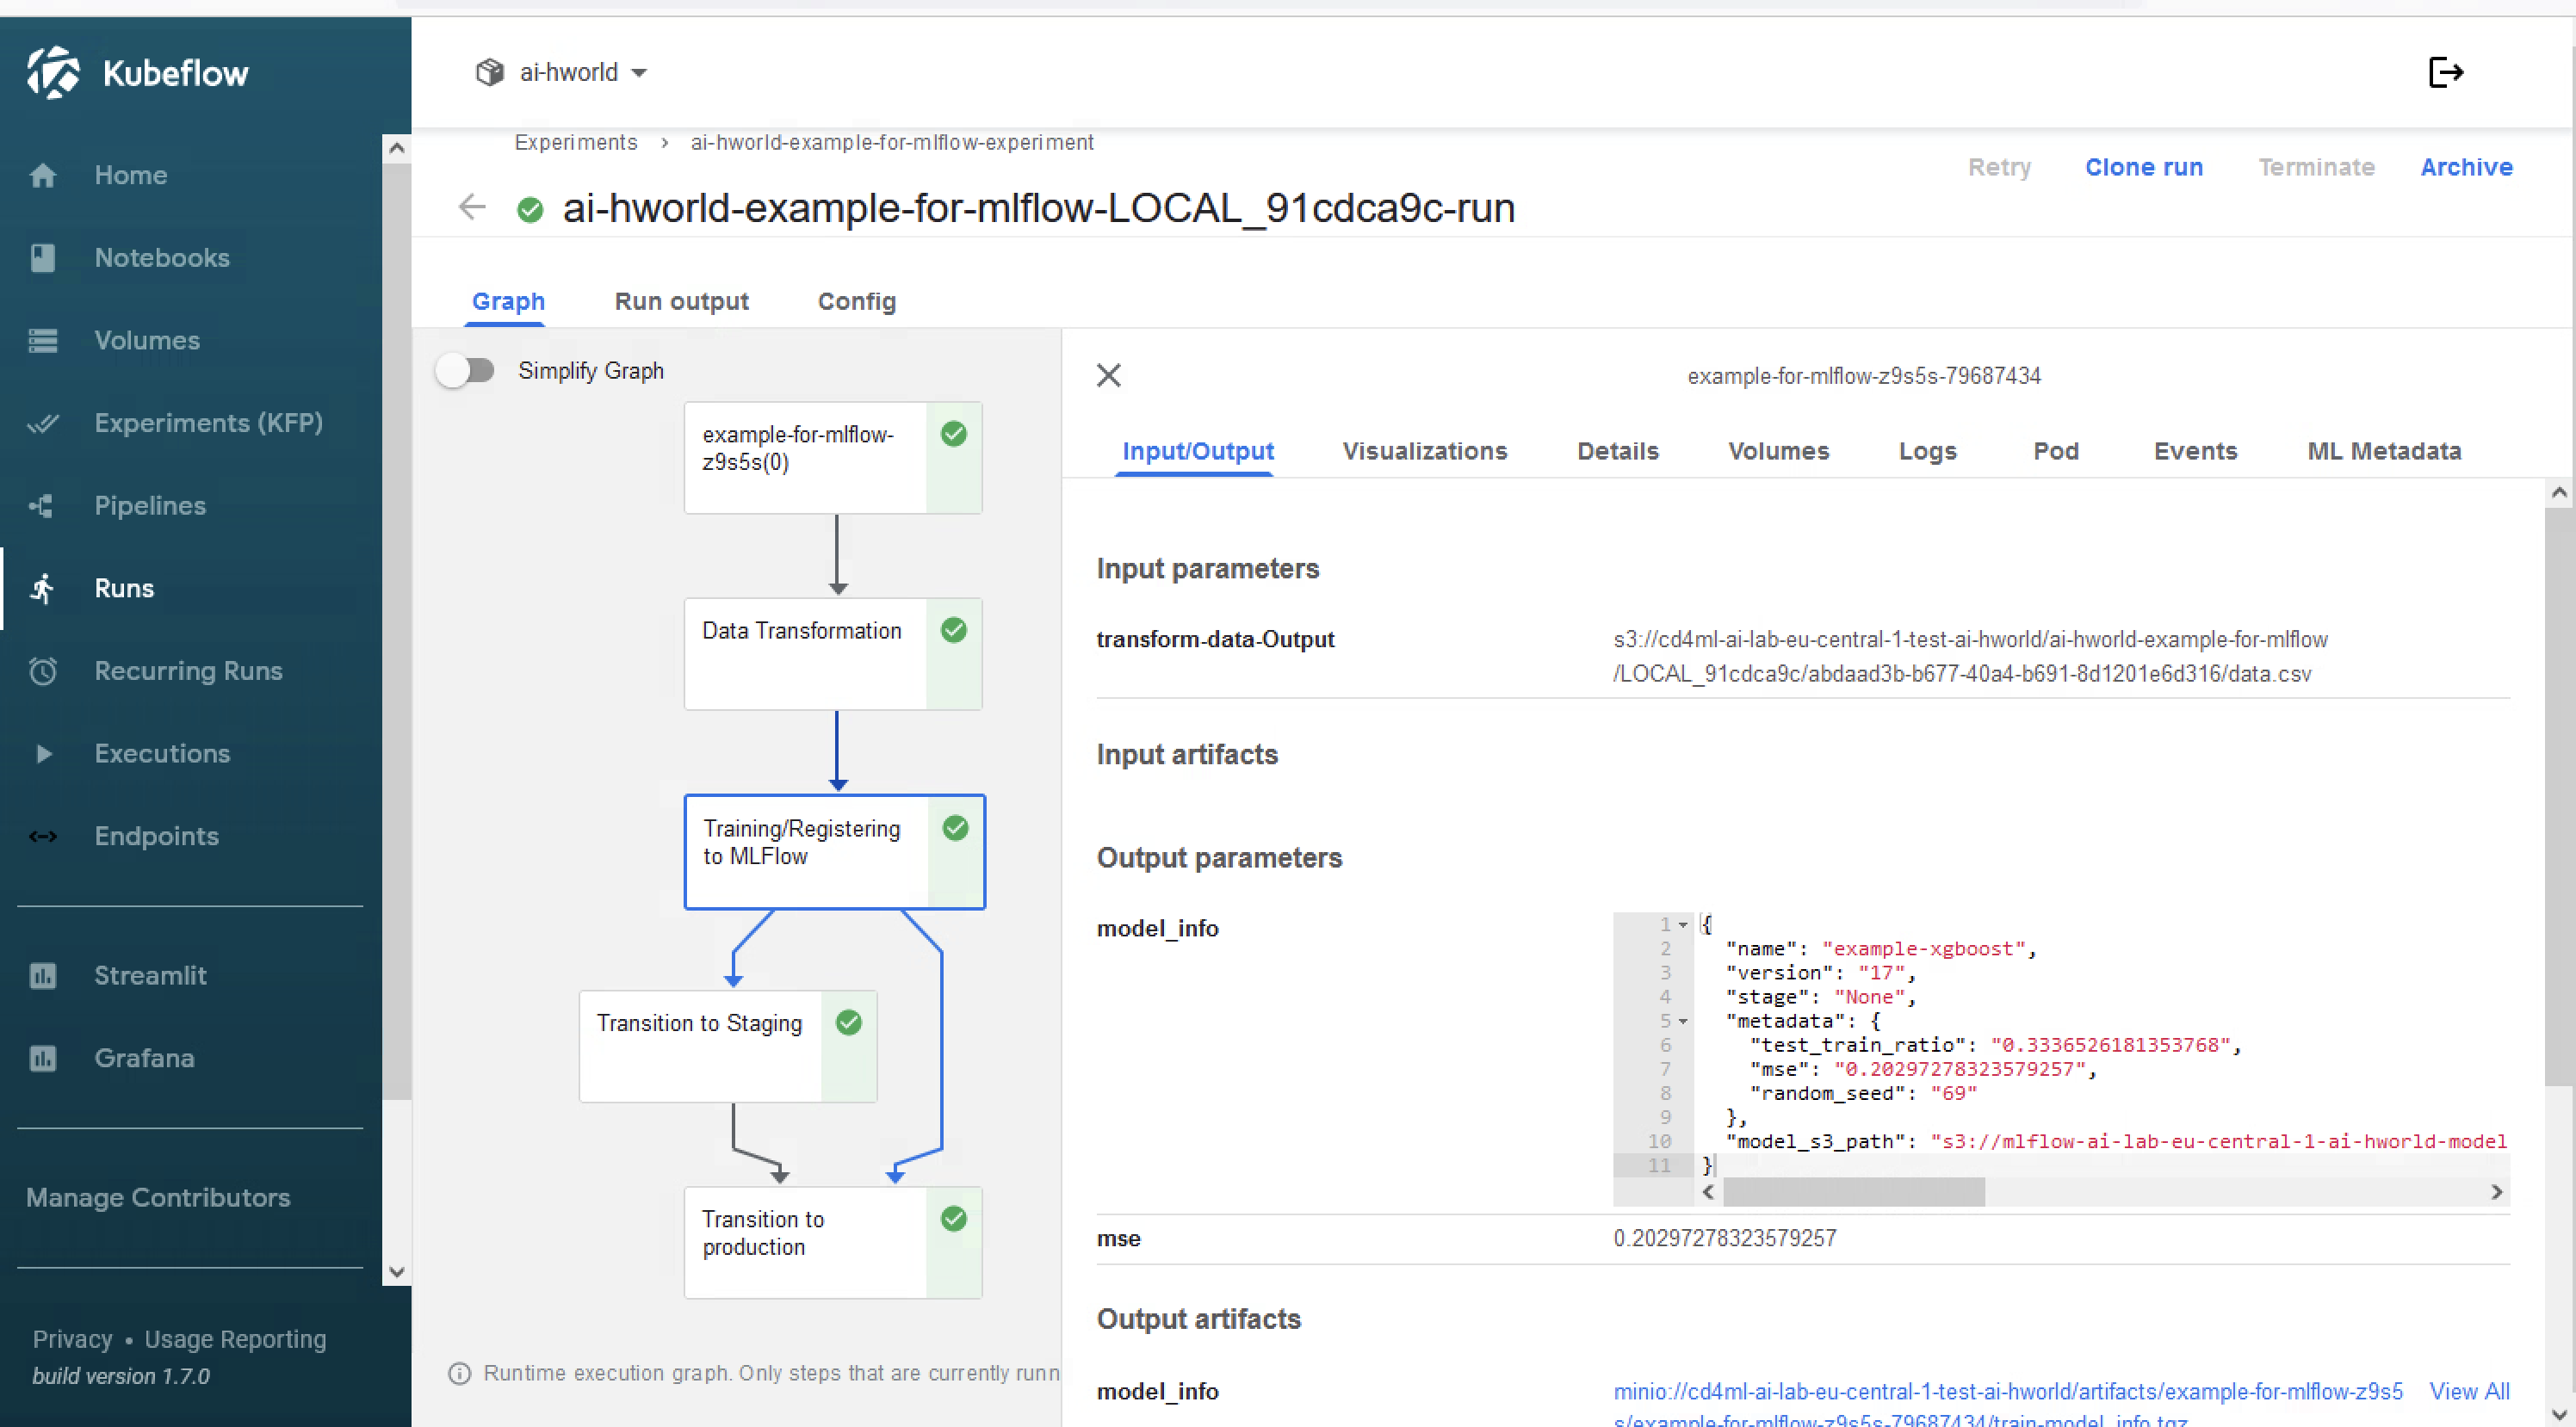
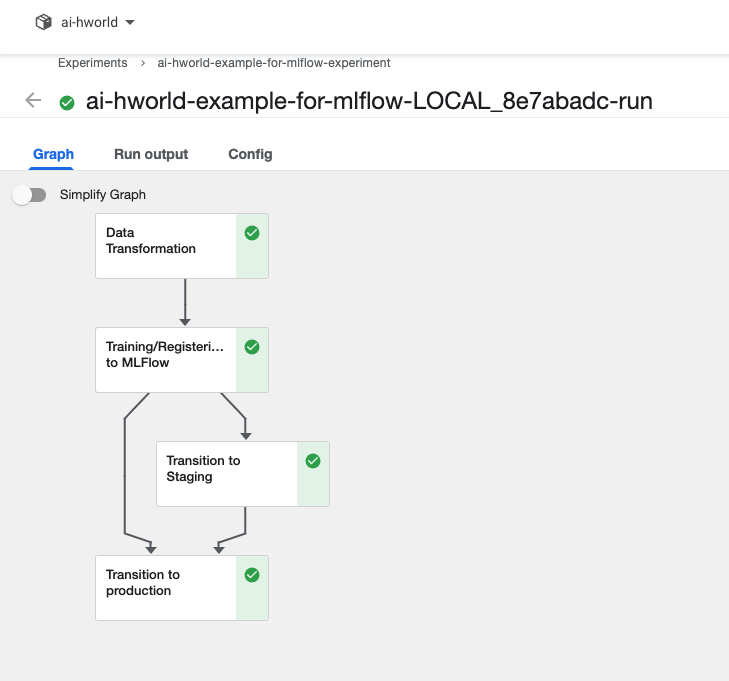
The platform provides a comprehensive Kubeflow pipeline example demonstrating MLflow integration. A successful run shows the complete workflow from training to model registration.
Training and Registration Step
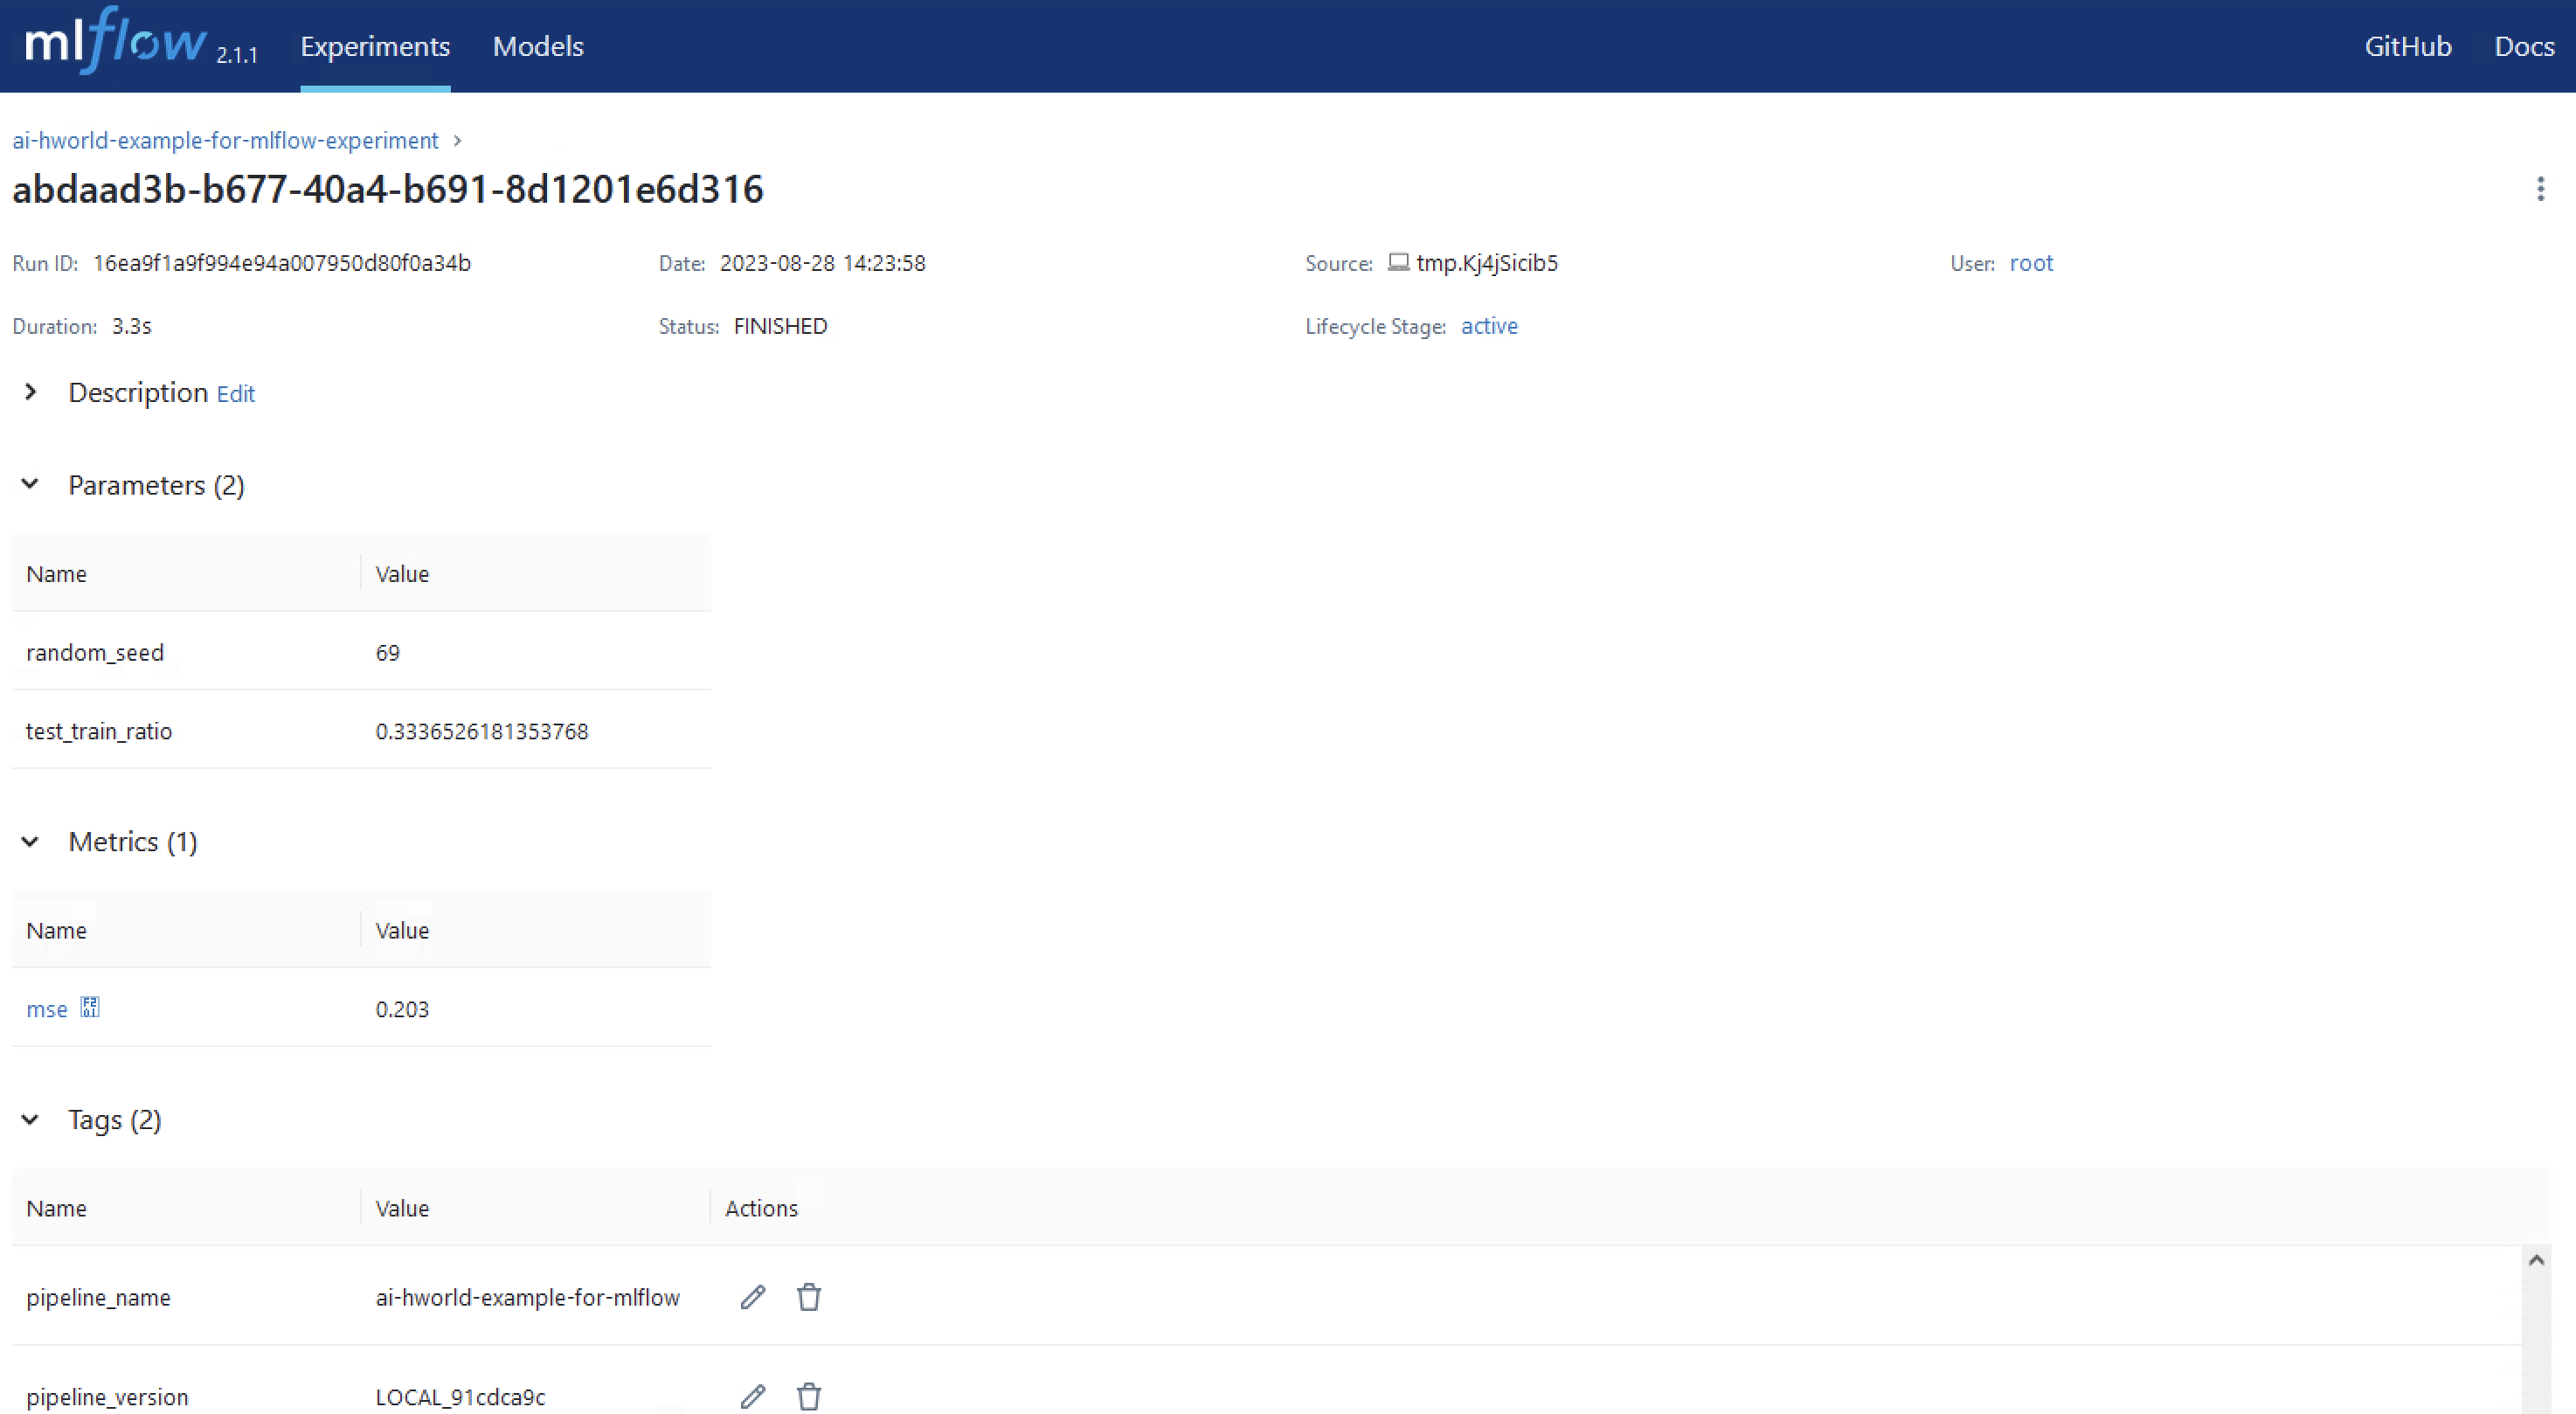
Inside the training/registering to MLflow step, the pipeline:
- Sets up an MLflow experiment (equivalent to a Kubeflow experiment)
- Registers a model with its version number
- Logs parameters (e.g.,
random_seed,test_train_ratio) - Records metrics (e.g.,
mse) - Adds tags (
pipeline_name,pipeline_version)
Model Artifacts Storage
All model artifacts are automatically saved to S3 with organized directory structure:
Non-prod environments:
- Test:
s3://mlflow-<product>-<region>-<profile>-modelregistry/non-prod-account/test/<experiment_id>/<run-id>/artifacts/model - Int:
s3://mlflow-<product>-<region>-<profile>-modelregistry/non-prod-account/int/<experiment_id>/<run-id>/artifacts/model
Production environment:
- Prod:
s3://mlflow-prod-<product>-<region>-<profile>-modelregistry/prod-account/<experiment_id>/<run-id>/artifacts/model
Model Stage Transition
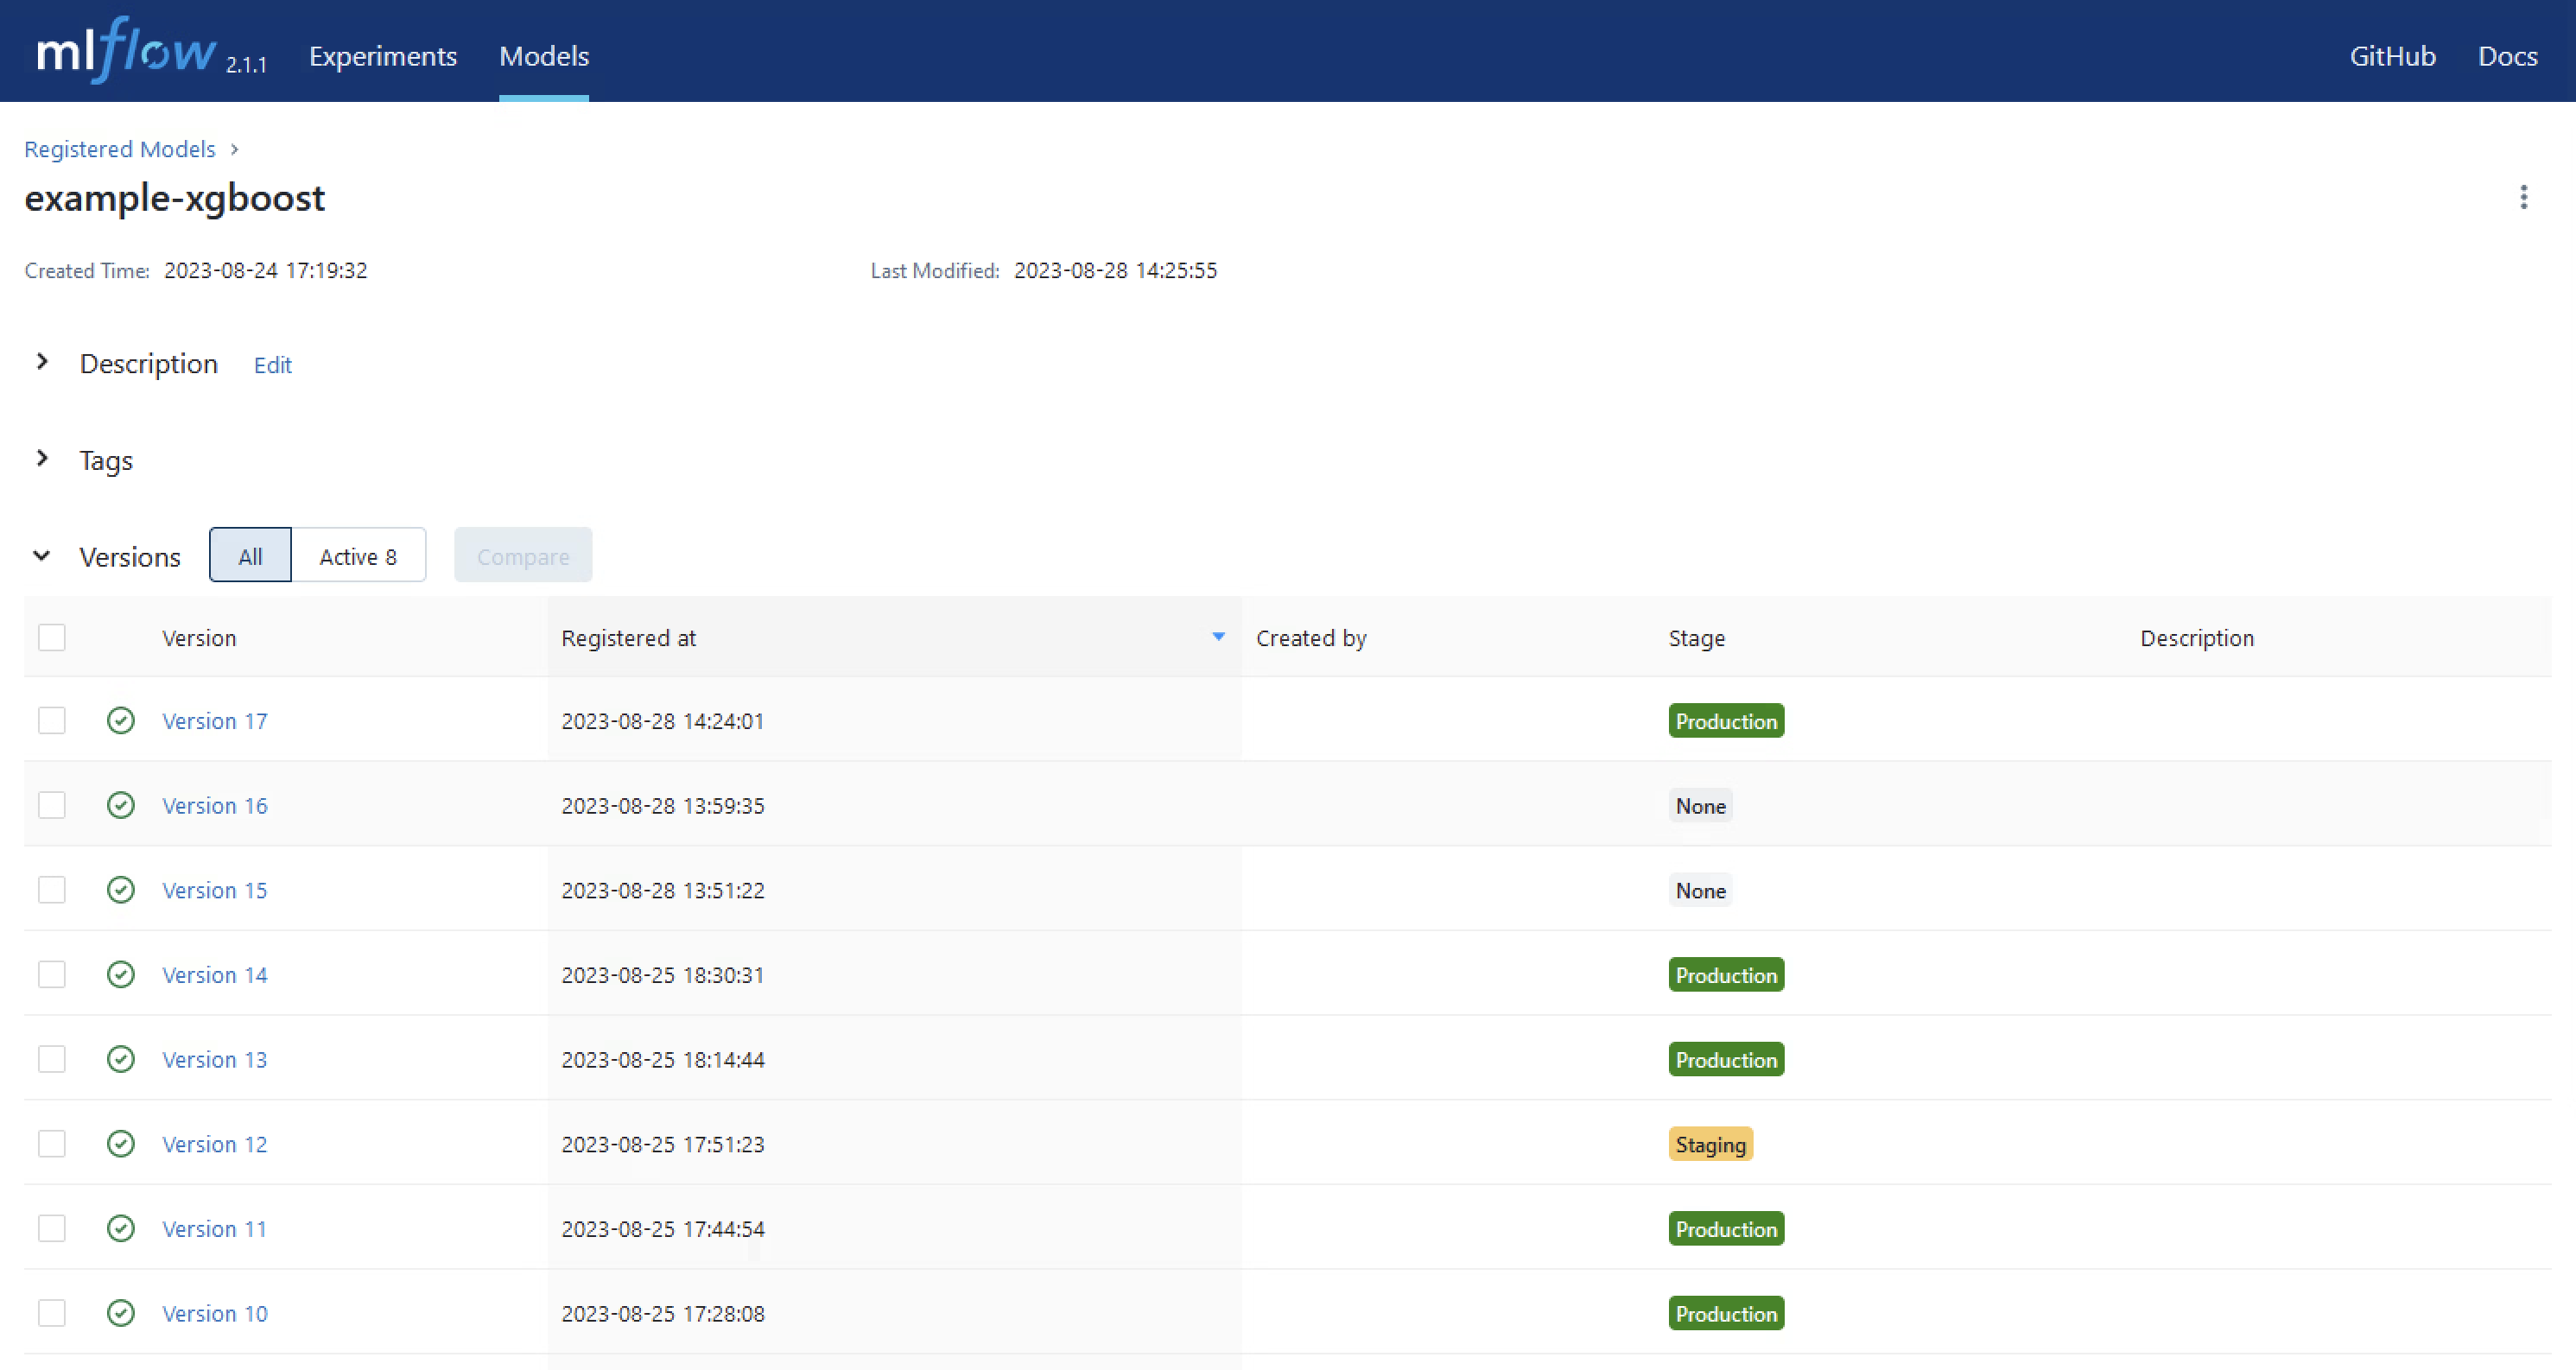
In the transition step, users can change model stages from None to Staging or Production, helping downstream tasks choose the appropriate models.
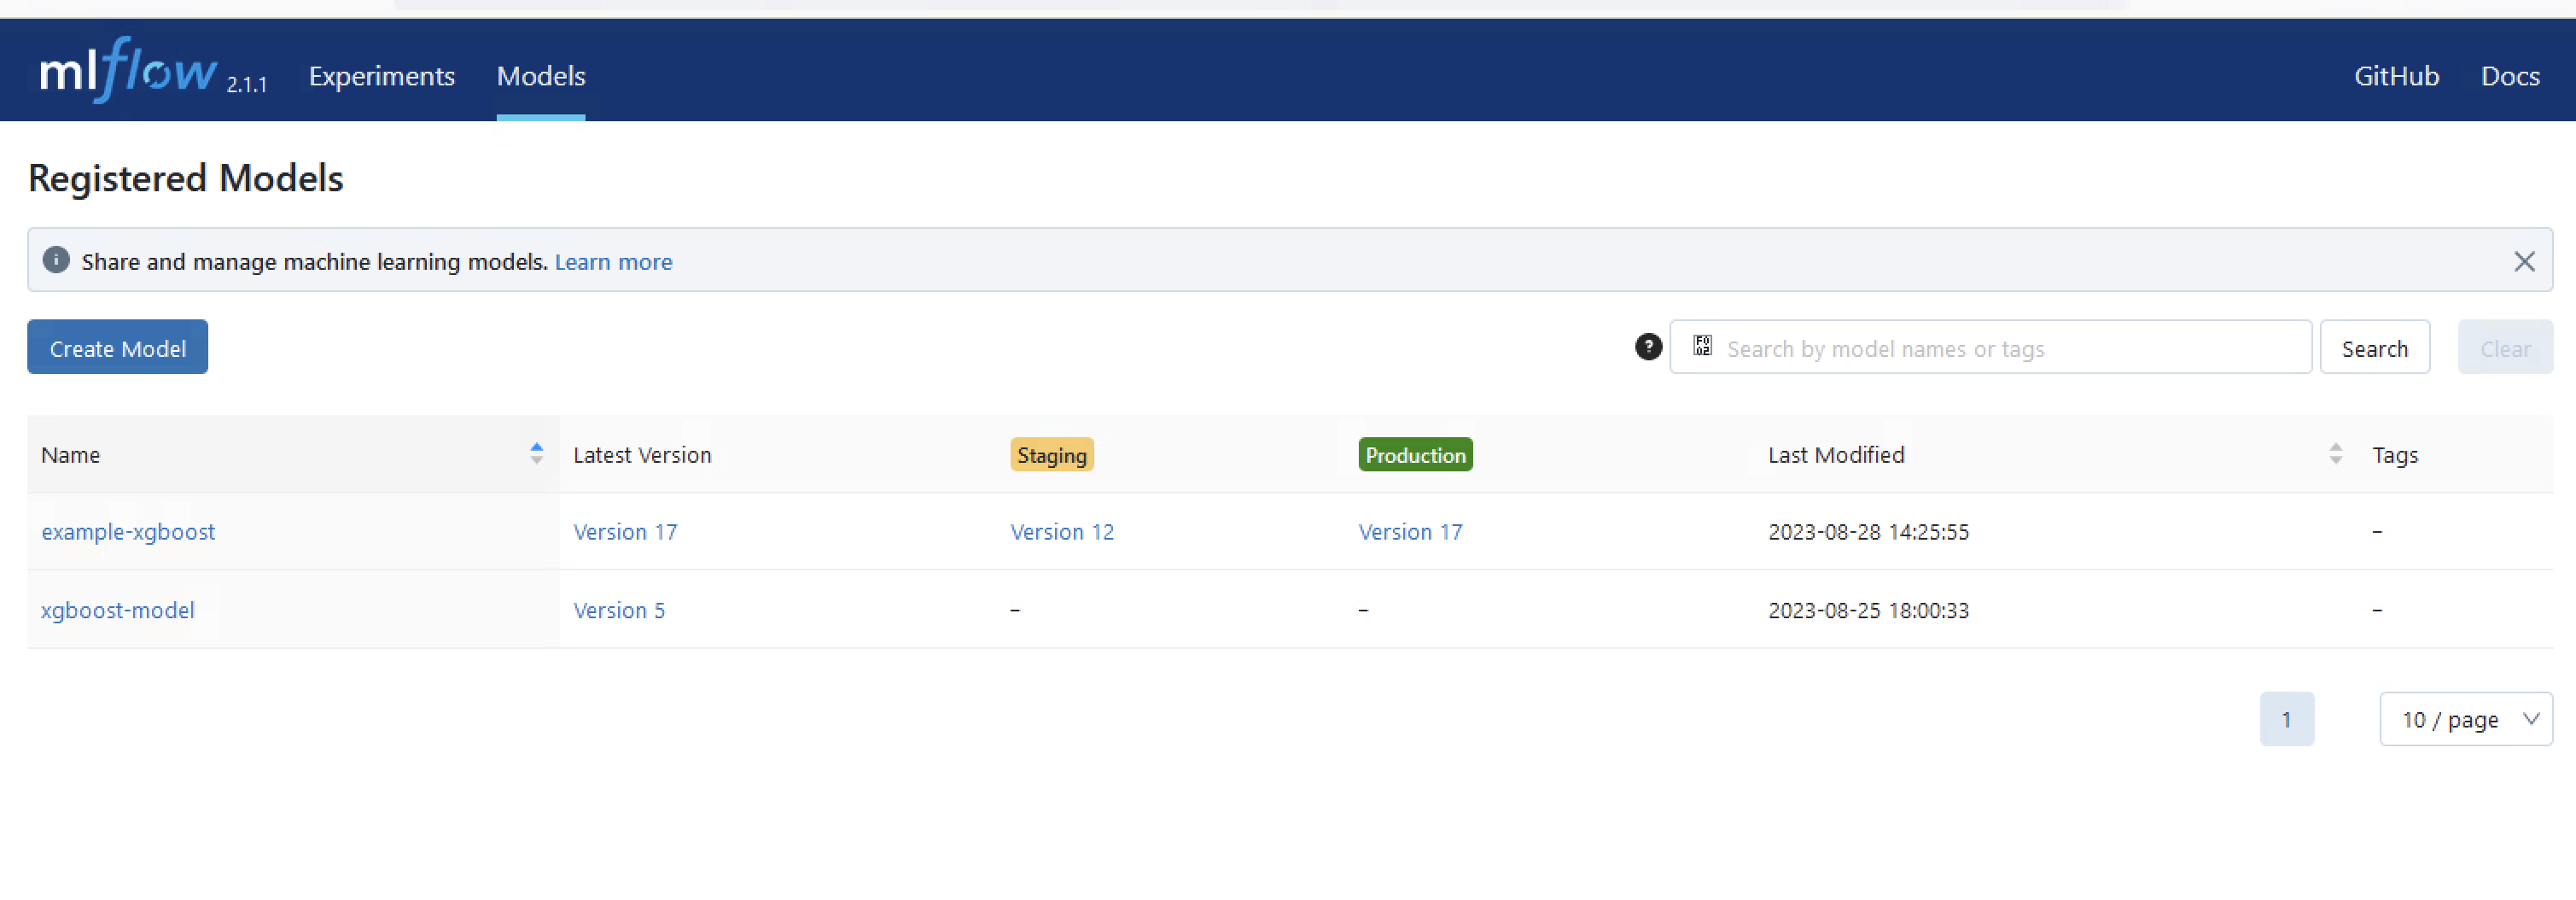
You can view:
- Latest model versions for each stage
- Detailed information about all stage transitions per model version
- Complete model lifecycle history
Setting Up MLflow in Kubeflow Workloads
For Jupyter Notebooks
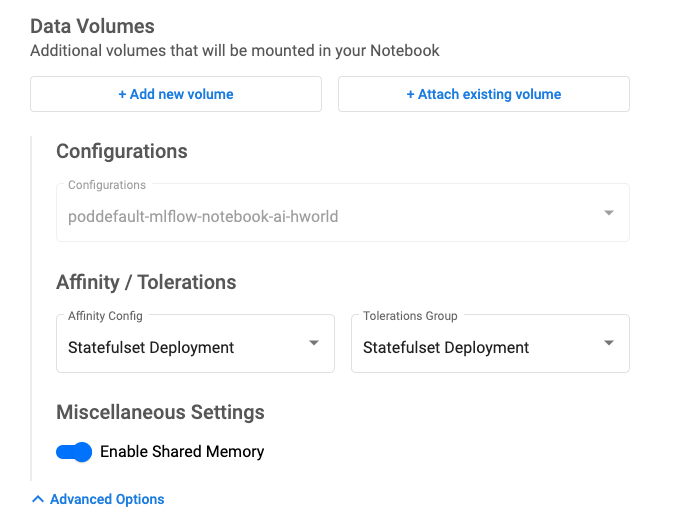
To enable MLflow parameters in Kubeflow Notebooks:
- Use "Configurations" on the Notebook creation page UI
- Choose configuration named
poddefault-mlflow-notebook-<NAMESPACE> - This configuration provides:
- Environment variables for MLflow Python API
- Istio sidecar annotation for service mesh integration
- Proper networking configuration for MLflow Tracking Server access
For Kubeflow Pipelines
To run pipelines with MLflow parameters:
- Set label
poddefault-mlflow-pipelines: "true"on component pods - Use KFP SDK methods:
add_pod_label("poddefault-mlflow-pipelines", "true") - Or use helper function from cd4ml-pipelines:
from helpers.helpers import hyphenated_lowercase, set_max_cache_staleness, set_as_mlflow_step

# Create your training step
training_step = training(
    pipeline_name=pipeline_name,
    pipeline_version=get_local_pipeline_version(),
    run_id=RUN_ID_PLACEHOLDER,
    data_s3_path=data_transformation_step.output,
)

# Mark as MLflow step
set_as_mlflow_step(training_step)
training_step.set_display_name("Training/Registering to MLflow")
set_max_cache_staleness(training_step)
MLflow Best Practices
Experiment Organization
- Use descriptive experiment names that reflect your project structure
- Group related runs within the same experiment
- Use consistent naming conventions for parameters and metrics
- Tag experiments with relevant metadata (team, project, version)
Model Management
- Follow semantic versioning for model releases
- Use stage transitions (None → Staging → Production) appropriately
- Document model changes and performance improvements
- Maintain model descriptions and metadata
Integration with Pipelines
- Log all relevant hyperparameters and configuration settings
- Track both training and validation metrics
- Save model artifacts with consistent naming
- Use MLflow's automatic logging when available
Useful MLflow Resources
For comprehensive information on MLflow usage:
- Managing Experiments and Runs with the Tracking Service API
- Adding an MLflow Model to the Model Registry
- Transitioning an MLflow Model's Stage
- MLflow Python API Documentation
Common MLflow Workflows
Basic Experiment Tracking
import mlflow
import mlflow.sklearn
from sklearn.ensemble import RandomForestClassifier
from sklearn.metrics import accuracy_score

# Start MLflow run
with mlflow.start_run():
    # Log parameters
    mlflow.log_param("n_estimators", 100)
    mlflow.log_param("max_depth", 10)

    # Train model
    model = RandomForestClassifier(n_estimators=100, max_depth=10)
    model.fit(X_train, y_train)

    # Log metrics
    predictions = model.predict(X_test)
    accuracy = accuracy_score(y_test, predictions)
    mlflow.log_metric("accuracy", accuracy)

    # Log model
    mlflow.sklearn.log_model(model, "model")
Model Registration and Stage Transition
import mlflow
from mlflow.tracking import MlflowClient

client = MlflowClient()

# Register model
model_name = "my-ml-model"
model_version = mlflow.register_model(
    model_uri=f"runs:/{run_id}/model",
    name=model_name
)

# Transition to staging
client.transition_model_version_stage(
    name=model_name,
    version=model_version.version,
    stage="Staging"
)