Identity & Access
The Identity & Access section manages user and programmatic access to your CAIP Space. It consists of three components:
- Members — Add or manage human users
- M2M Clients — Register machine-to-machine clients
- API Keys — Create and manage API credentials for development and quick starts
- Use Members (WebEAM User) for interactive, user-based access in the portal.
- Use M2M Clients (WebEAM M2M) for productive API-to-API automation.
- Use API Keys for development and quick starts.
Members
The Owner of a particular Space can add members by clicking the Add Member button, which opens a side panel. Fill in the following information to add the member:
- A valid QX ID
- A BMW Group Email ID or Partner Email ID
- Department
Once the required details are provided, the member can be added to the Space.
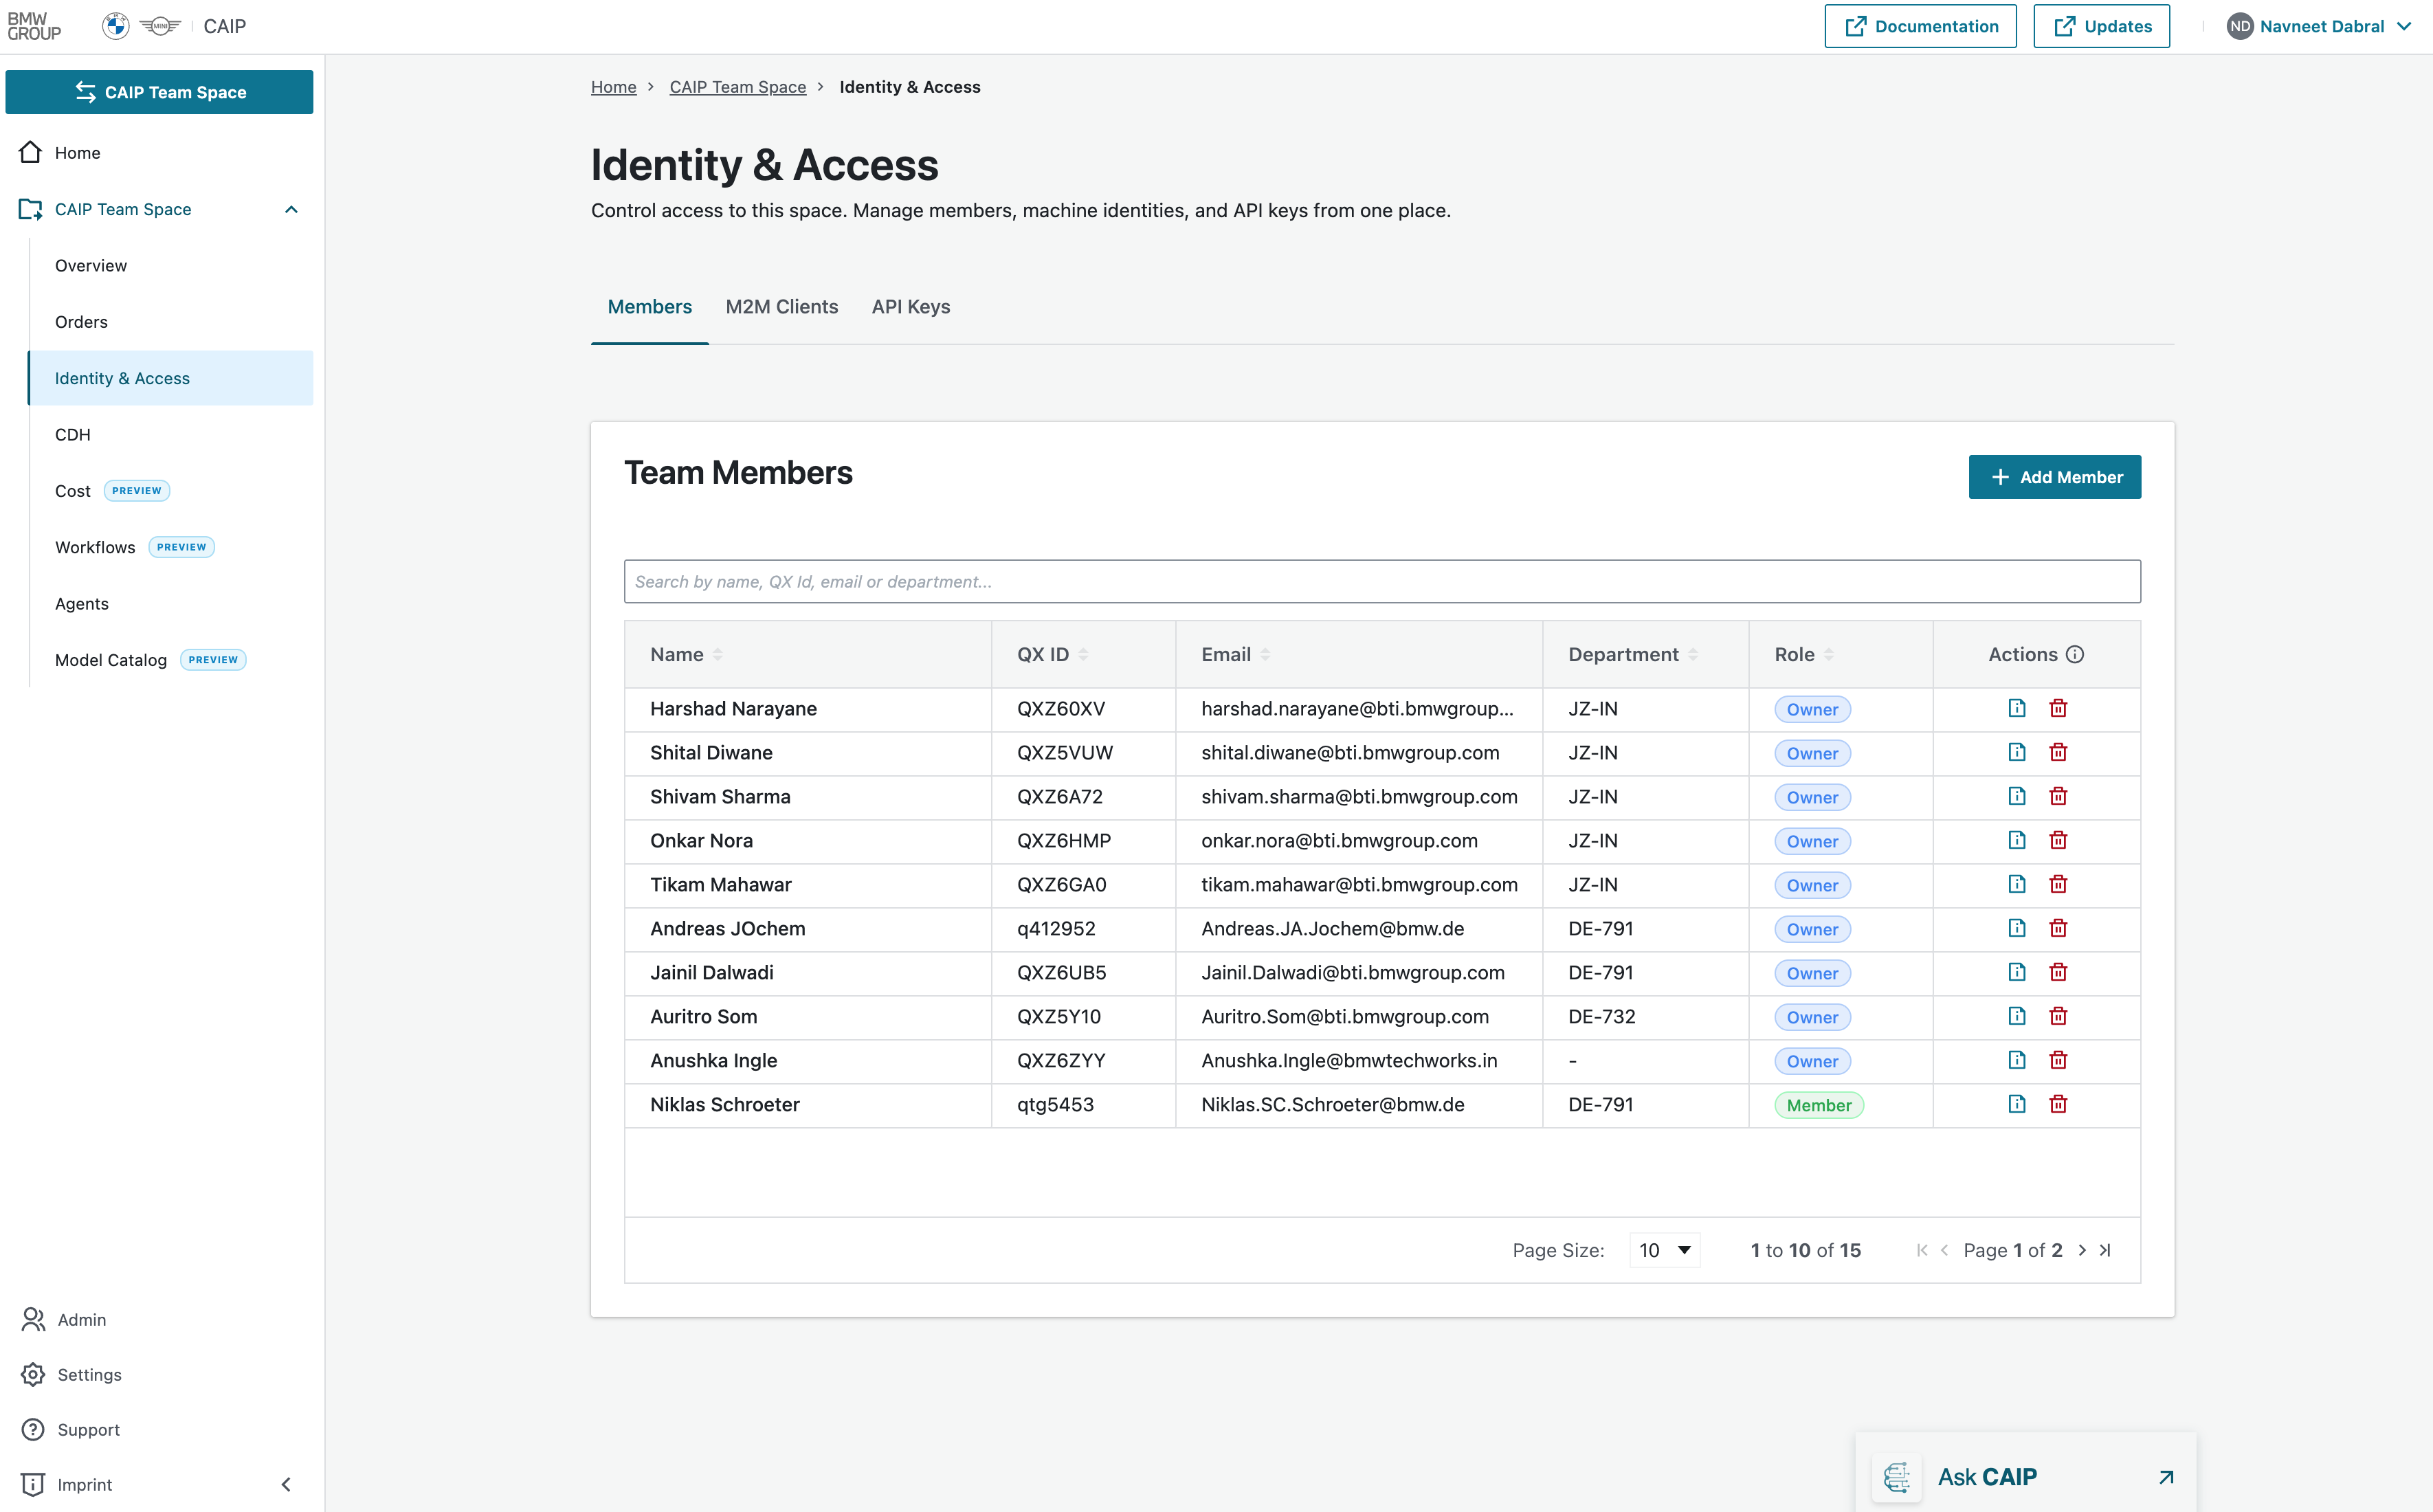 Members Overview Page
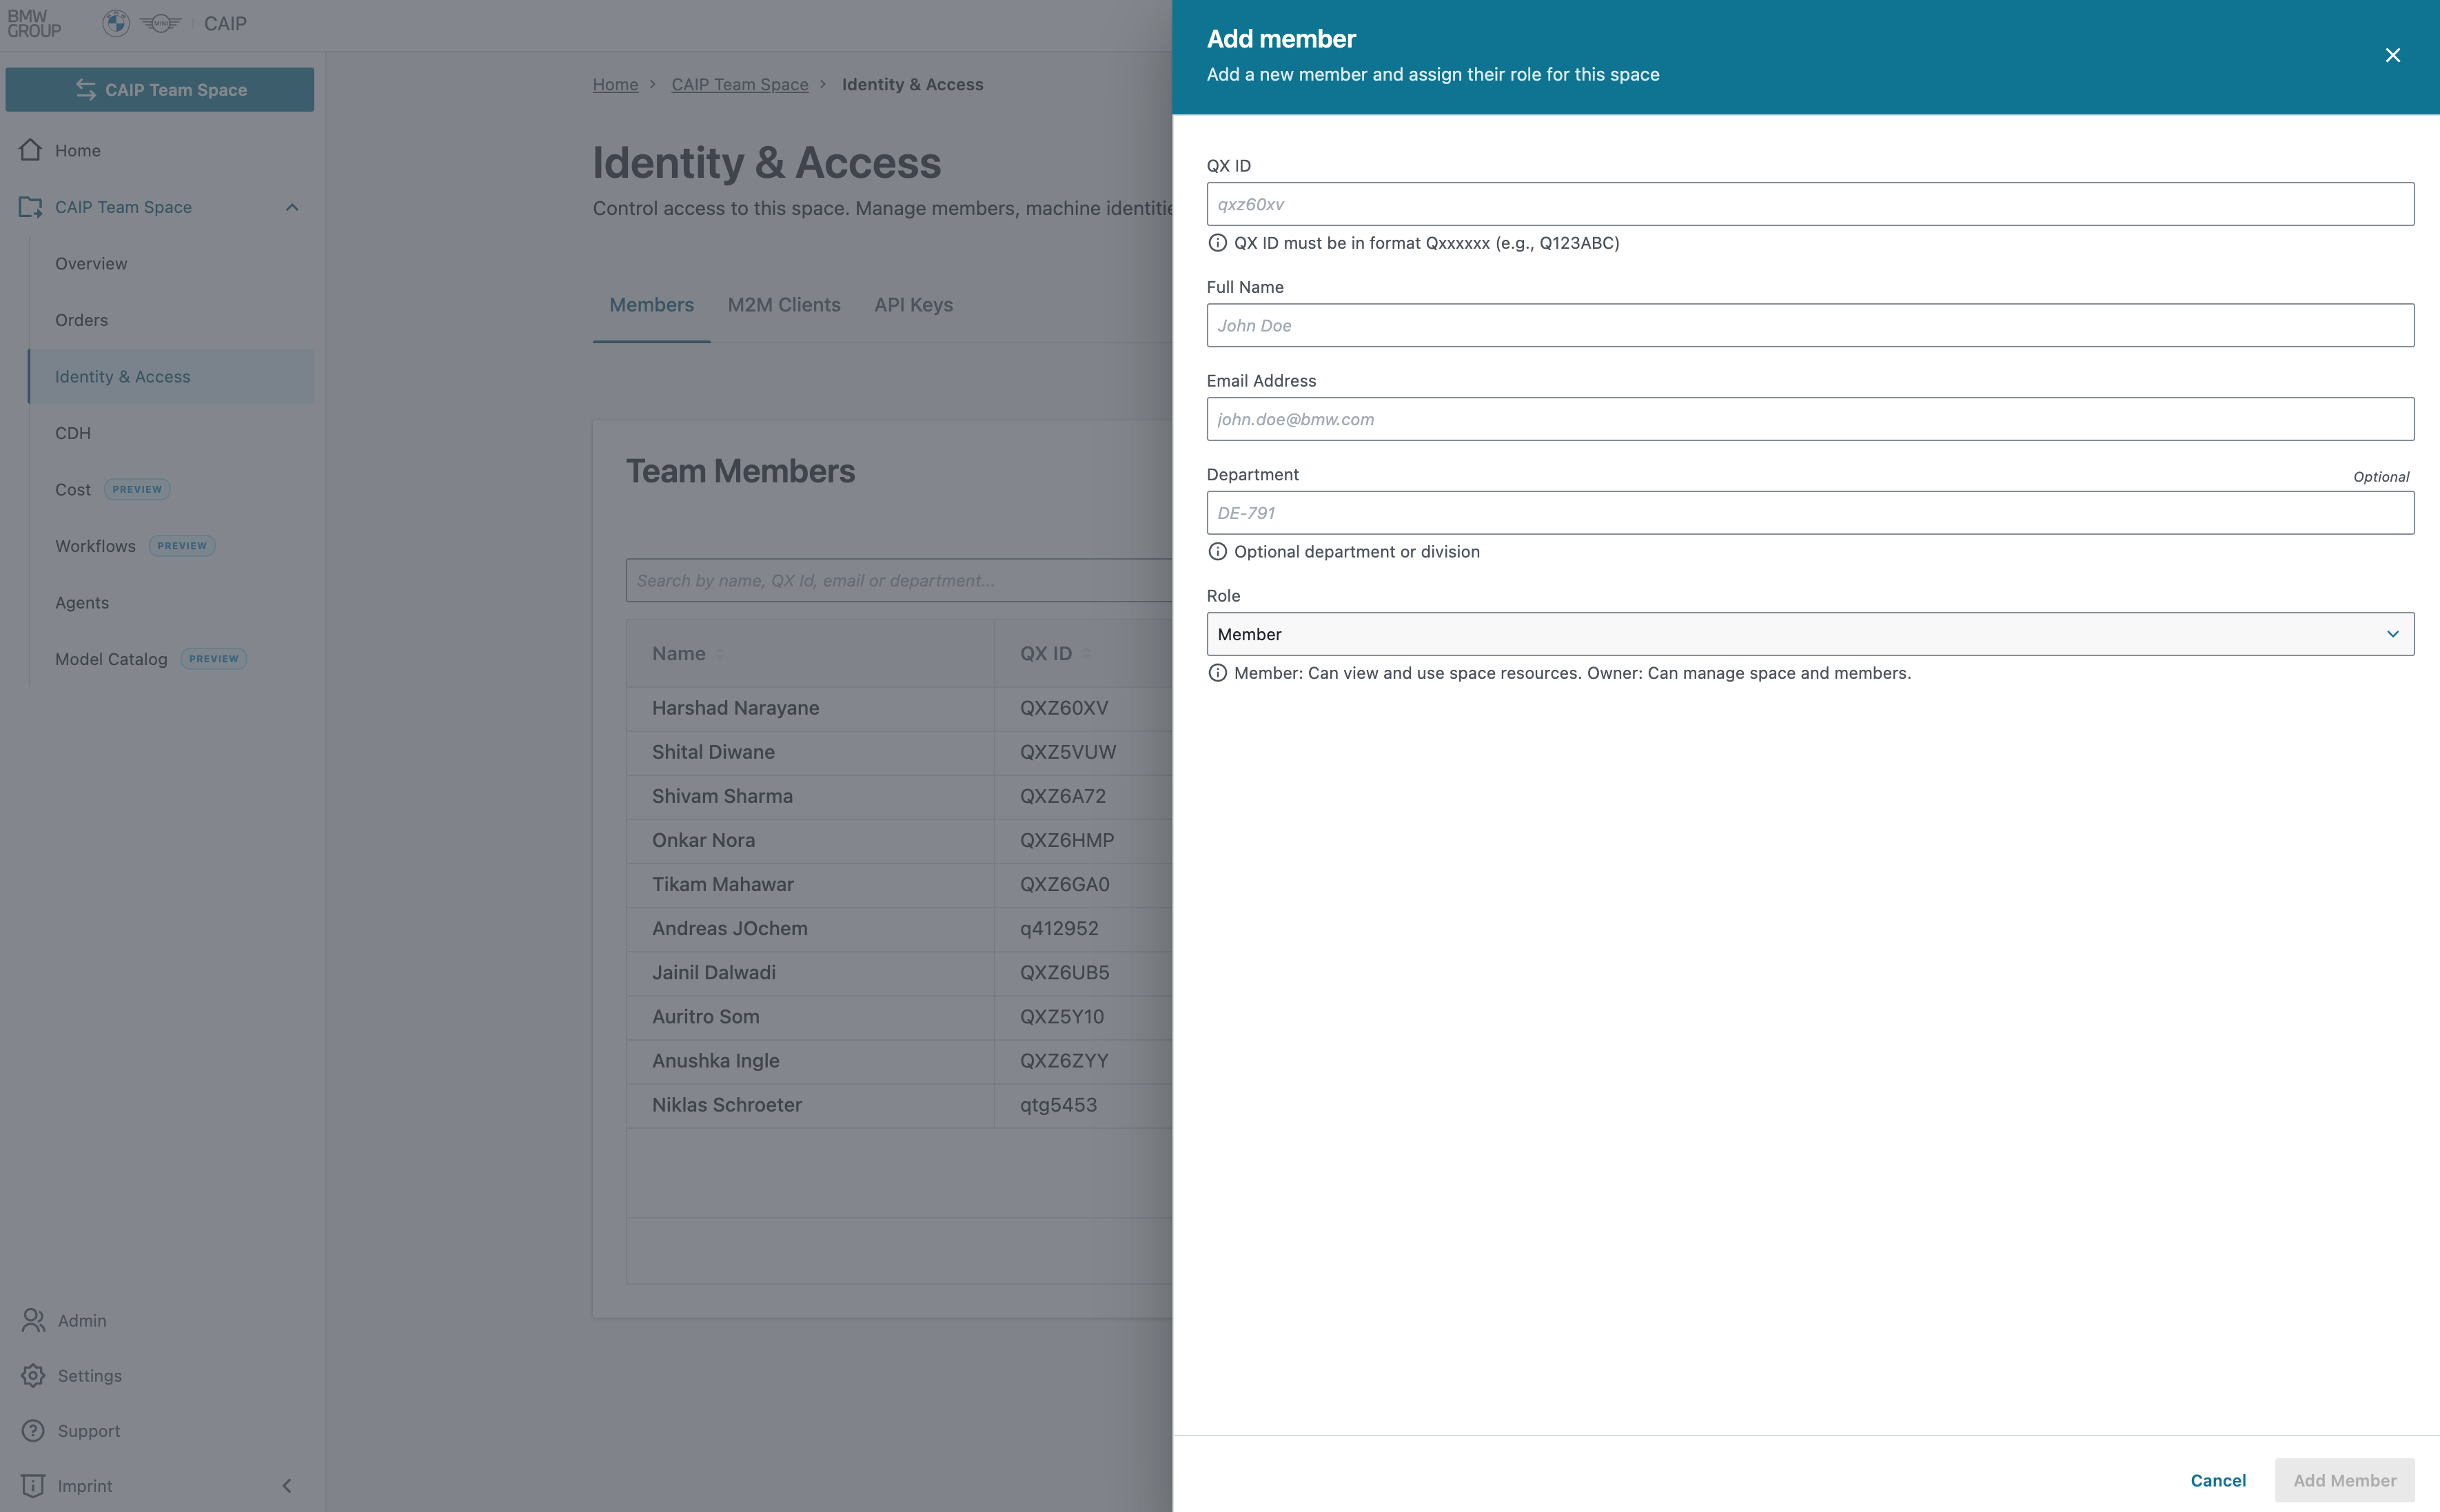 Add Member
M2M Clients
What is an M2M Client?
M2M (Machine-to-Machine) clients are application identities that call CAIP services programmatically using the WebEAM OAuth 2.0 Client Credentials flow. Each client is identified by a client_id (with a corresponding client secret) issued through WebEAM.Next.
Each M2M client must be registered with exactly one Space and assigned only the access scopes required for that Space.
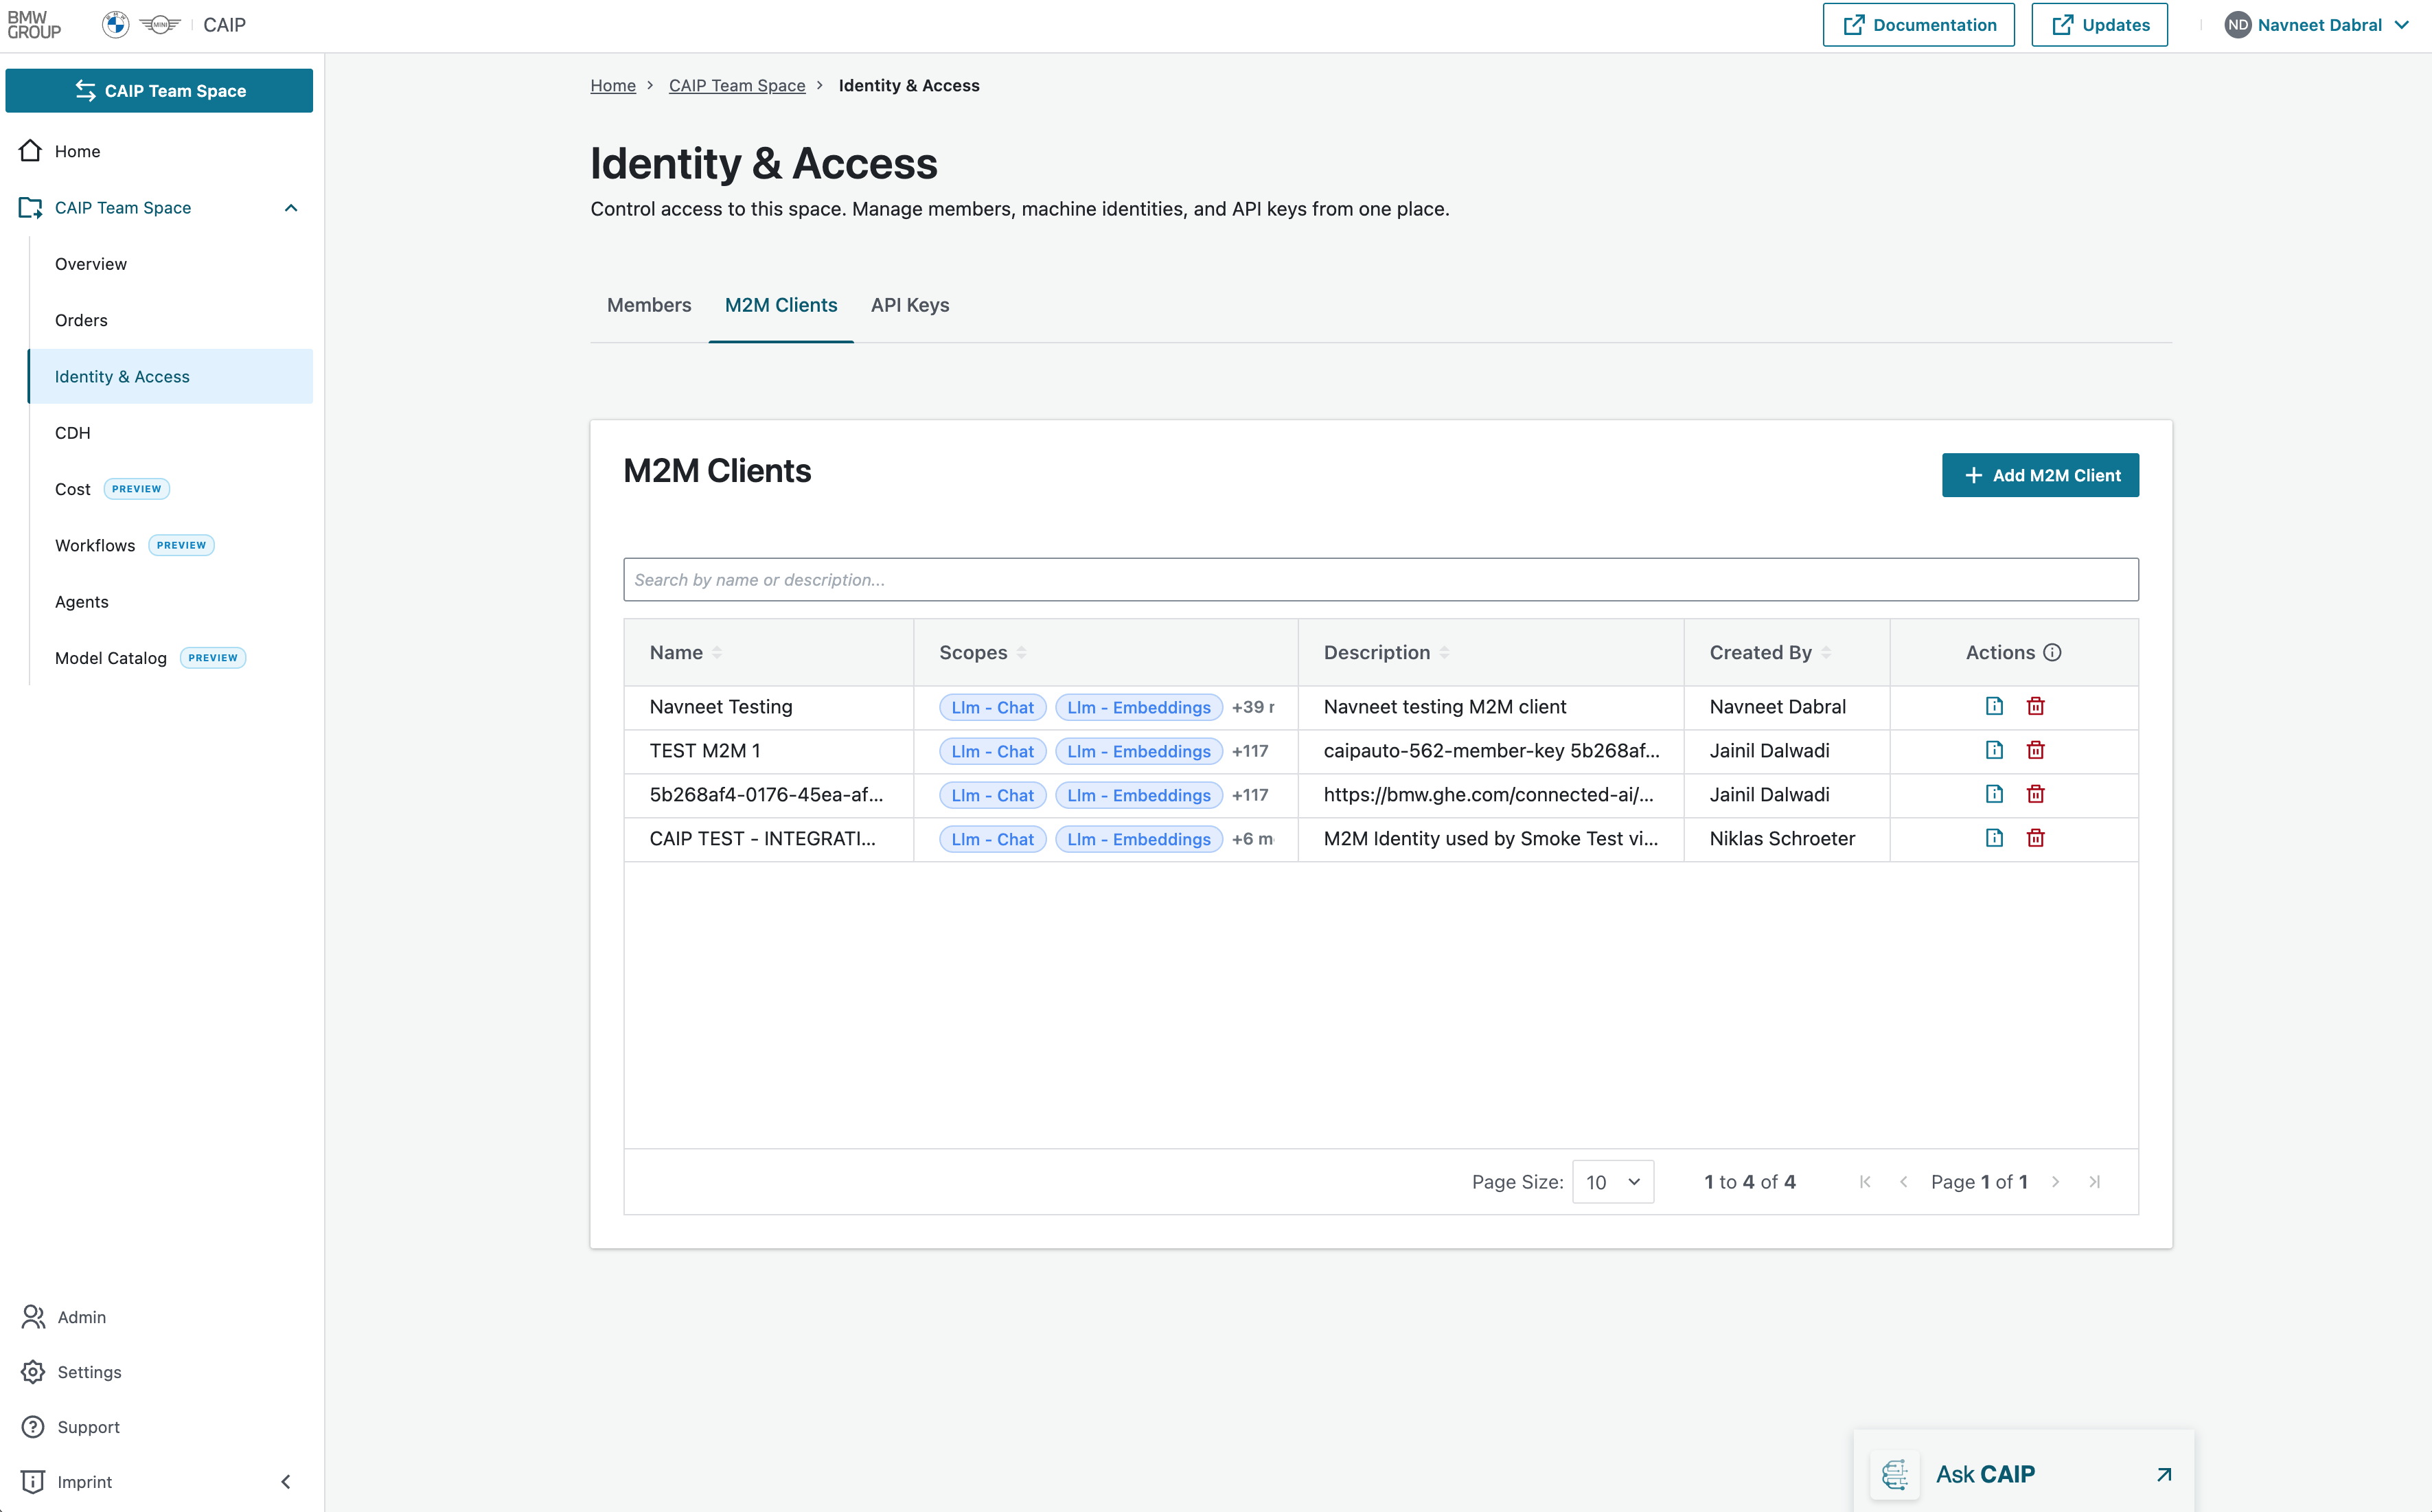 M2M Clients Overview Page
M2M Authentication Process
Follow the steps below to set up and use an M2M client with CAIP:
Step 1 — Obtain Credentials from WebEAM
Register your application in the BMW WebEAM Self-Service Portal to receive a Client ID and Client Secret. Follow the full registration steps in the WebEAM M2M Setup guide.
Step 2 — Register the Client in the CAIP Portal
Once you have your Client ID, register it in the CAIP Portal under Identity & Access → M2M Clients:
- Click Add M2M Client — a side panel slides open
- Enter the Client ID (UUID format from WebEAM)
- Provide a Client Name and Description
- Select the required Scopes for your Space using the scope selector
- Click Add M2M Client to confirm
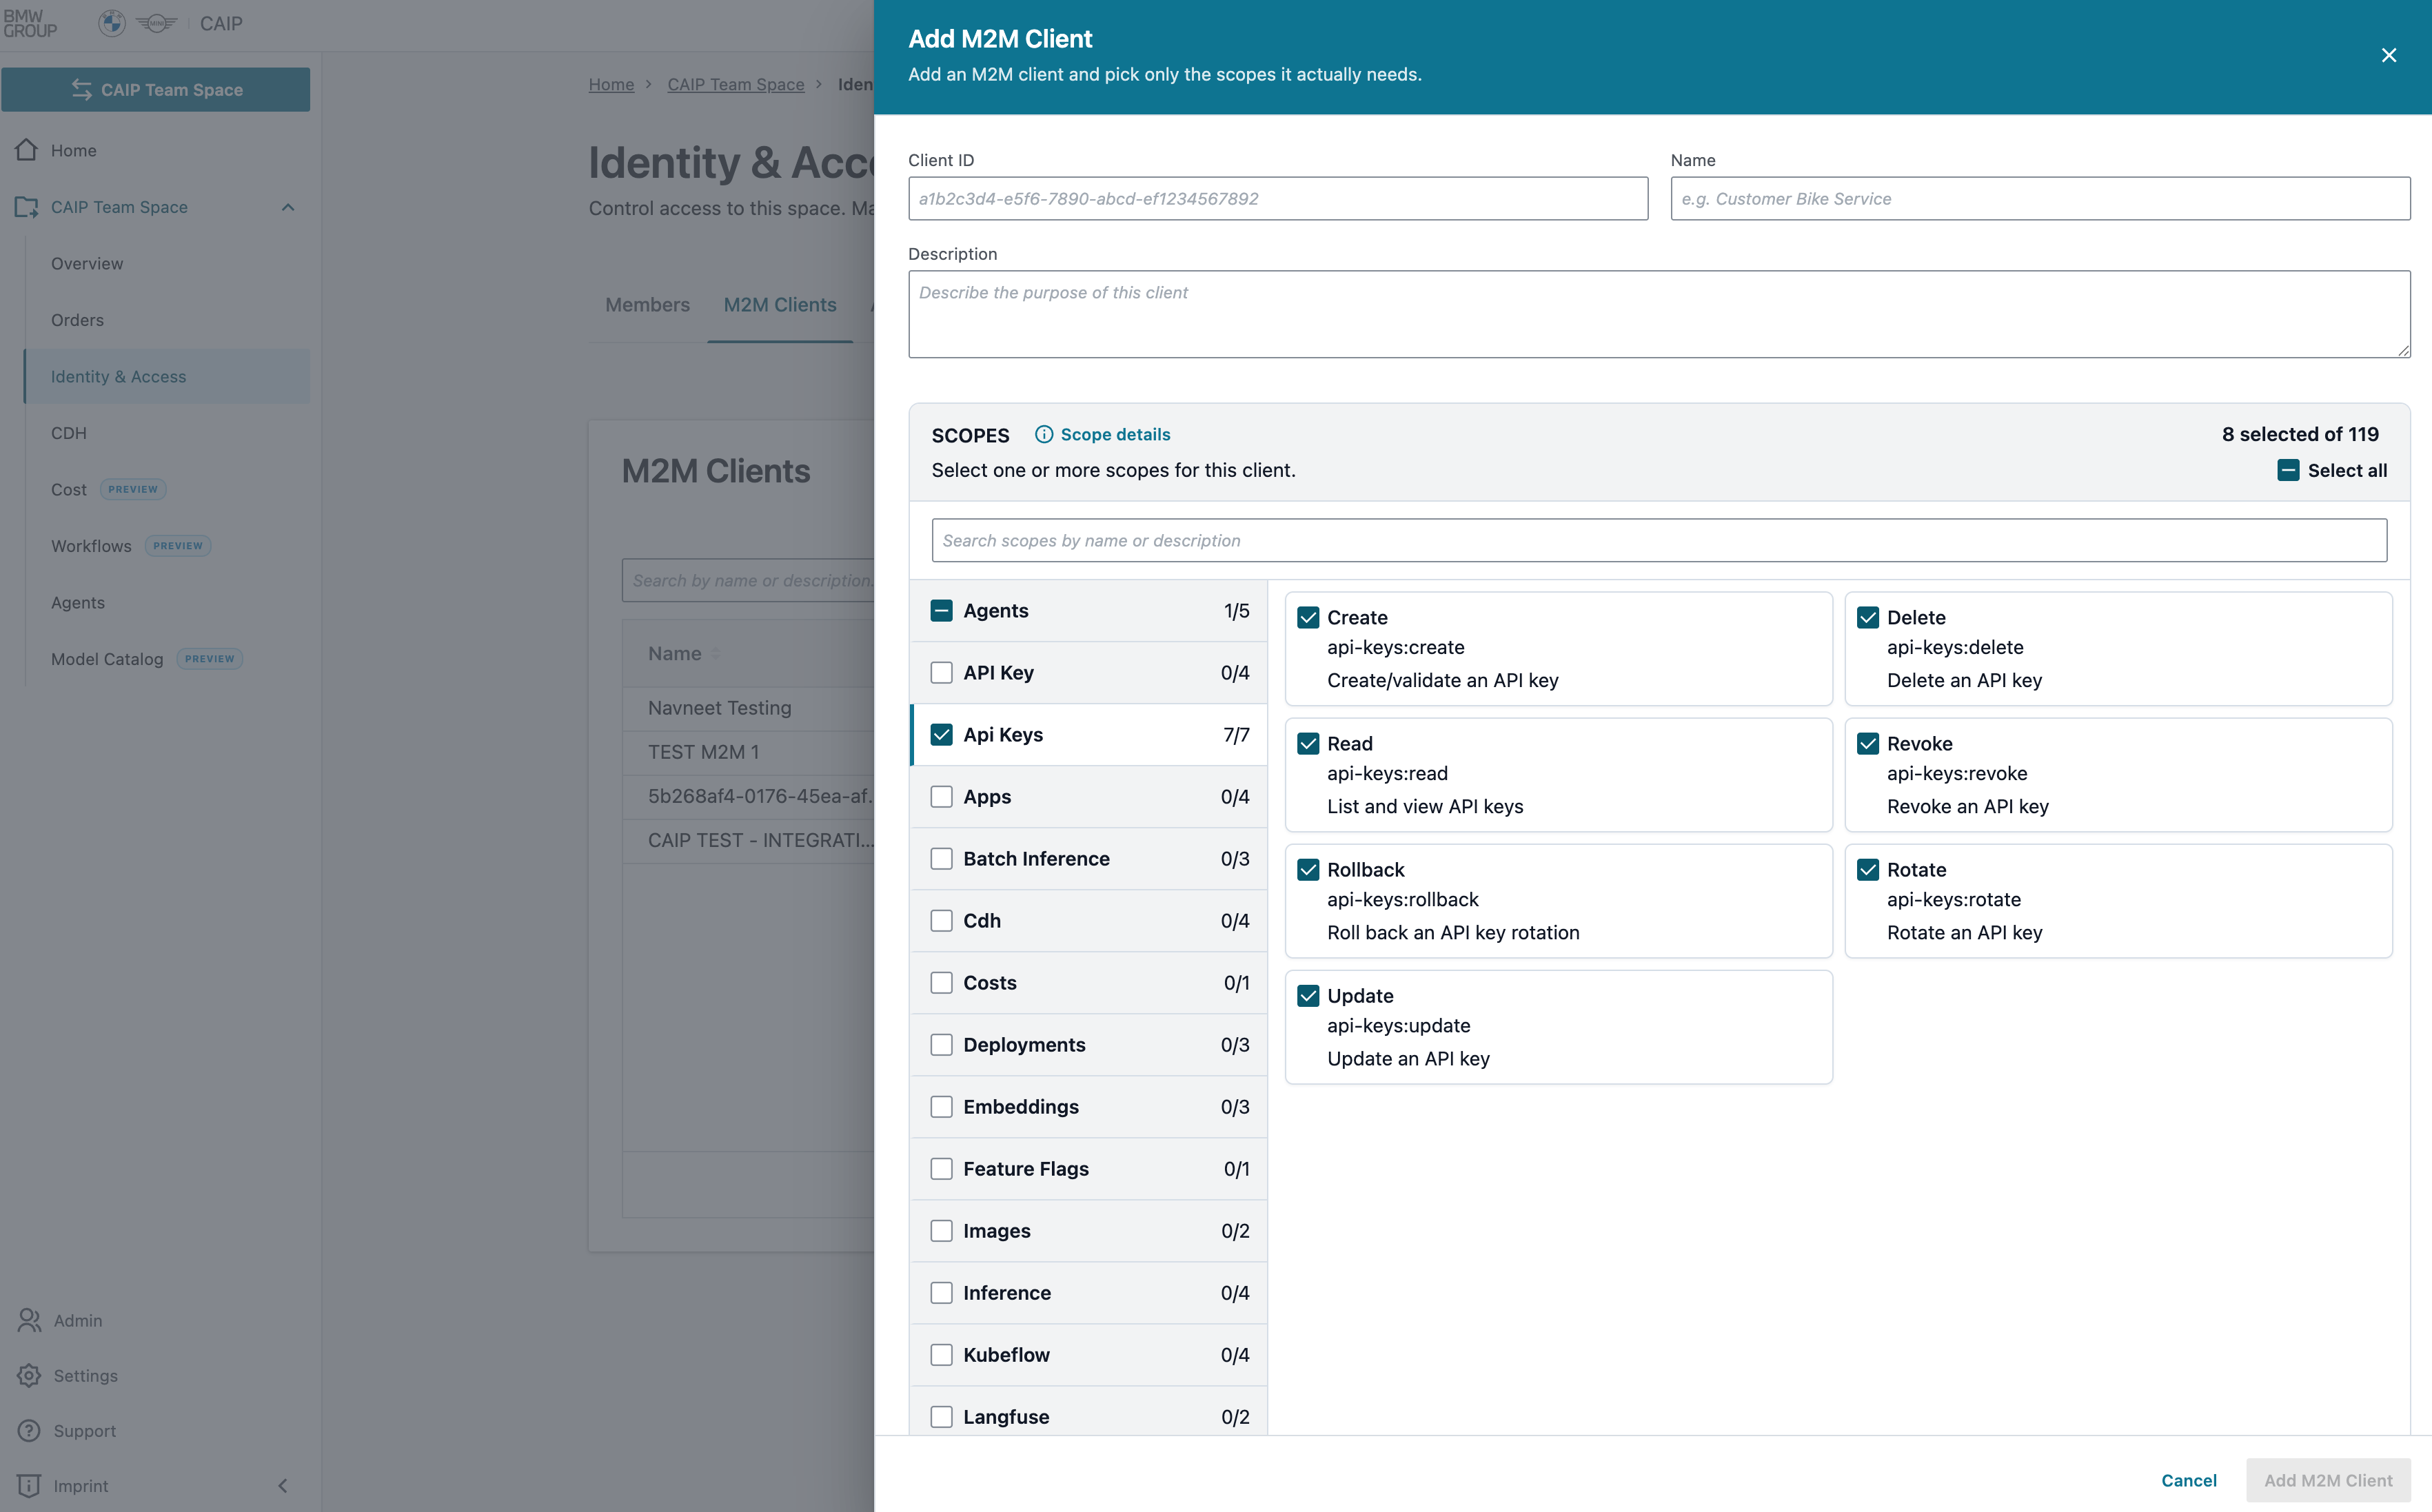 Add M2M Client
- The scope selector shows service groups on the left; selecting a group reveals its individual scopes on the right, each with a name, identifier, and description
- Use the search bar to filter scopes by name or description, and the select-all toggle to quickly select or deselect an entire service group
- Scope options are loaded from the live Scope Catalog endpoint (
GET /v1/scopes/catalog) and can evolve over time - The permissions granted to the M2M client depend on the scopes that are selected
- You can click any existing M2M client in the list to open the same panel in view mode, with an edit button in the panel header to make changes
- You may use any scope available within your assigned Space
- An M2M Client should be scoped to one Space
Step 3 — Generate an Access Token and Call the API
Use your Client ID and Client Secret to request a short-lived access token from WebEAM, then send it as a bearer credential on your CAIP API requests. Full token endpoint details and examples are in the WebEAM M2M Setup guide.
API Keys
API keys are pre-issued credentials for secure, programmatic access to CAIP services. In the CAIP Web Portal, this section allows API key management per Space while keeping access scoped and governed. Available actions depend on assigned permissions.
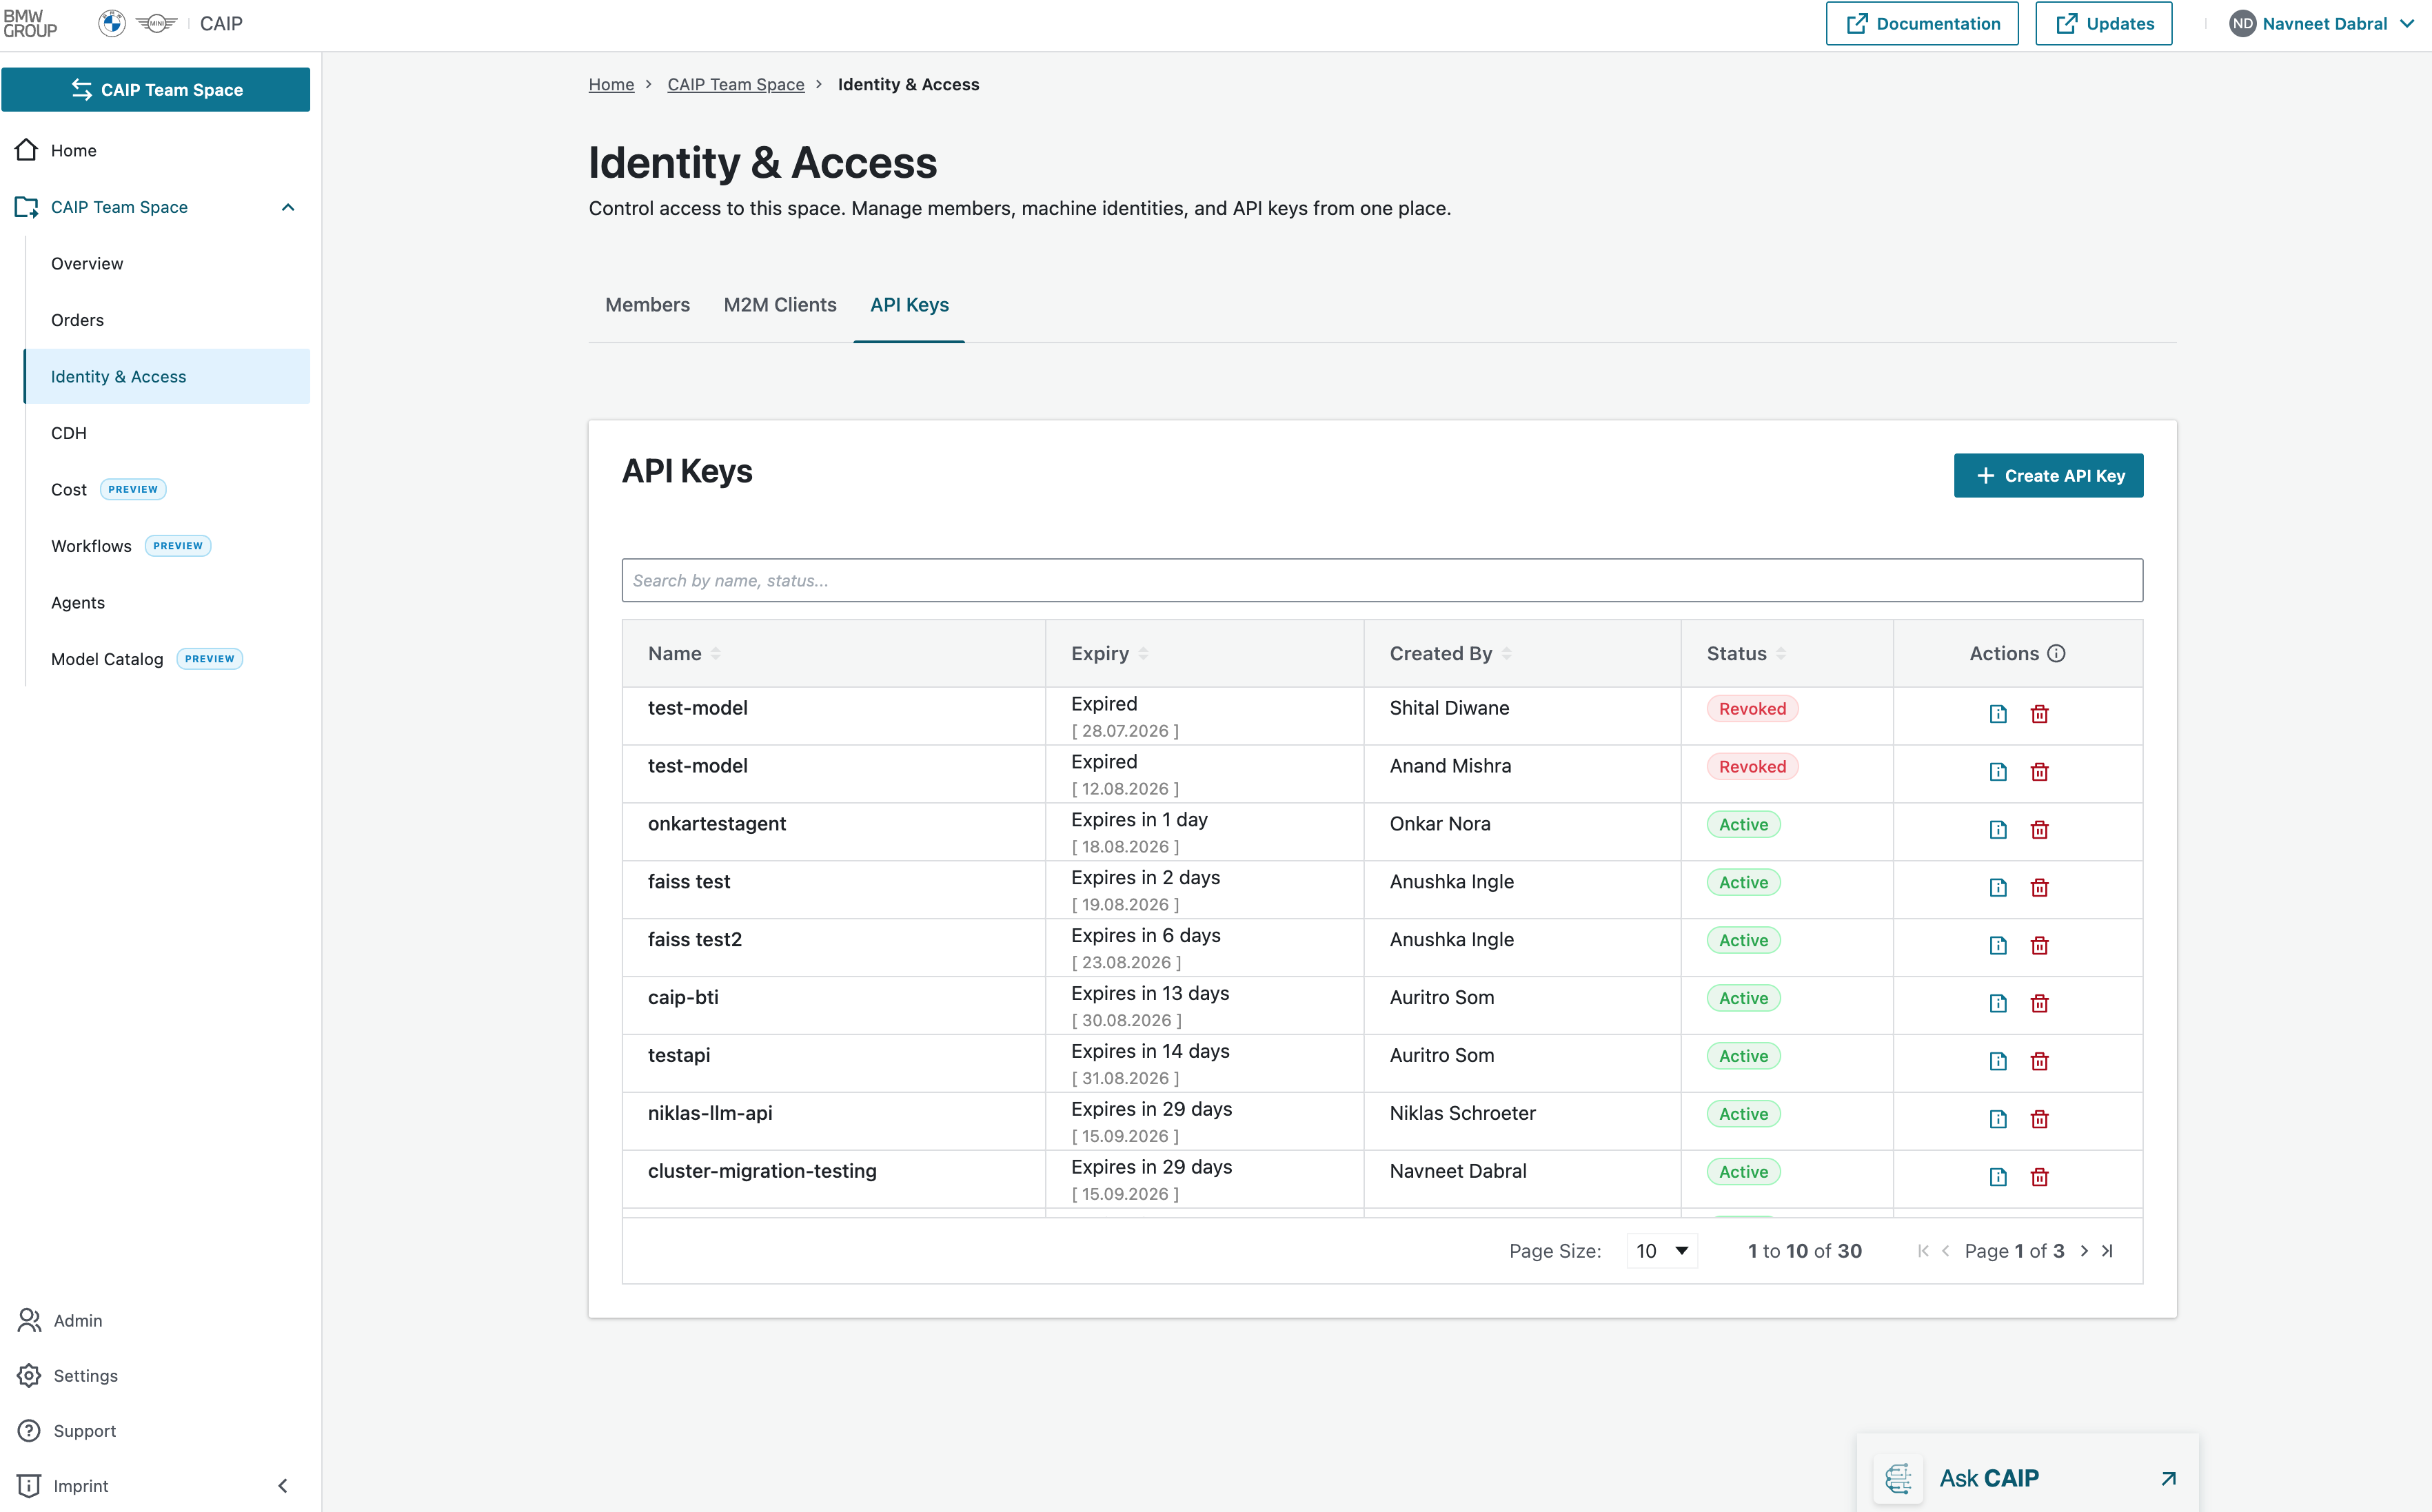 API Keys Overview Page
Key Capabilities
- Create API Keys — Generate API keys for integrating applications and services with CAIP
- Clicking Create API Key opens a side panel where you provide a name and select scopes
- The scope selector uses a two-pane layout: service groups on the left, individual scopes on the right — use the search bar to filter and the select-all toggle to quickly select or clear a group
- Scope options are loaded from the live Scope Catalog endpoint (
GET /v1/scopes/catalog), allowing you to define the specific permissions and level of access required for your API key - It is recommended to select only the scopes necessary for your use case to ensure secure and controlled access to CAIP resources
- Delete API Keys — Remove or revoke API keys that are no longer required
- Secure Credential Storage — All API keys are stored securely in AWS Secrets Manager to ensure the protection of sensitive credentials
- Authorization and Validation — Every API key is validated by the Platform API before access is granted, ensuring that requests comply with the assigned permissions and security policies
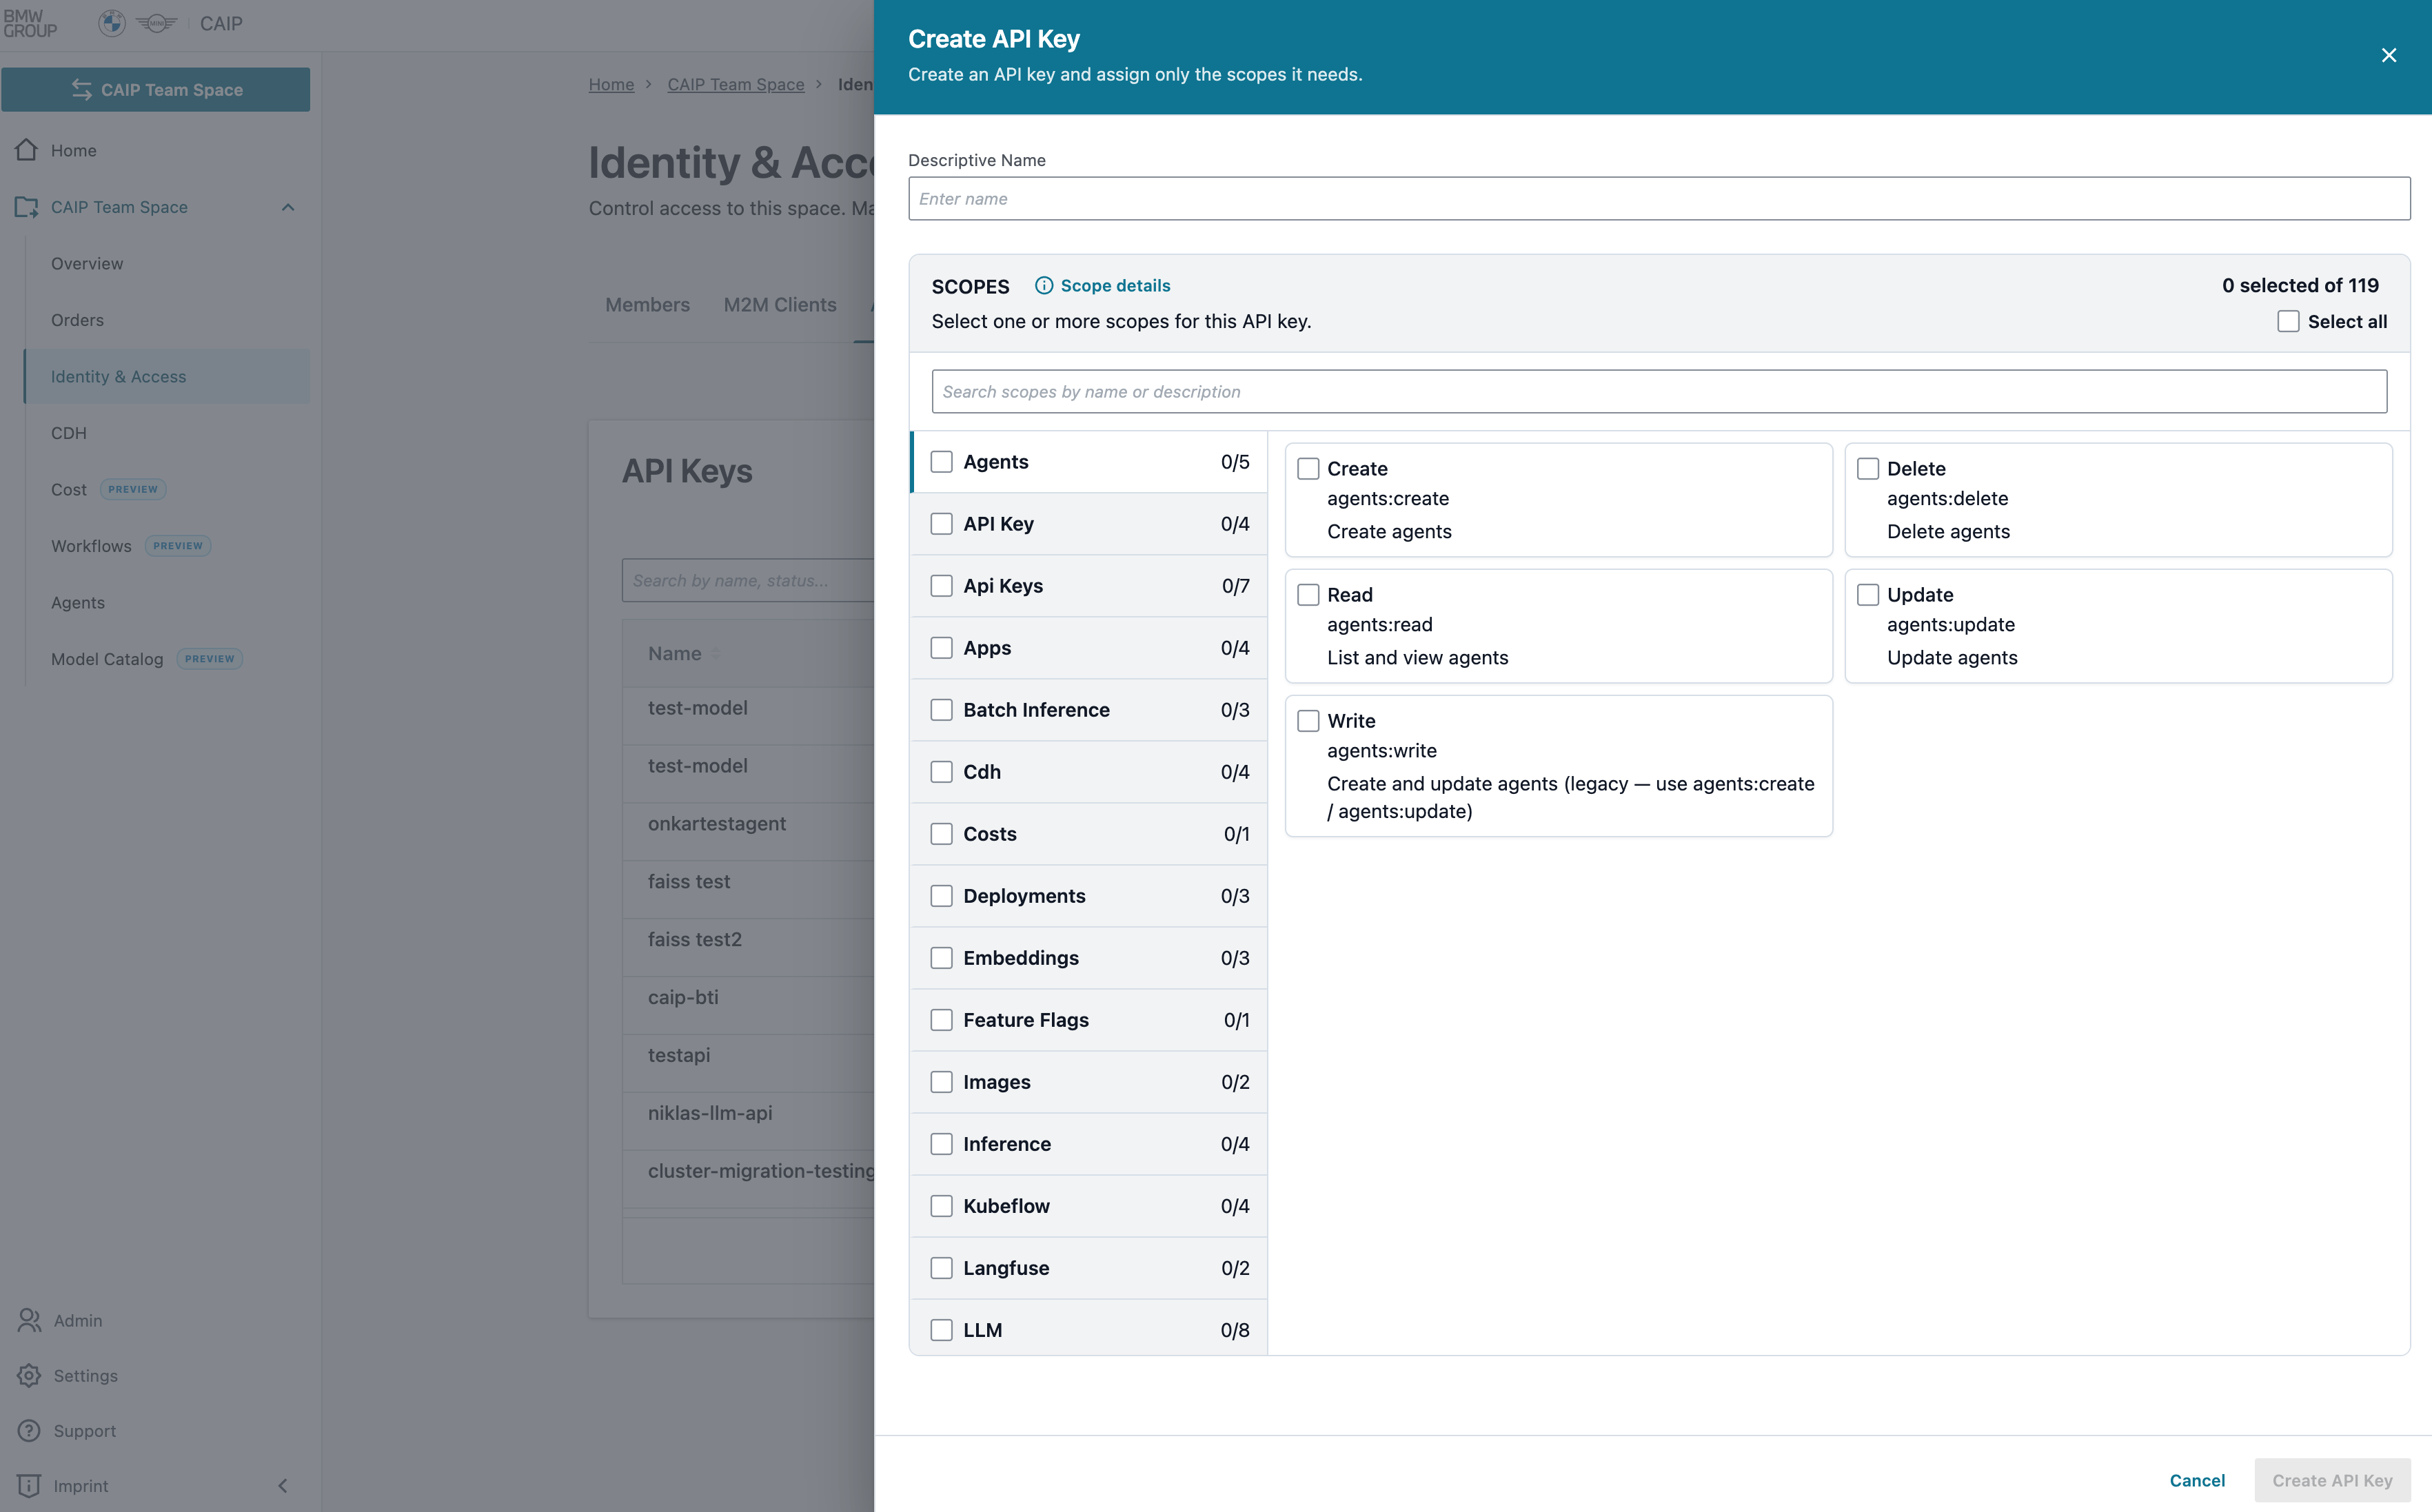 Create API Key
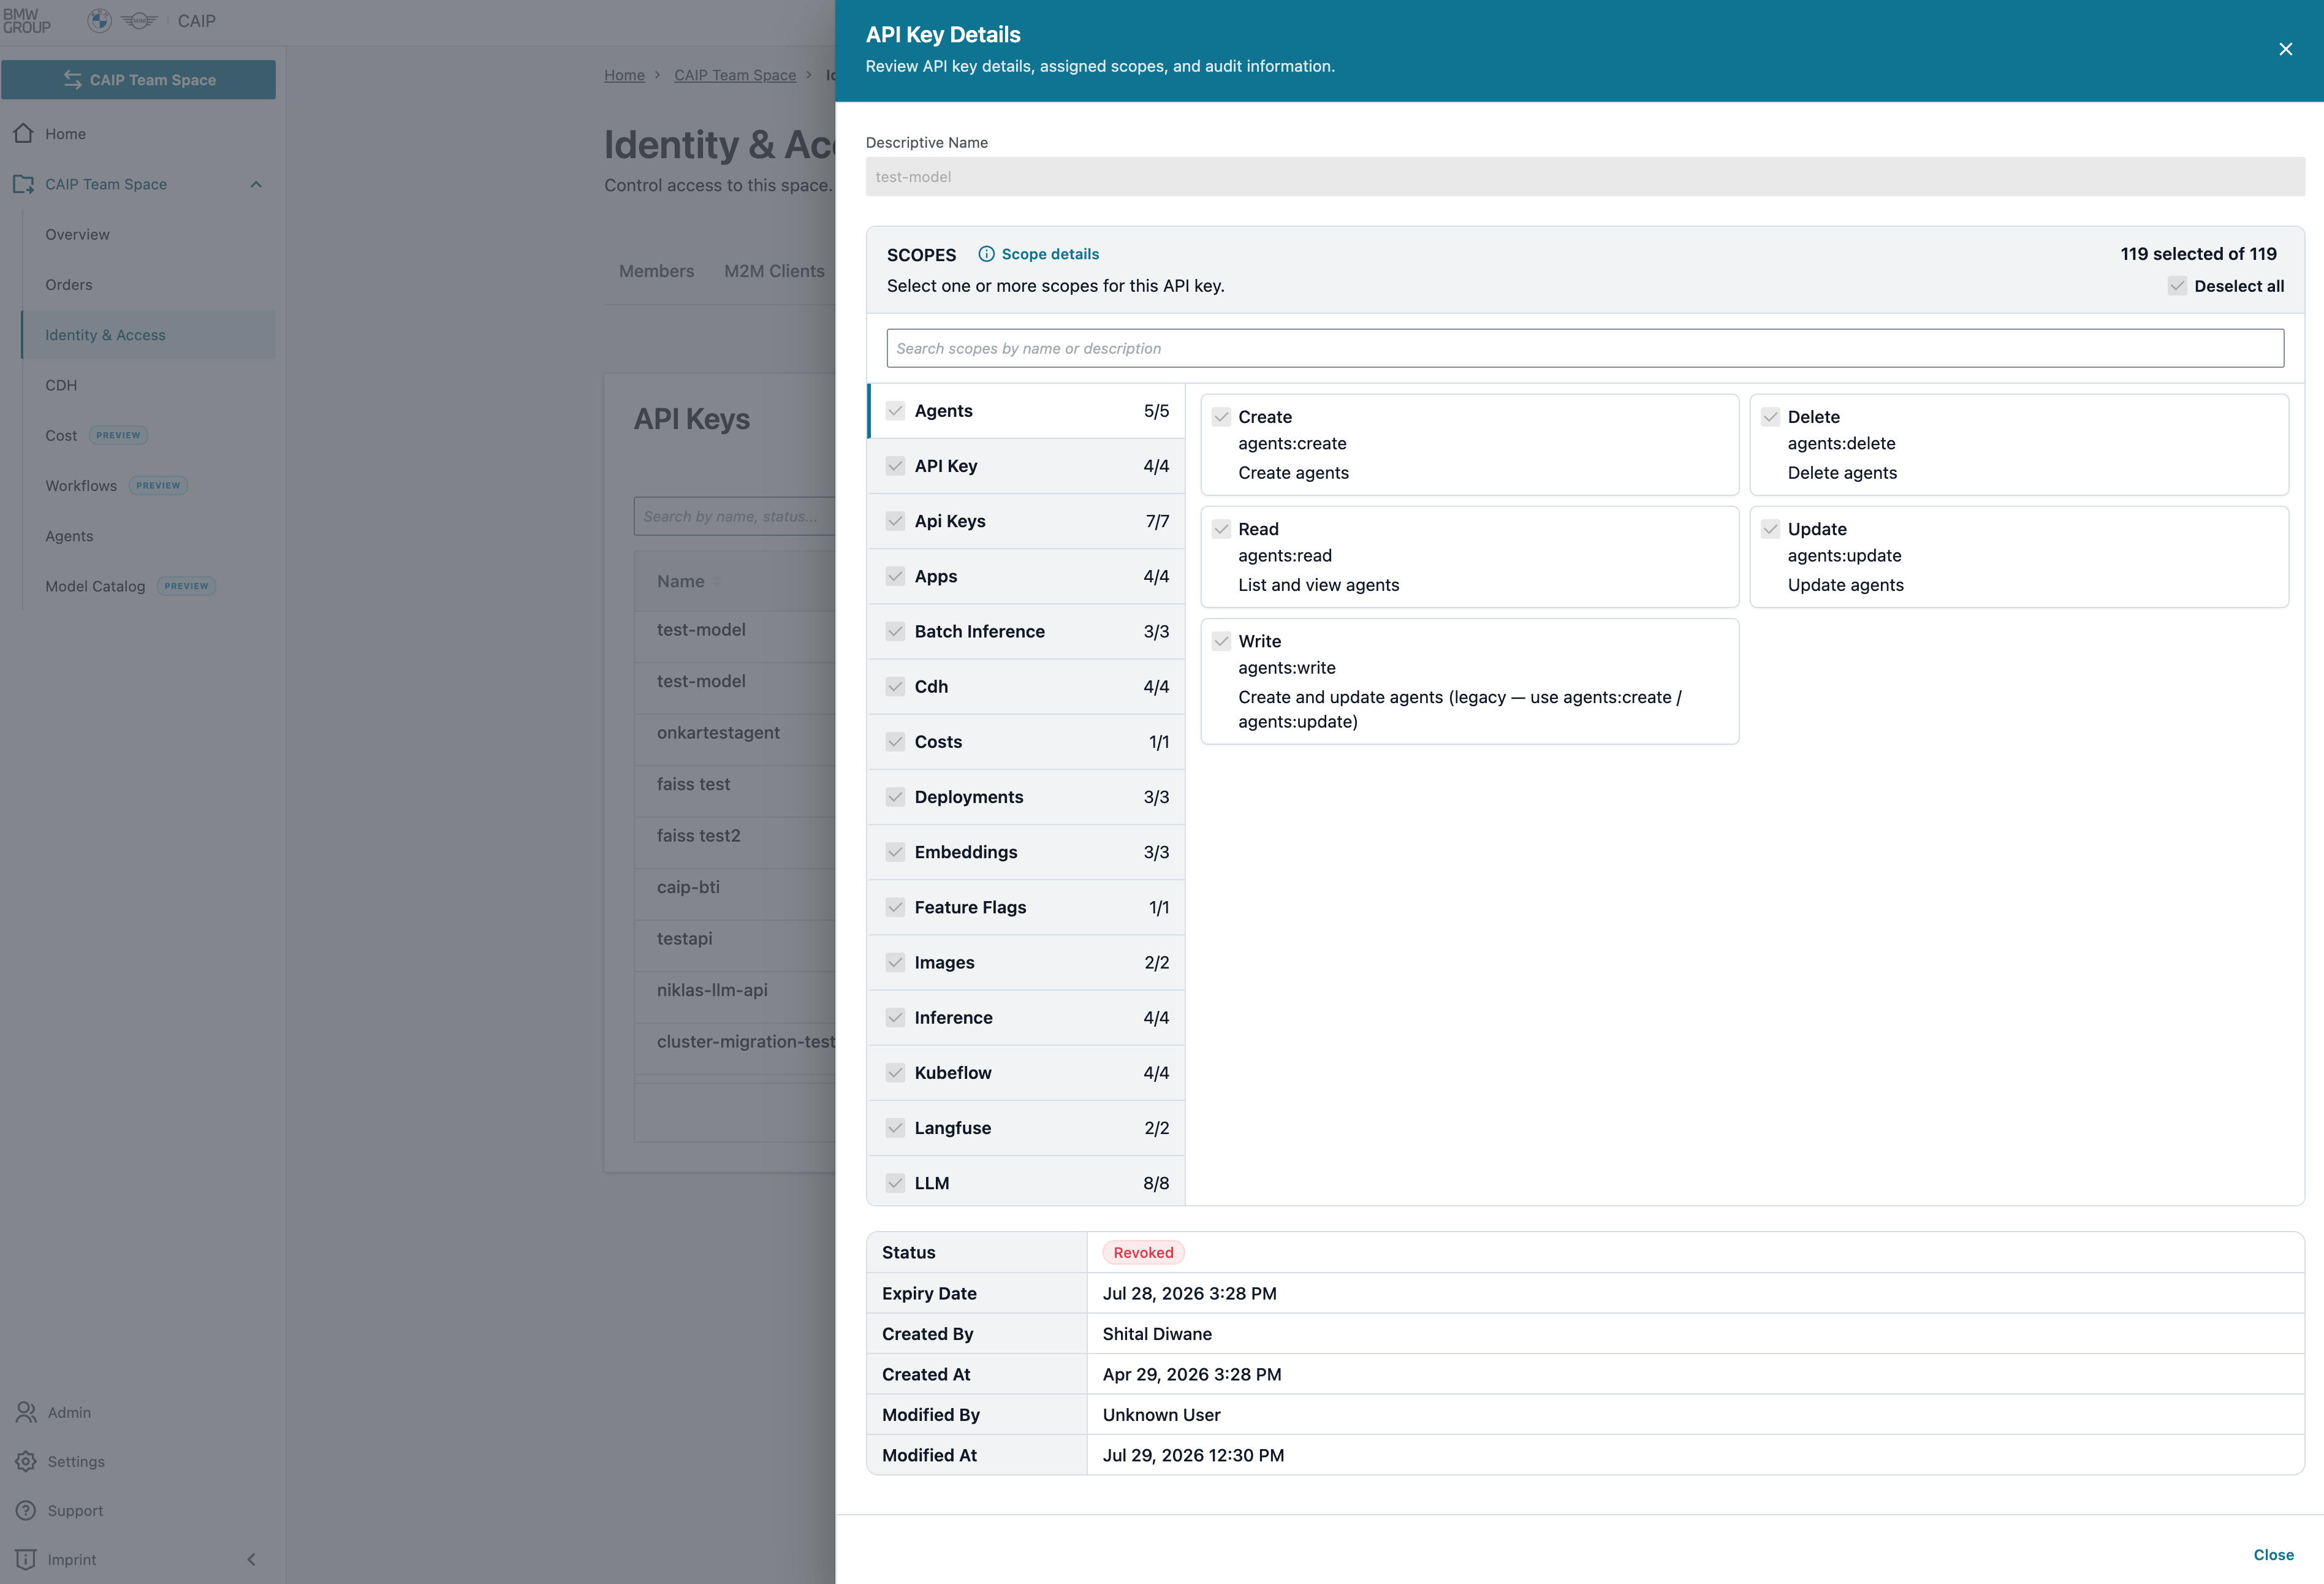 API Key Details & Scope Selection
API Key Lifecycle
To maintain platform security, API keys follow a defined lifecycle:
- Validity Period: API keys remain active for 90 days from the date of creation
- Automatic Expiration: Keys are automatically deactivated after the 90-day validity period
- Key Renewal: To avoid service interruptions, a new API key should be generated before the existing key expires
API Key Naming Guidelines
When creating an API key, follow these naming requirements:
- Use lowercase letters (a-z) only
- Use numbers (0-9) as needed
- Hyphens (
-) are allowed - Spaces are allowed
- Maximum length: 50 characters
- After successfully creating an API key, copy it and store it securely. This key acts as your unique password and cannot be recovered later.
- If you lose the API key, you will need to generate a new one (reset the key).
Once an API key is created, it is automatically stored in AWS Secrets Manager. The Platform API uses this stored credential to authenticate requests and grant access to CAIP resources based on the permissions associated with the corresponding Space.
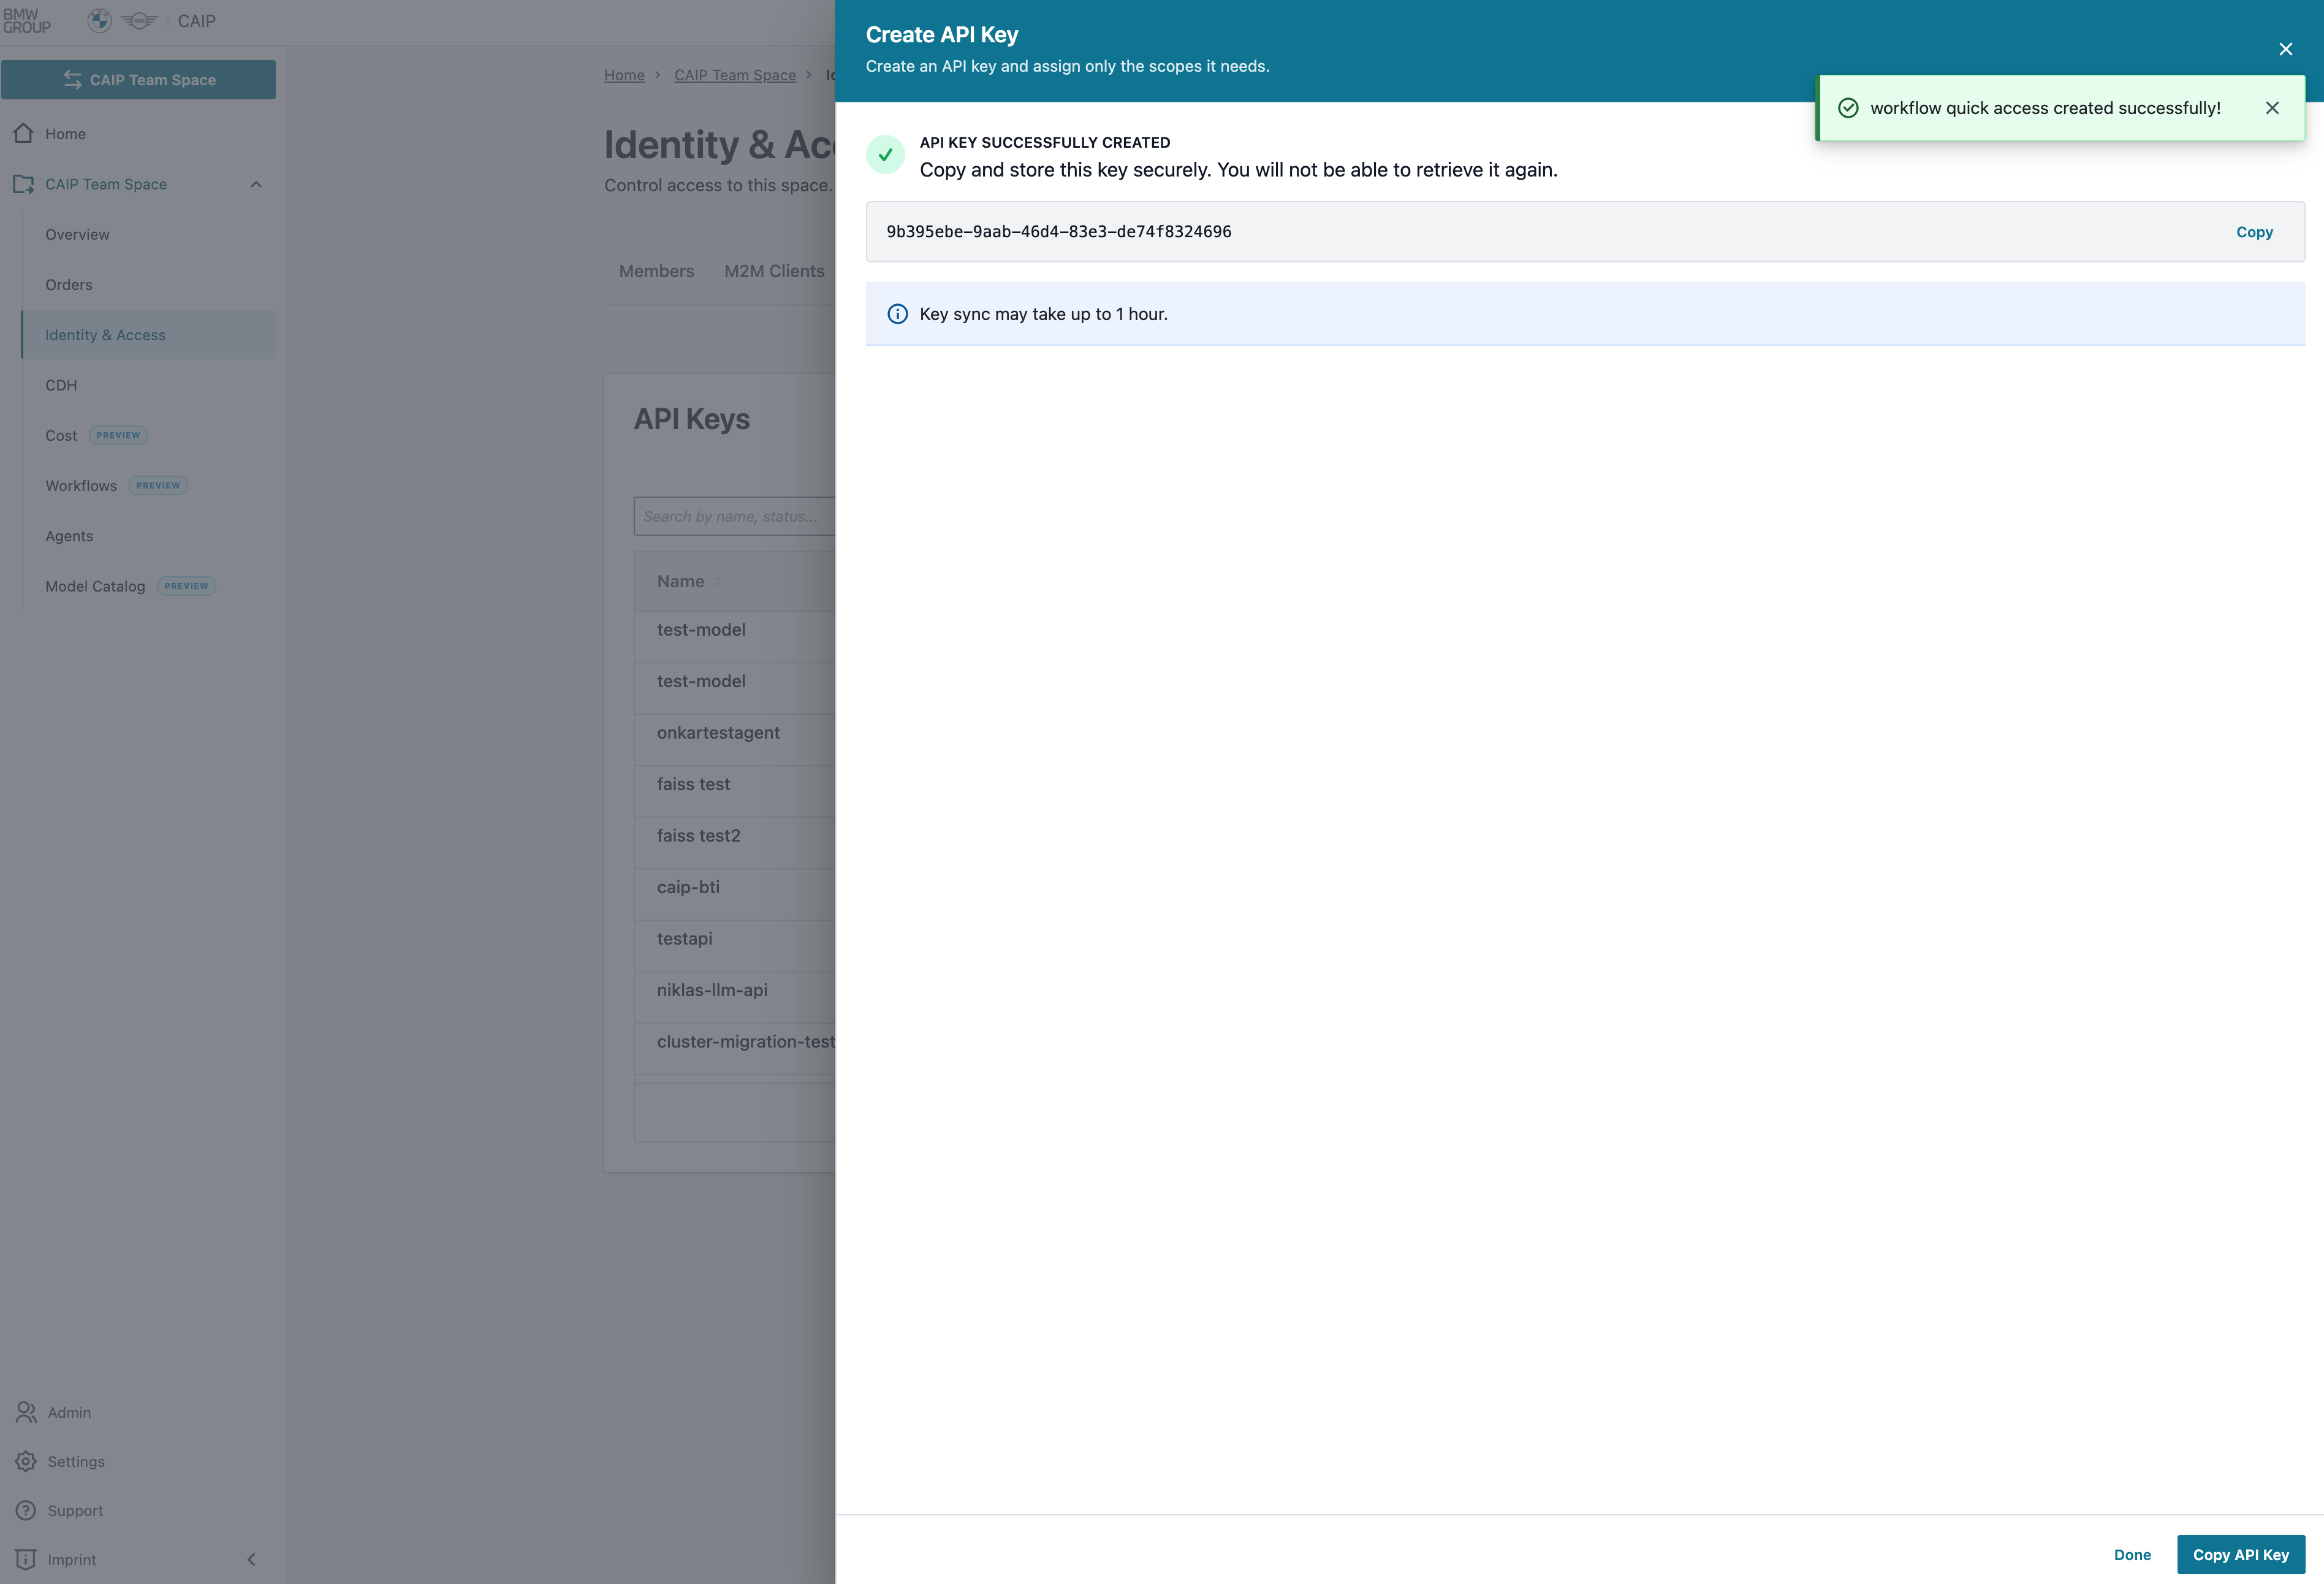 API Key Created
Permission Levels
See the centralized Permissions Matrix for owner/member Create, Read, Update, and Delete permissions across all portal features.